
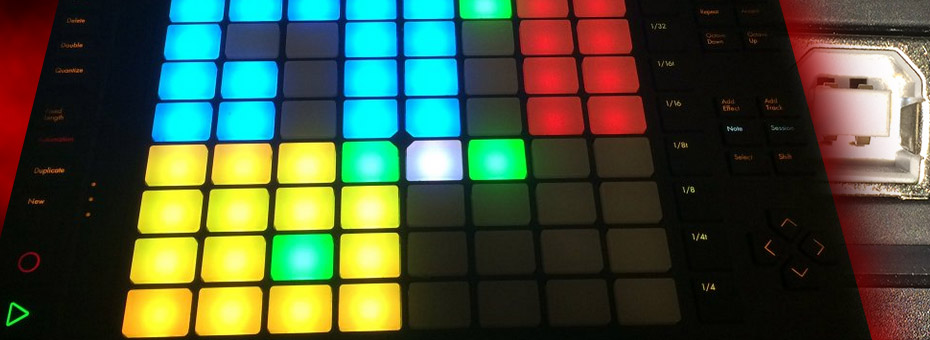
My introduction to Ableton Push.
An Ableton push has landed upon our bench! It was performing reasonably well for about six months. With my Live Lite license in hand, we loaded the Ableton Push onto my computer and got right to work. The intention is rather clear about purchasing this piece of hardware, which is simply to have the ability to make my own musical assets for the videos that are done on this site. Perhaps even beyond the lines of games if we get good enough at composition.
But something went very wrong. We should probably start with a disclaimer before continuing this blog entry, as we am fully aware that the music community is overly sensitive to criticisms of their products and/or software. So, let's get that out of the way first
Musical disclaimer!
WARNING: As this is my very first experience diving into the business of musical production headfirst, I should warn everyone that I am no expert on music theory, nor have we composed a single song during the time of this blog posting. Feel free to take the opinions of the blogger of this website for whatever grains of salt you wish, as the opinions of "S" may not reflect the opinions of the Ableton music community. As I have stated in my FAQ, we do not mind people disagreeing with me in comments, but insults will just go right to the spam folder.
You have been warned!
What the hell is the Ableton Push?!?!?
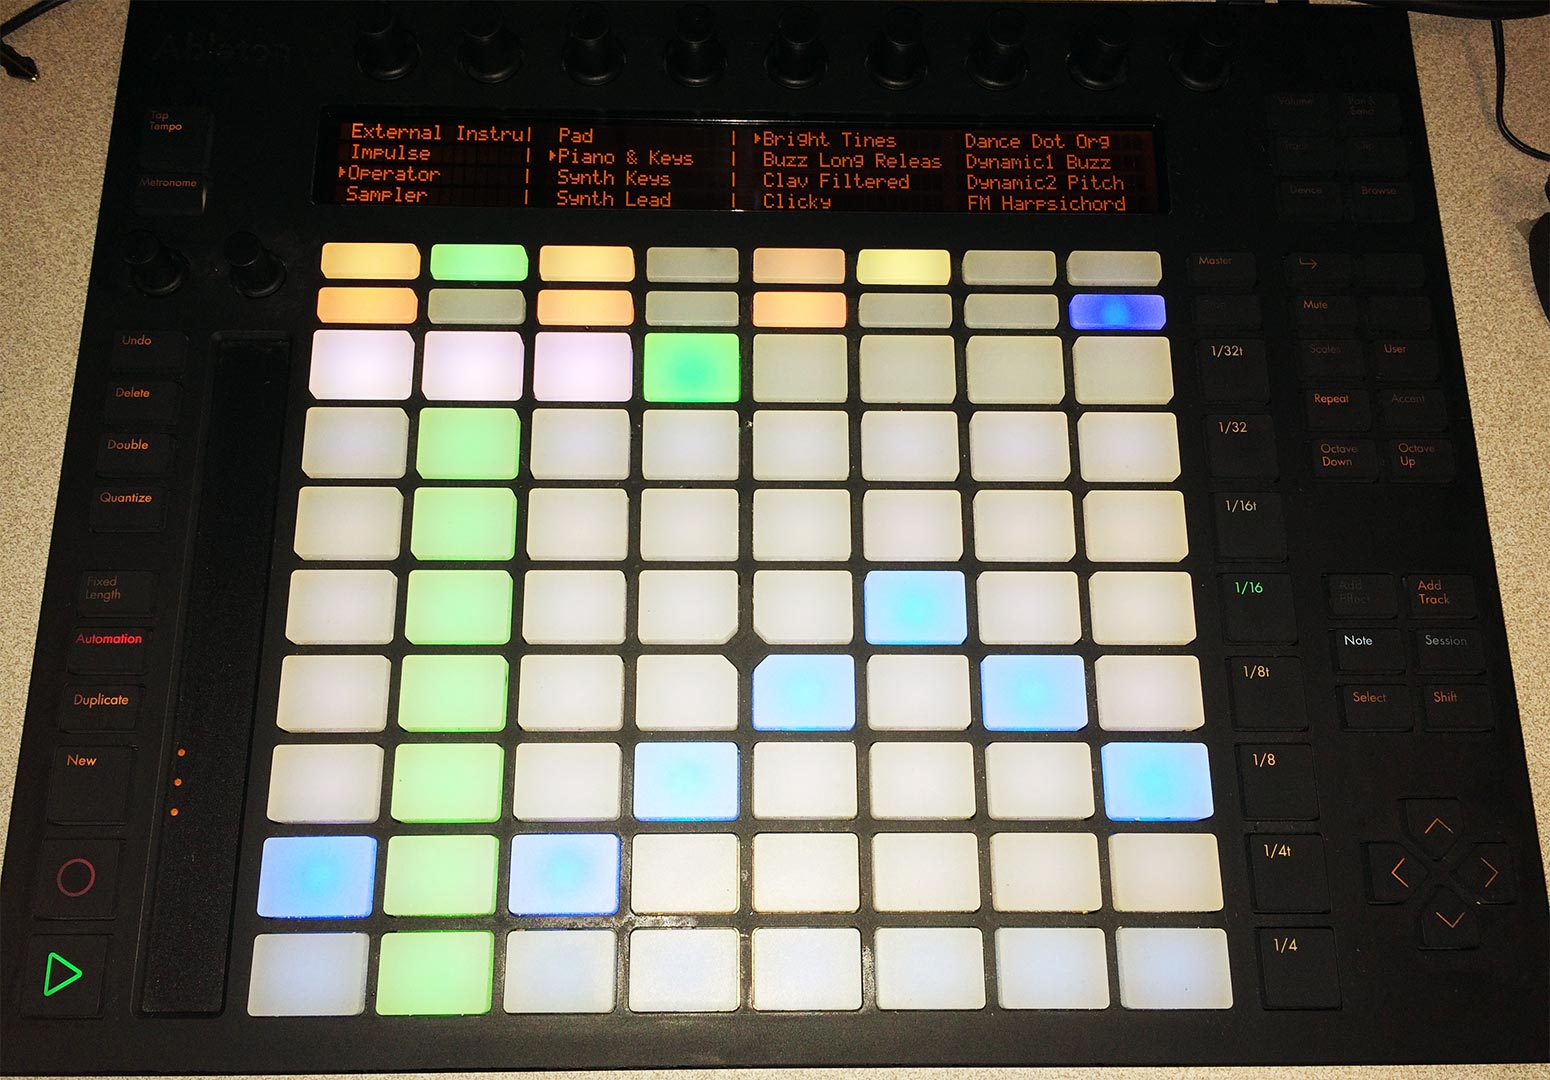
The Ableton Push is a piece of hardware that serves as a MIDI controller for music programs. When using the "Ableton Live" software, the keyboard comes to life with LEDs and all utilizing different patterns for different instrumental functions. If we were to describe what it's like to use the Ableton Push, it's like a hybrid between a Piano and a Guitar with the way the LEDs display the major musical chords in a mode like the piano. Allowing you to play with two hands on the deck like a keyboard.
The problem that we noticed right away is that the Ableton is a little TOO sensitive. Brushing your hands across the deck by accident in record mode ends up throwing extra notes into your songs. And also, there's no feedback on how hard you are pushing a key like, say, using a Roland Piano, or an actual guitar. Because of its larger footprint, you could go into note mode and treat it like a more traditional synthesizer, and if you access a drum kit, it switches into a drum-pad-like mode so you could enter your own sequences. Finally, you could switch to session mode to record your songs. The Ableton Push is designed so that even if you have a PC hooked up to the controller, you could go from start to finish on a composition without ever looking up at your computer's LCD screen.
The software and the money.
Ableton comes with its own proprietary software called "Ableton Live," which, when purchasing a full license, we found to be brutally expensive (The Ableton Push hardware is actually cheaper than a full version of their software!). I'm starting to understand why musicians are so poor all of the time. Companies like Ableton must think that all of their customers can make the "moneyz" rain! It is also witnessed on music forums that we went to for help these people believe that if you pay more for a piece of software then it's suddenly more professional as fewer people use it and the end-users feel like they are in some exclusive club not understanding that with fewer people also comes less testing, support, and most importantly feedback for their software which has driven other packages such as FL-Studio to the forefront of musical production. Ableton Live feels like there are things missing from their software that FL Studio has already added and/or overcome because their user base is so large. These, of course, are just observations and not facts.
Back to the problem.
After six months, my Ableton Push is now dead.
How did our Ableton Push die, you ask?
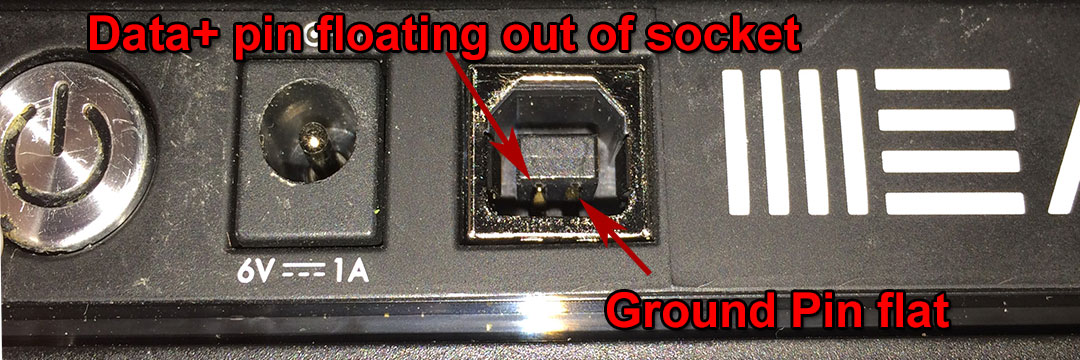
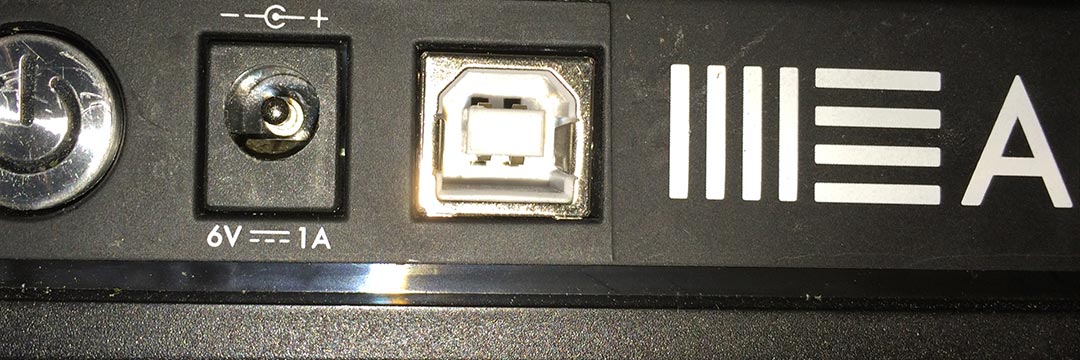
Well, we were moving it around the house. and after plugging in a USB plug into the "B" style connector of the Ableton Push controller. It was hard getting a good picture of this, but if you look closely, the ground pin on the USB controller is totally flat and not curved to make a connection to the plugs I'm using. Also, one of the data pins is not even properly seated in the female molding, and it is drifting all over the place. I've had plenty of USB "B" connector style hard drives, and never have I had a controller go bad in the way that I had with the Ableton Push.
Unlike all of those portable hard drives that bounced around in my work truck all day. The Push sat happily on my desk, only being moved about 20 or so times around the house. It was not dropped, and we were using the manufacturer's USB cable up until the point of death.
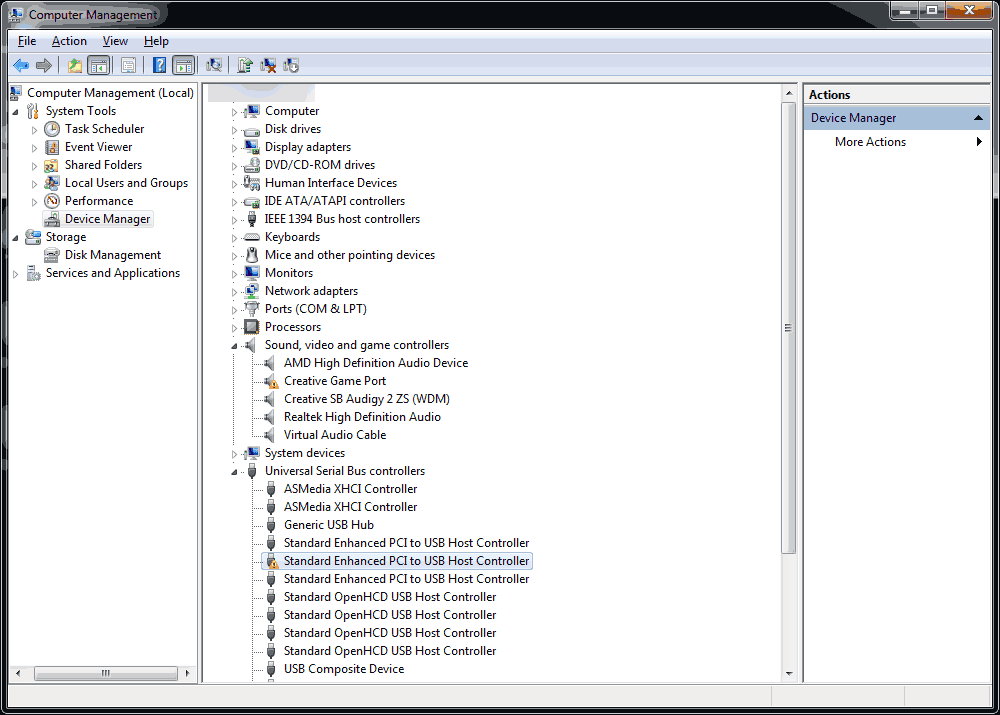
Since the USB plug is gone, the unit is non-operational, only doing the stupid rainbow pattern, letting you know that it's alive but not communicating. When it's plugged in the OS shuts down the USB hub, thinking there's a ground fault. But guess what? We may not be musicians. But if anyone who reads my blogs knows about me. I'm not afraid of the soldering Iron. So let's open up this unit and see what happened.
Laughable 1-year Ableton warranty.
Even though we had this unit for six months, the warranty apparently has expired because we did not purchase this from an authorized Ableton vendor, and thus they go off of the manufacturer's warranty of only one year. And because it was sitting around for months, guess what? Expired! Ableton really shows a lot of faith in their musical equipment to only give one year on their controllers and afterwards shrug their shoulders and tell musicians that you're just going to have to get a Push Gen 2 controller, which costs DOUBLE that of what you paid for your Push Gen 1.
Give us MORE money if you want a messily 2-year warranty. Otherwise, fuck you you only get one year!
This circles back to my comments earlier that Ableton must think musicians can simply make money rain for them! Perhaps being in the computer repair field was the wrong business to be in. And that musical career is the place to be because apparently they make thousands to spend on hardware! Perhaps Ableton is right! Musicians would simply buy another controller with the theoretical money we may or may not have! Apologies for the sarcasm in the least bit. However, since the career we chose is computer repair.
Let's take this thing apart!
Disassembly of the Ableton Push.
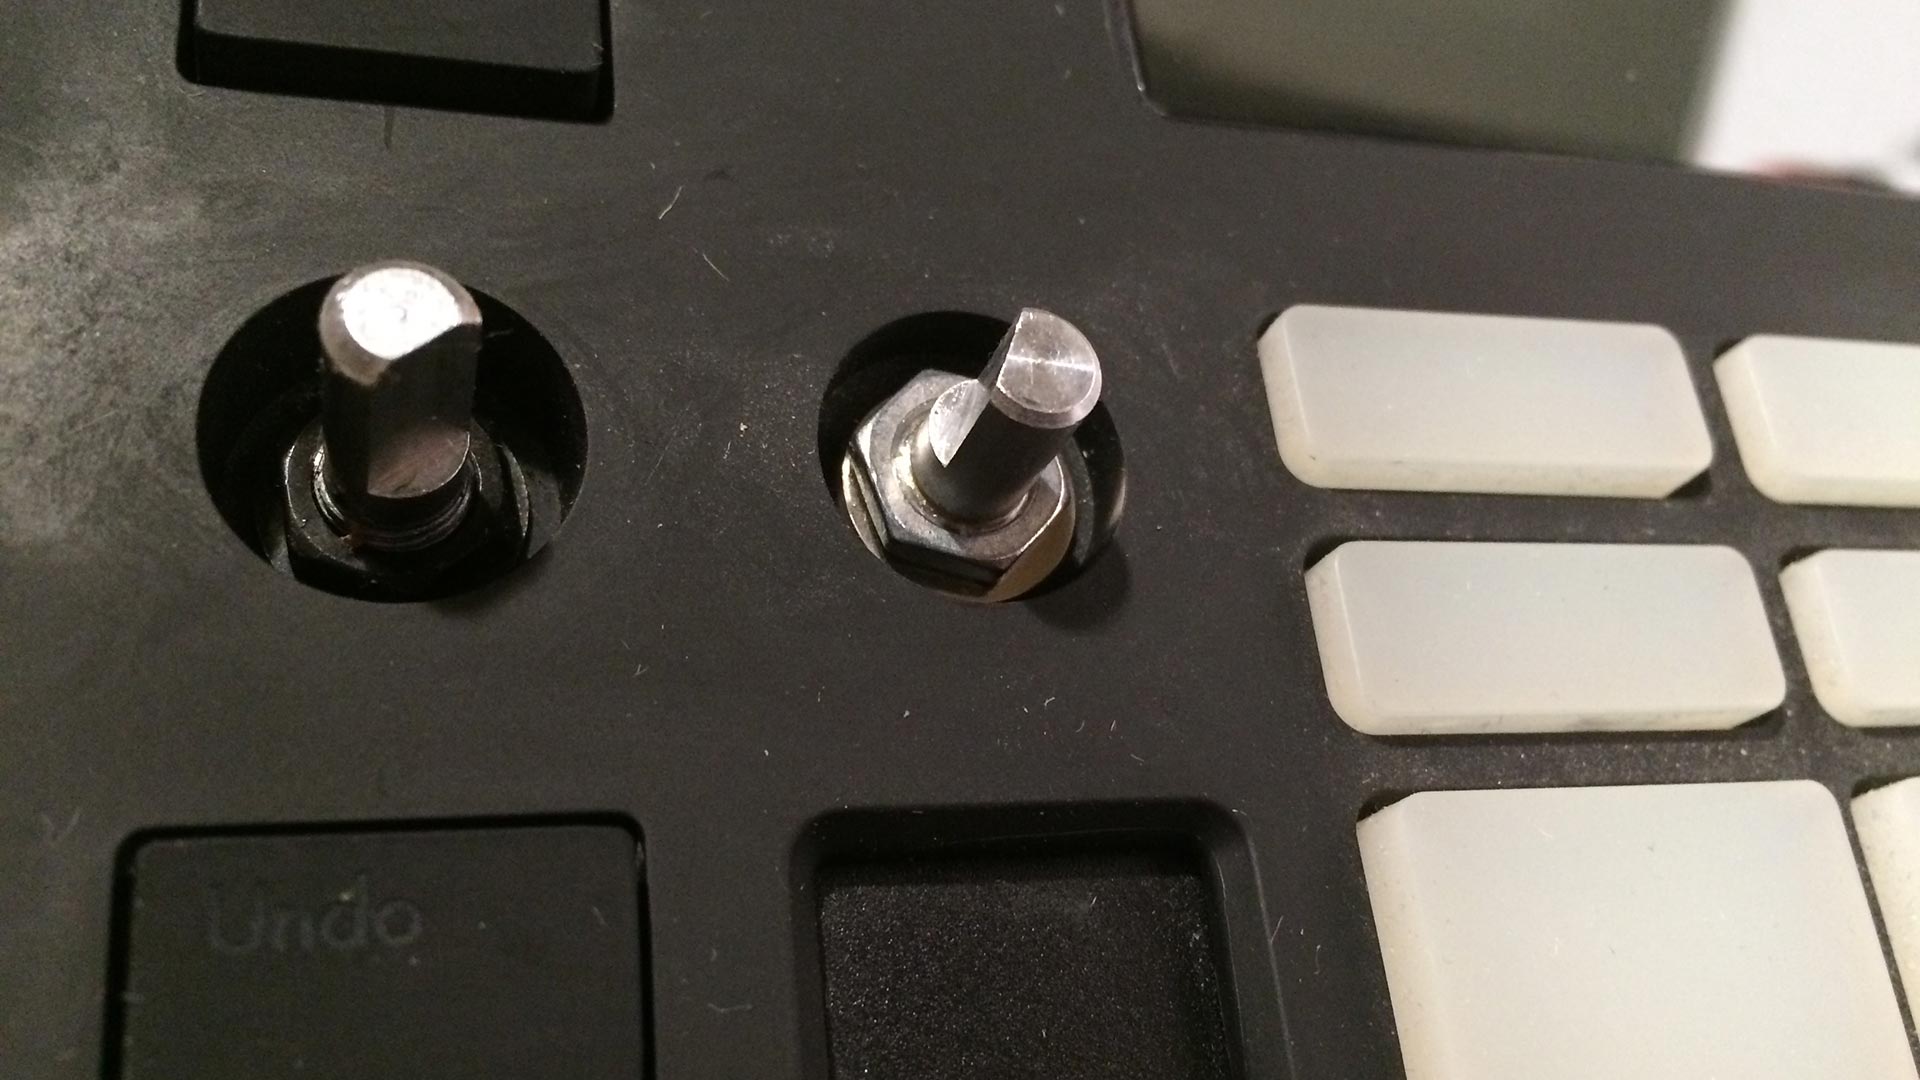
Before we flip the Ableton Push over and undo the tons of screws, we must first remove the caps from the "Tempo" and "Swing" pots. Underneath, there is a nut and washer. Silver nut for the "Swing" and black nut and washer for the "Tempo".
Thankfully, Ableton did not do anything evil like use Loctite red or blue to lock the nuts and washers into position, so a socket wrench or even thin pliers makes them very easy to remove. Taking care of this early on is important, as only these two pots are linked directly to the main board of the Ableton Push. All of your other parts are on a separate board that we will not be removing.
Remove the back screws.
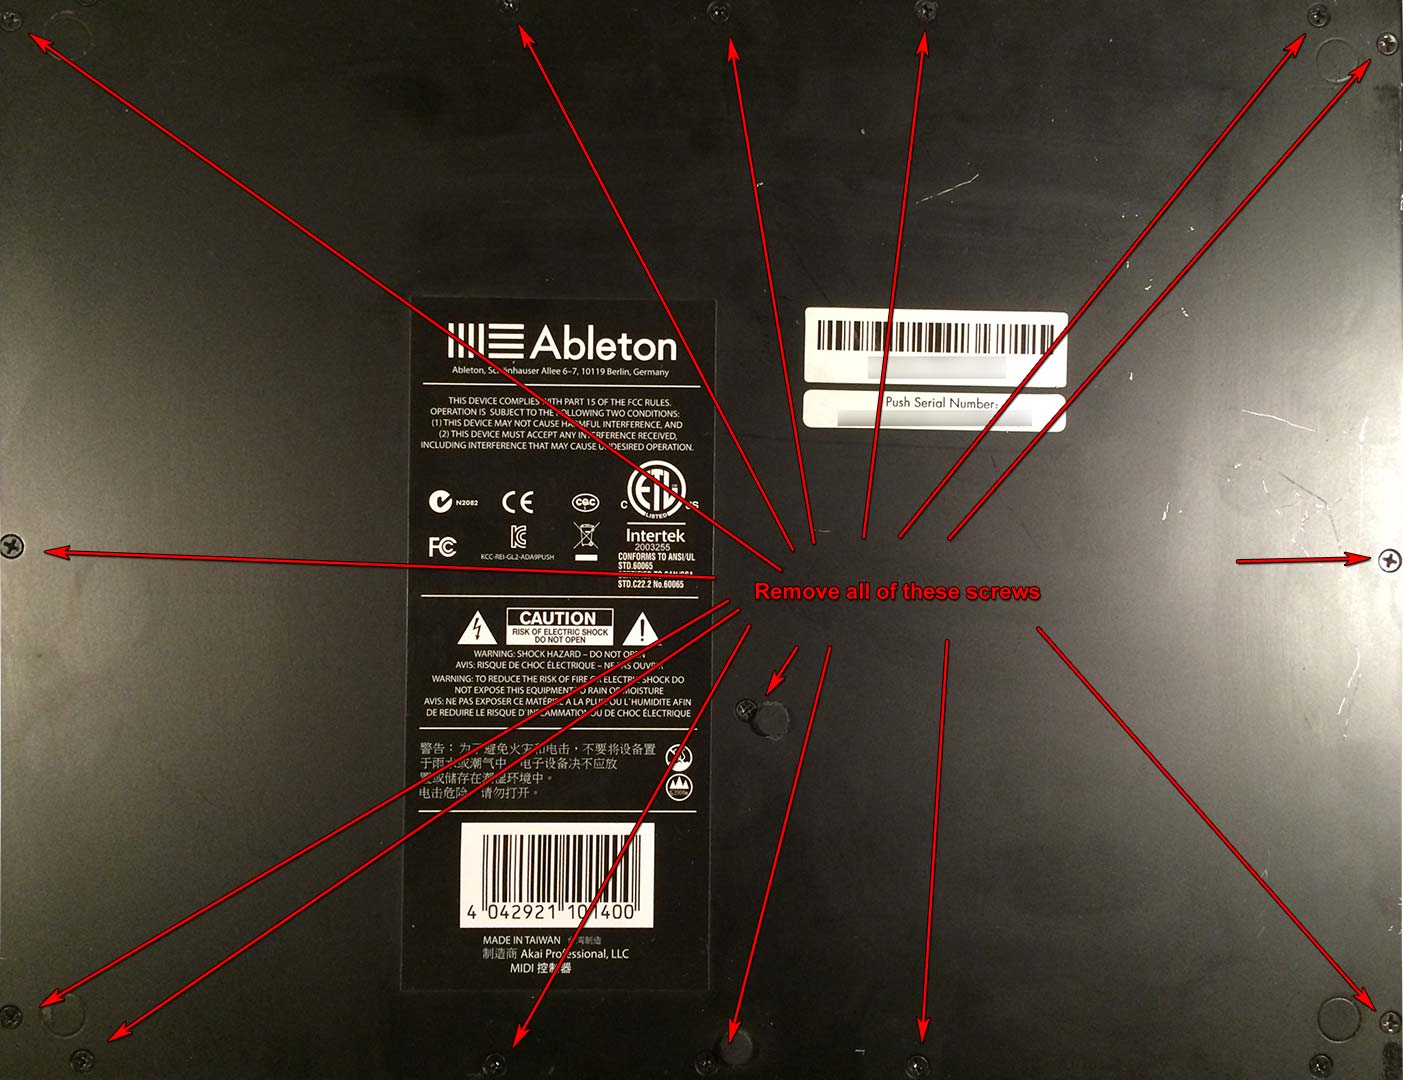
Serial number hidden to protect the guilty. Also, I removed the rubber feet as they were falling off my Ableton Push, and I have a pack of rubber feet that I use for my other hardware projects that I will install onto the bottom instead.
During this disassembly process, I highly recommend that you use hand tools for removing all of the screws, as just about every screw inside the Ableton Push is a plastic tapping screw. Over-torquing your screws will result in breaking the plastic sockets. It's highly tempting to use a power screwdriver because of how many screws we are removing. But don't do it. Also, when flipping your Ableton Push, place a towel underneath to prevent damage to the pots during disassembly.
Remove the stabilizing plate screws.
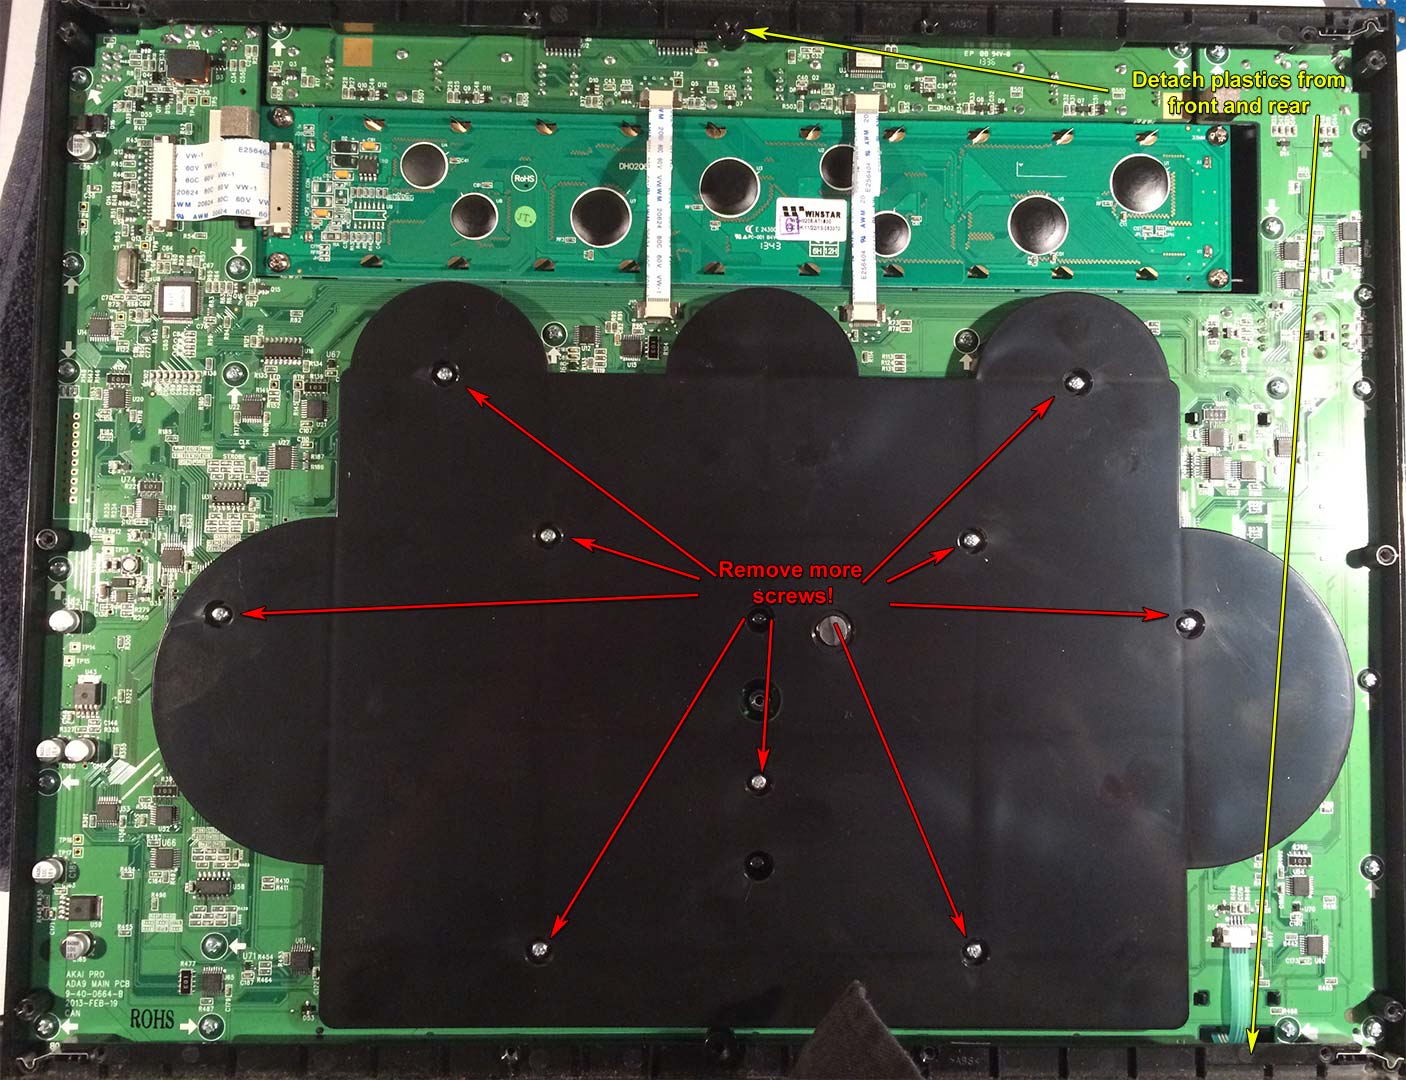
Since Ableton encourages its users to be total monsters by punching your pads to achieve intensity, depending on the music bank you choose, this chunk of plastic keeps the board from warping on the inside. Since it doesn't really provide any feedback as you're pressing the buttons, everyone who has tried to use the Ableton Push always slams on the pads hard. Also, once you remove the metal backing from your Ableton Push, there will be two long strips of plastic that can simply be removed from the front and back.
Undo edge connectors and... You guessed it! Remove even more screws!
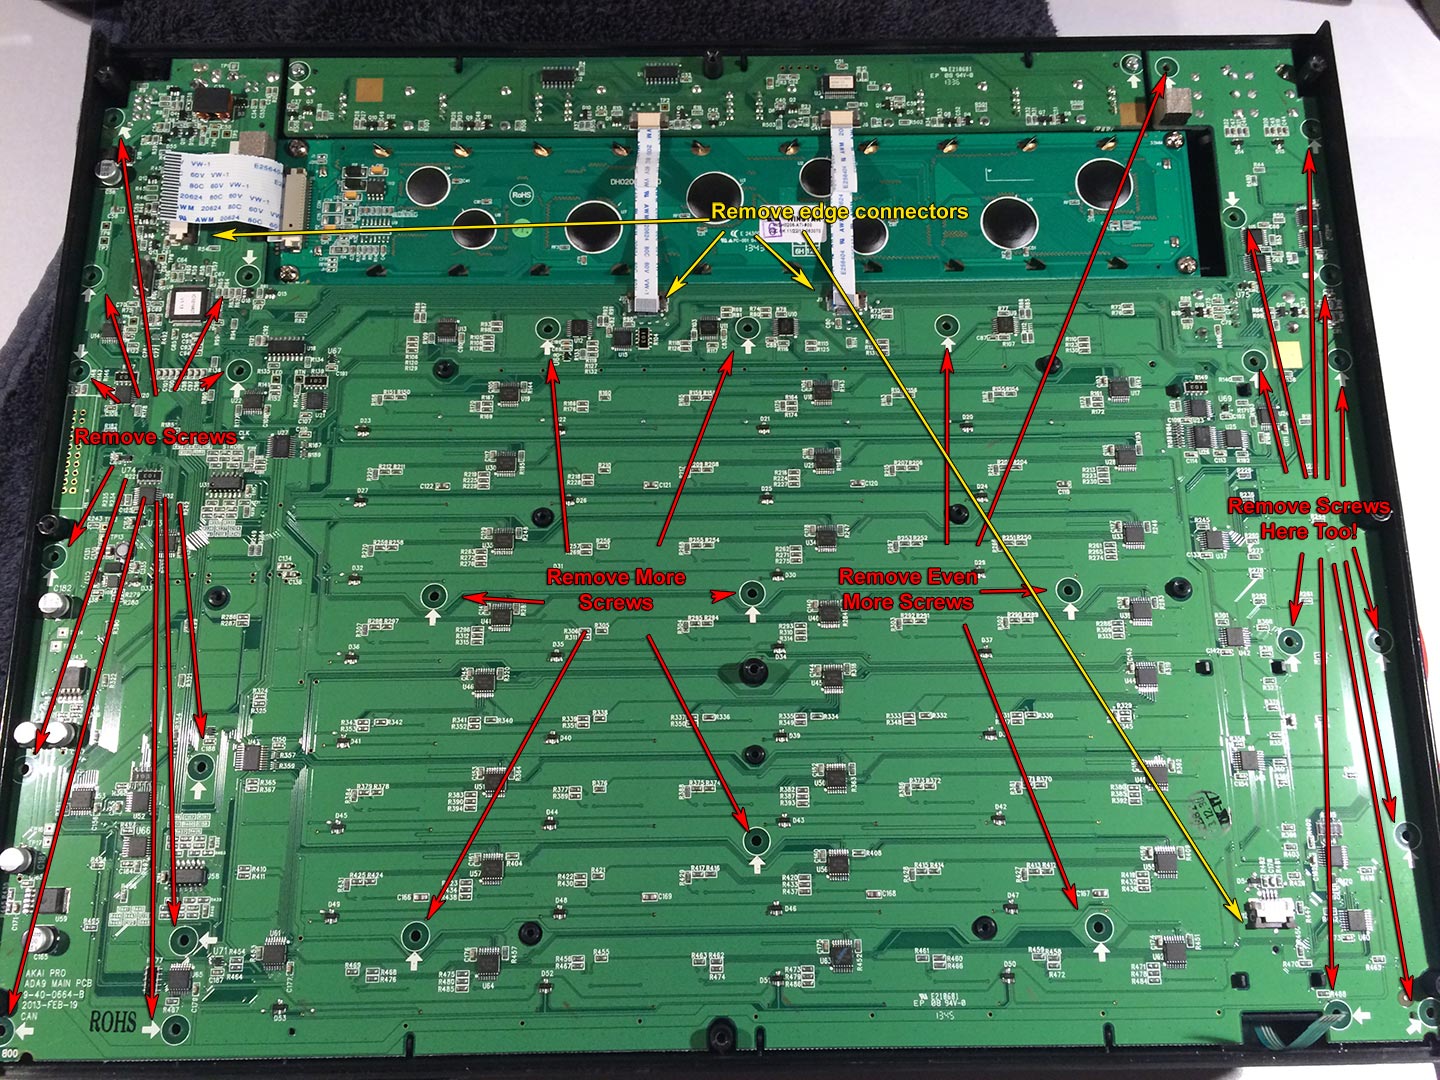
Now we can finally remove the motherboard. Unscrew the insane number of screws that hold the board in place. You are probably asking why so many screws? Some laptops use fewer screws to keep motherboards in place.
The answer is the sensors on the Ableton Push. They need to be as flat as possible. Any warping of the board may cause a pad or key to misfire. Be especially careful with the edge connectors highlighted in yellow. Much like a laptop, they are held in by some very fragile clips. Breaking those clips could render your Ableton Push unusable, as the connectors would never seat properly inside. Once you have removed every screw from the unit, you can lift the board from the bottom of the unit facing you and pull up. You will not be able to pull up from the front-facing side away from you, like the USB, power, and aux jacks are wrapped around the plastic. However, with a little bit of tilting, they come out very easily.
The culprit: Bad USB Connector.
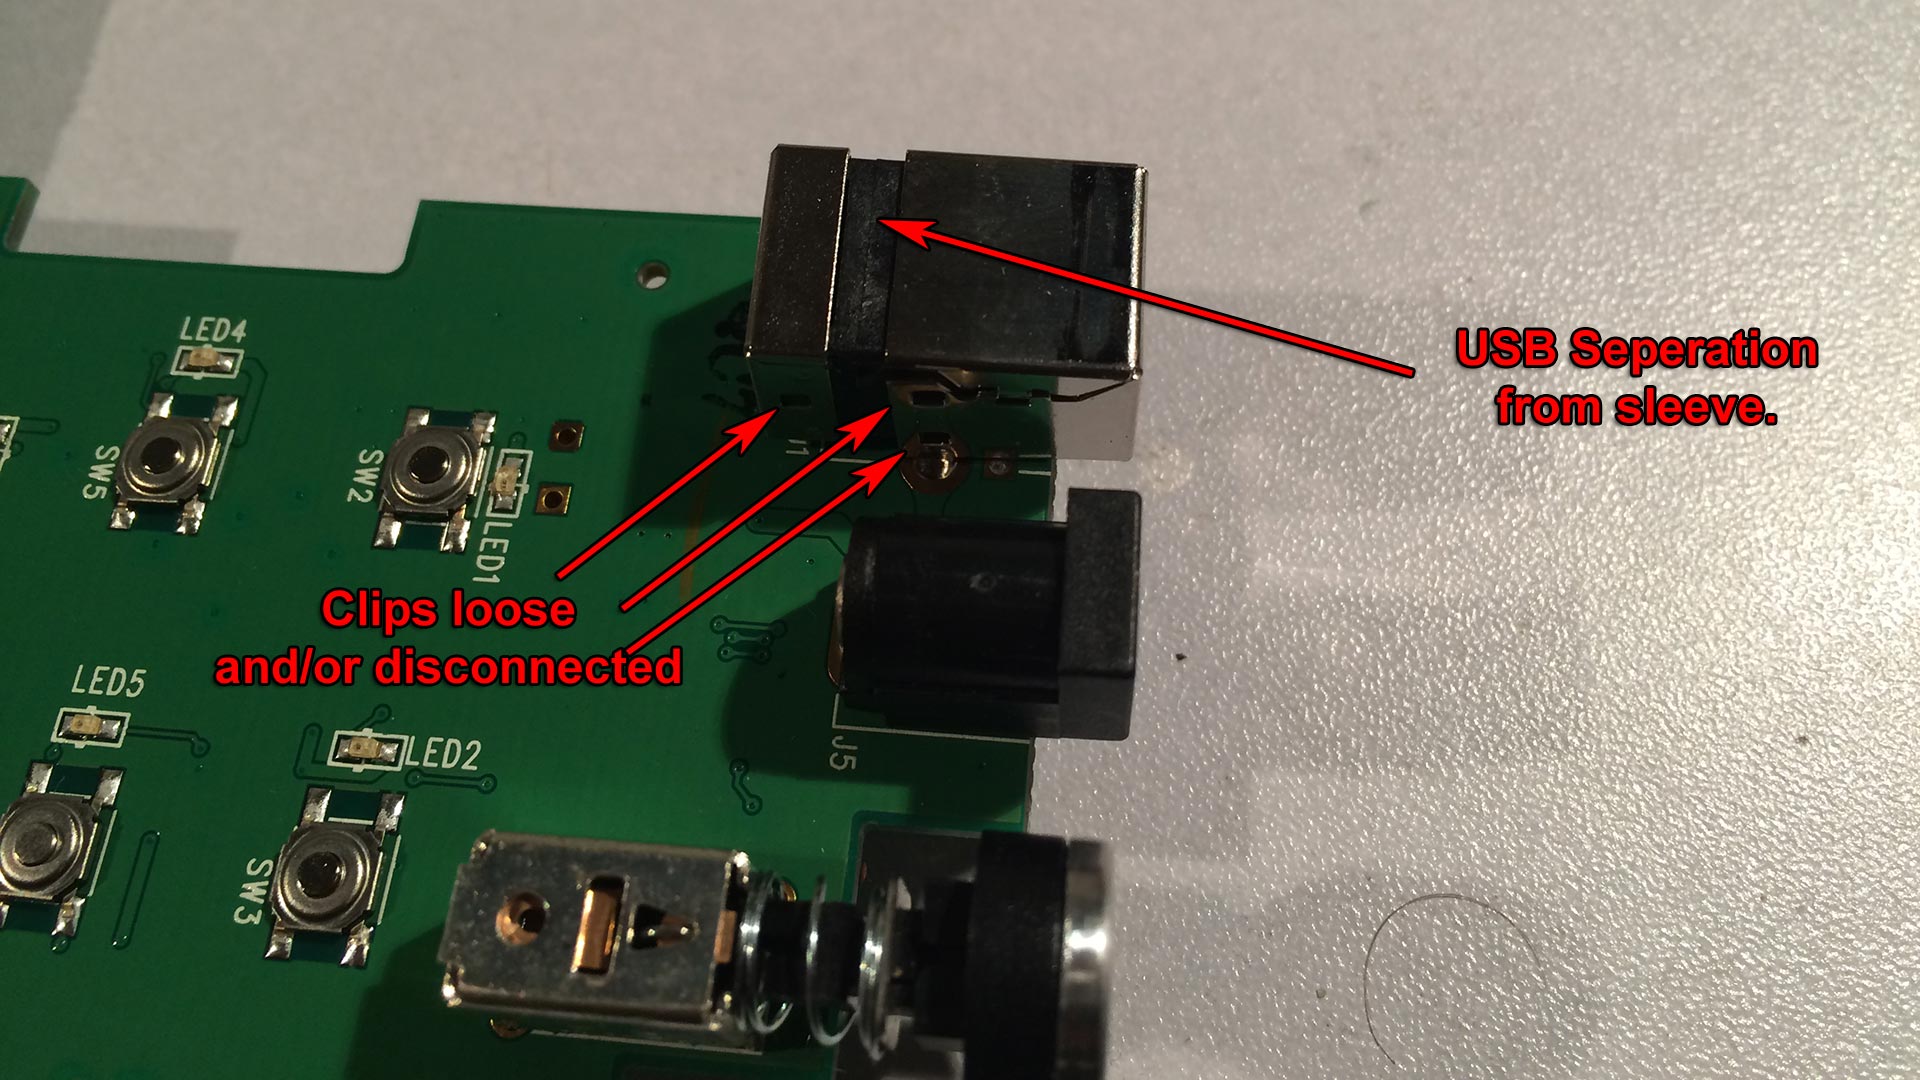
Upon flipping it over, the problem was rather apparent as to why the pins were so jacked up on my Ableton Push. Which is the USB connector inside was literally falling apart. So much in fact that without the support of the outer casing tied to ground, the only thing holding the connector down really is the 4 ultra-fine connectors soldered onto the PCB board. and since they are getting pushed back, Ground and +5vdc were now touching, and this is why the USB hub on my PC was disabling itself. I know there are going to be a lot of people that would simply say the following:
You abused it! Tough luck! Not Ableton's fault! Treat your equipment better n00b!
Durability of the USB "B" Connector.
It should be noted that I have a lot of USB "B" type connectors around my house, ranging anywhere from printers, portable hard drives, scanners, you name it! The USB "B" style connector was always one of durability and one that could take a good amount of abuse before damage set in.
However, whatever company Ableton went through on their USB "B" plugs must have been terribly low quality as just average use of plugging in a USB cable around the house caused it to break. I did not even do what most people do with the Ableton Push by taking it on tour or transporting it out of the house! It's a rather unfair assessment to state that you have to treat some parts of a piece of musical equipment like glass, but other parts you have to use force upon. But that is just the opinion of this lowly blogger.
Notes about removal of the USB port.
When using your soldering iron to remove the USB port, the Ableton Push board is heavily grounded, and you're going to require a minimum of a 60watt iron capable of minimum 450 degree temperature. I would recommend around 500+ degrees if you can get a soldering iron cheap enough to go that high. A 40-watt cheapo iron isn't going to cut it. This is both for the ground plane and also because the solder used is ROHS compliant, which can be harder to heat up and remove with your solder sucker. Do not use solder braid, as it will break the traces of the USB connector. You can flow lead solder to attempt to soften the ROHS solder already on the board if you are having difficulty removing the ground plane connectors on the USB port.
Finding a replacement USB port.
We got a question asking where to find a 4-pin "B" class female USB dip connector. You can go to eBay if you don't mind waiting from China, or paying a nominal fee in shipping from an American vendor. Alternatively, if you would rather want to buy new you can check out Digikey (Sorry party people, for some reason Digi-Key won't let us link to their catalog anymore!): Digi-Key Part number AE11188-ND A.K.A Manufacture number AU-Y1007-2 Digi-Key Part number ED2983-ND A.K.A Manufacture number USB-B1HSB6 If you need something quick and local you can hunt around the local thrift store for a similar USB female connector on it.
Also, if you know someone who has a lot of electronics. Things like DSL routers and print servers will have them. Not only can you get one fast for $1-5, but you can also practice your socket removal skills on a garbage board before trying it on your expensive Ableton.:) Oh, and you recycle by salvaging parts, too. So it's a win-win that way. After you replace it. Reassembly is very easy and straightforward.
 Oh no! The precious warranty that I never-ever had! I voided it, I guess?
Repaired, back online, and afterthoughts.
Since we're already good with a soldering iron, repairing the Ableton is not that hard to repair. The most annoying factor was probably removing all of those screws. We're surprised they didn't put the power circuit and pots on their own board, making it a little easier to service than flipping the whole board out, but all in all, everything is fine again, and we're able to go back into the production of our terrible, terrible music!
The new USB connector feels nice! That nice, fresh click and the device manager kicking in all happy is a welcoming sound. Despite all of the complaints I have, I do like the Ableton Push's hardware. Even some aspects of Live I liked. I have used musical programs in the past, such as Rubber Duck and Mixman, and those seem like toys in comparison to this. And very slowly, I am learning how to actually make something that resembles music with this thing. That in itself is worth the hundreds of dollars we've spent on this unit.
Attitudes of Ableton.
The thing we don't like about Ableton really is the company itself! The level of sheer arrogance they have. We understand is a reflection of the music industry and the customers that surround them. The notion of not having any standardization of their hardware with other platforms of musical production. Despite their attitudes, it really doesn't affect what we're doing, so fuck 'em! We posted this because if I had an issue with the USB ports, then others obviously will run across a similar issue. If it helps someone, great. If not, then hope you find answers elsewhere.
Don't die.
Server protect you.
+++END OF LINE
Hi @S-Config,
Thanks a lot for this. I've managed to change my usb port but could you share the dimensions of the stabiliser plate as well as the front and back plastic covers.
I've been gifted my Push 1 already dismantled and no more stabiliser plates. Otherwise maybe you could take a picture of it next to a coin so i can have a go at modelising so i can 3D print one.
Thanks a lot for your help.
Of course,
Stabilizer is 7.85mm tall according to Calipers I have. I did an earlier blog on how I pulled vectors off of an image to make feet pads for my mouse. using a flat-bed scanner should eliminate a lot of distortion but even still because the part is raised a little we anticipate a +/- 1mm variance from the original part.
Wells are 6.15mm - might be important as the supports avoid any of the array chips on the Ableton.
If you were to pull this image into inkscape:
8.500 in
13.333 in
600dpi
pits are 3mm deep(the screw holes)
If you were to pull this into Inkscape:
8.500 in
13.333 in
600dpi
I'm trying to find the value of resostor #468 on the bottom right hand side of the main board of a push 1 . it was to destroyed for me to read and there is no board view anywhere I can find online . any chance you still have yours and could check out the value ? It's not worth sending in for repair but I like fixing stuff . any help would be much appreciated
Hello Jay,
Still have it.. Still works.. And give me a few days. I'll take it apart and give you those values.. and because it's an older blog article there wasn't much for high resolution photos of the board which I will correct as well.
Thanks for visiting
- S
thank you so much!!!
Thank you for this article! Very well written, and as a musician I appreciate your comments on Ableton, haha.
Perhaps Ableton has improved on the warranty front as I have a Push 2 that I bought secondhand and it was well out of warranty. I had unresponsive pads and I got in touch with Ableton support and after doing some diagnostic stuff, they charged me a very reasonable cost to replace it (including international shipping) with a refurbished unit that appears new and works perfectly.
So I'm very happy with Ableton support.
Interesting, perhaps over the years they turned around versus the time i called and they stated they could do absolutly nothing for me unless i gave them another $200 for an extended warranty. It's good to know things are improving over at Ableton.
Thank you so much for writing this up. My push has been broken for over a year and I’m about to attempt to restore it.
I’m looking to buy a 4-pin “B” class female USB dip connector off the site you listed on digikey.
There is two options
1.) ED2983-ND
2.) USB-B1HSB6
Which one does the push1 need?
Thanks again! Very much appreciated!!!
Actually those two part numbers are the same. ED2983-ND is digikeys part number and USB-B1HSB6 is the manufacturer part number. Digikey has a lot more of these types of connectors. There are actually a TON of usb connectors on Digikeys site. But in general you want a USB B Connctor that has the 4 pin connector on the bottom and the two grounding posts on the side. On digikeys site it's known as "Through Hole, Right Angle"
Anyhow, take your time with pulling it apart. Best of luck in repairing your push!
Would you recommend trying if you have no soldering iron experience? I'm positive my usb b port is broken and want to replace. I'm concerned I might make things worse learning to solder on my push lol.
We would recommend practicing with a soldering iron on some electronics you don't care about. If you don't have anything around the house go to Goodwill or any thrift store and find a cable/DSL modem for like $2.. those will have USB-B ports that you can practice salvaging and also RJ-45 ports and all of that.. If you can get the parts off of the board without destroying traces on the board. Then dive into your ableton to repair. The ableton shouldn't be the very first thing to solder on. As the ground-plane on that board will fight you a little (heat dissipates on ground because there's more metal for the heat to spread.)
Anyhow, best of luck with mastering the art of soldering!
Hey I just got out my 10x hand lens and flashlight and figured it out hah. You have to pull the black plastic out towards the direction the cable is coming from to release each one. Thanks again !