
DIY Controller (and MAYBE keyboard) wall mounts.
Organization is a neat thing. Especially if you're the kind of person who has control(er) issues as we go. No, seriously, we have two totes filled with controllers! In many cases, we don't even have the game consoles that these controllers originally came from. Yet, we cycle through these controllers a lot when testing drivers or just playing a game that absolutely requires a gamepad to play.
Read on if you want to see us hang things on walls like some bizarre home interior decoration channel.
The parts.

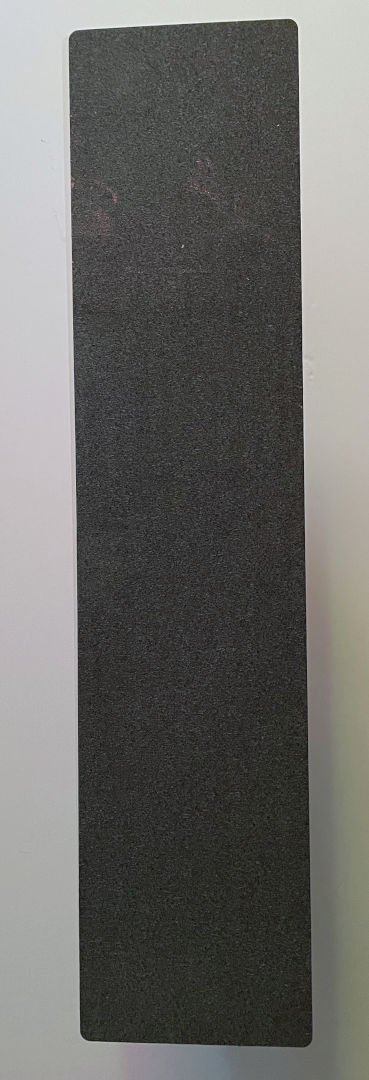
What you are looking at is 10mm PalBoard, which is essentially a commercial brand for "PVC Board" cut up on a CNC Router.
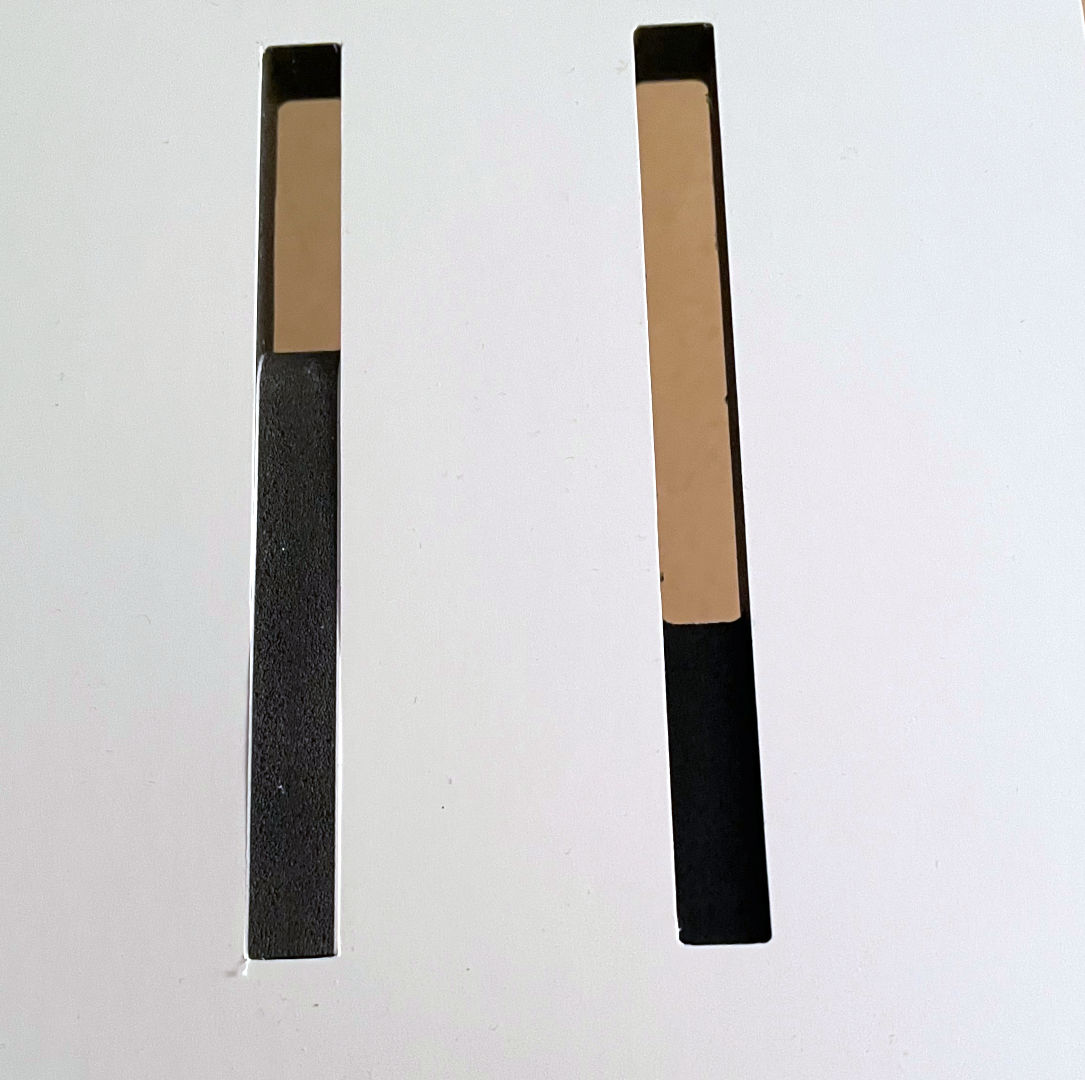
This stuff is actually lightweight but can take a good amount of weight without deforming at all. We actually used this exact material for our DIY Lighting blog a while back, too. We love this stuff a lot because if you have a CNC router, it cuts through material like this like butter and hardly wears down your bits, too. We were using a 4mm dia. downward spiral bit, as the top of each hook is a 5mm gap, which fits perfectly inside the pocket-routed slots within the base of this project. As you can see by the contrast in the base. We routed completely through 60 percent of that slot so that we can easily slide these hooks into position.
You'll notice the bottom hooks are curved a little differently. Those were our original Hooks. Upon building our very first one, we found out rather quickly that even though we got them mounted, they were insecure, as they couldn't overlap as we pushed down.
You may notice a little bit of a fuckup on some of the pieces. Yeah, that's what happens when you place your starting route position in a sensitive area with no bridging support. Grandma was not happy with me on that!:)
But, since the routing error is facing inwards. No one is really going to see that part once assembled! But a lesson for those rocking a CNC router. Start your plunge along the OUTSIDE of your smaller parts. Not inside a pocket.
As we routed these rectangles EXACTLY to 10mm. It was a bit of a "Press to fit" approach requiring no glue (Although if you wanted to reinforce it certainly wouldn't hurt)\

With the first hook mounted. We repeat this process eight times and then flip this assembly back over.
Now, this may not look like a whole hell of a lot. But we applied a felt backing to our DIY Joystick rack for a few reasons.
- As the PVC sheet is still rather hard, hanging up the joysticks would audibly CLACK against the drywall of our place of living. This stops it.
- You could use 5-minute epoxy. But realistically, Hot glue adheres incredibly well to the PVC (especially if you lightly sand it prior), and hot glue adheres to the felt REALLY well!
- With the felt in place, I could re-use some old 3M command strips that we took off of the walls prior and hot-glue those to the felt. Again, the 3m-strips and the felt bond really well with hot-glue and haven't felt the need to use epoxy throughout the project.
Testing time.
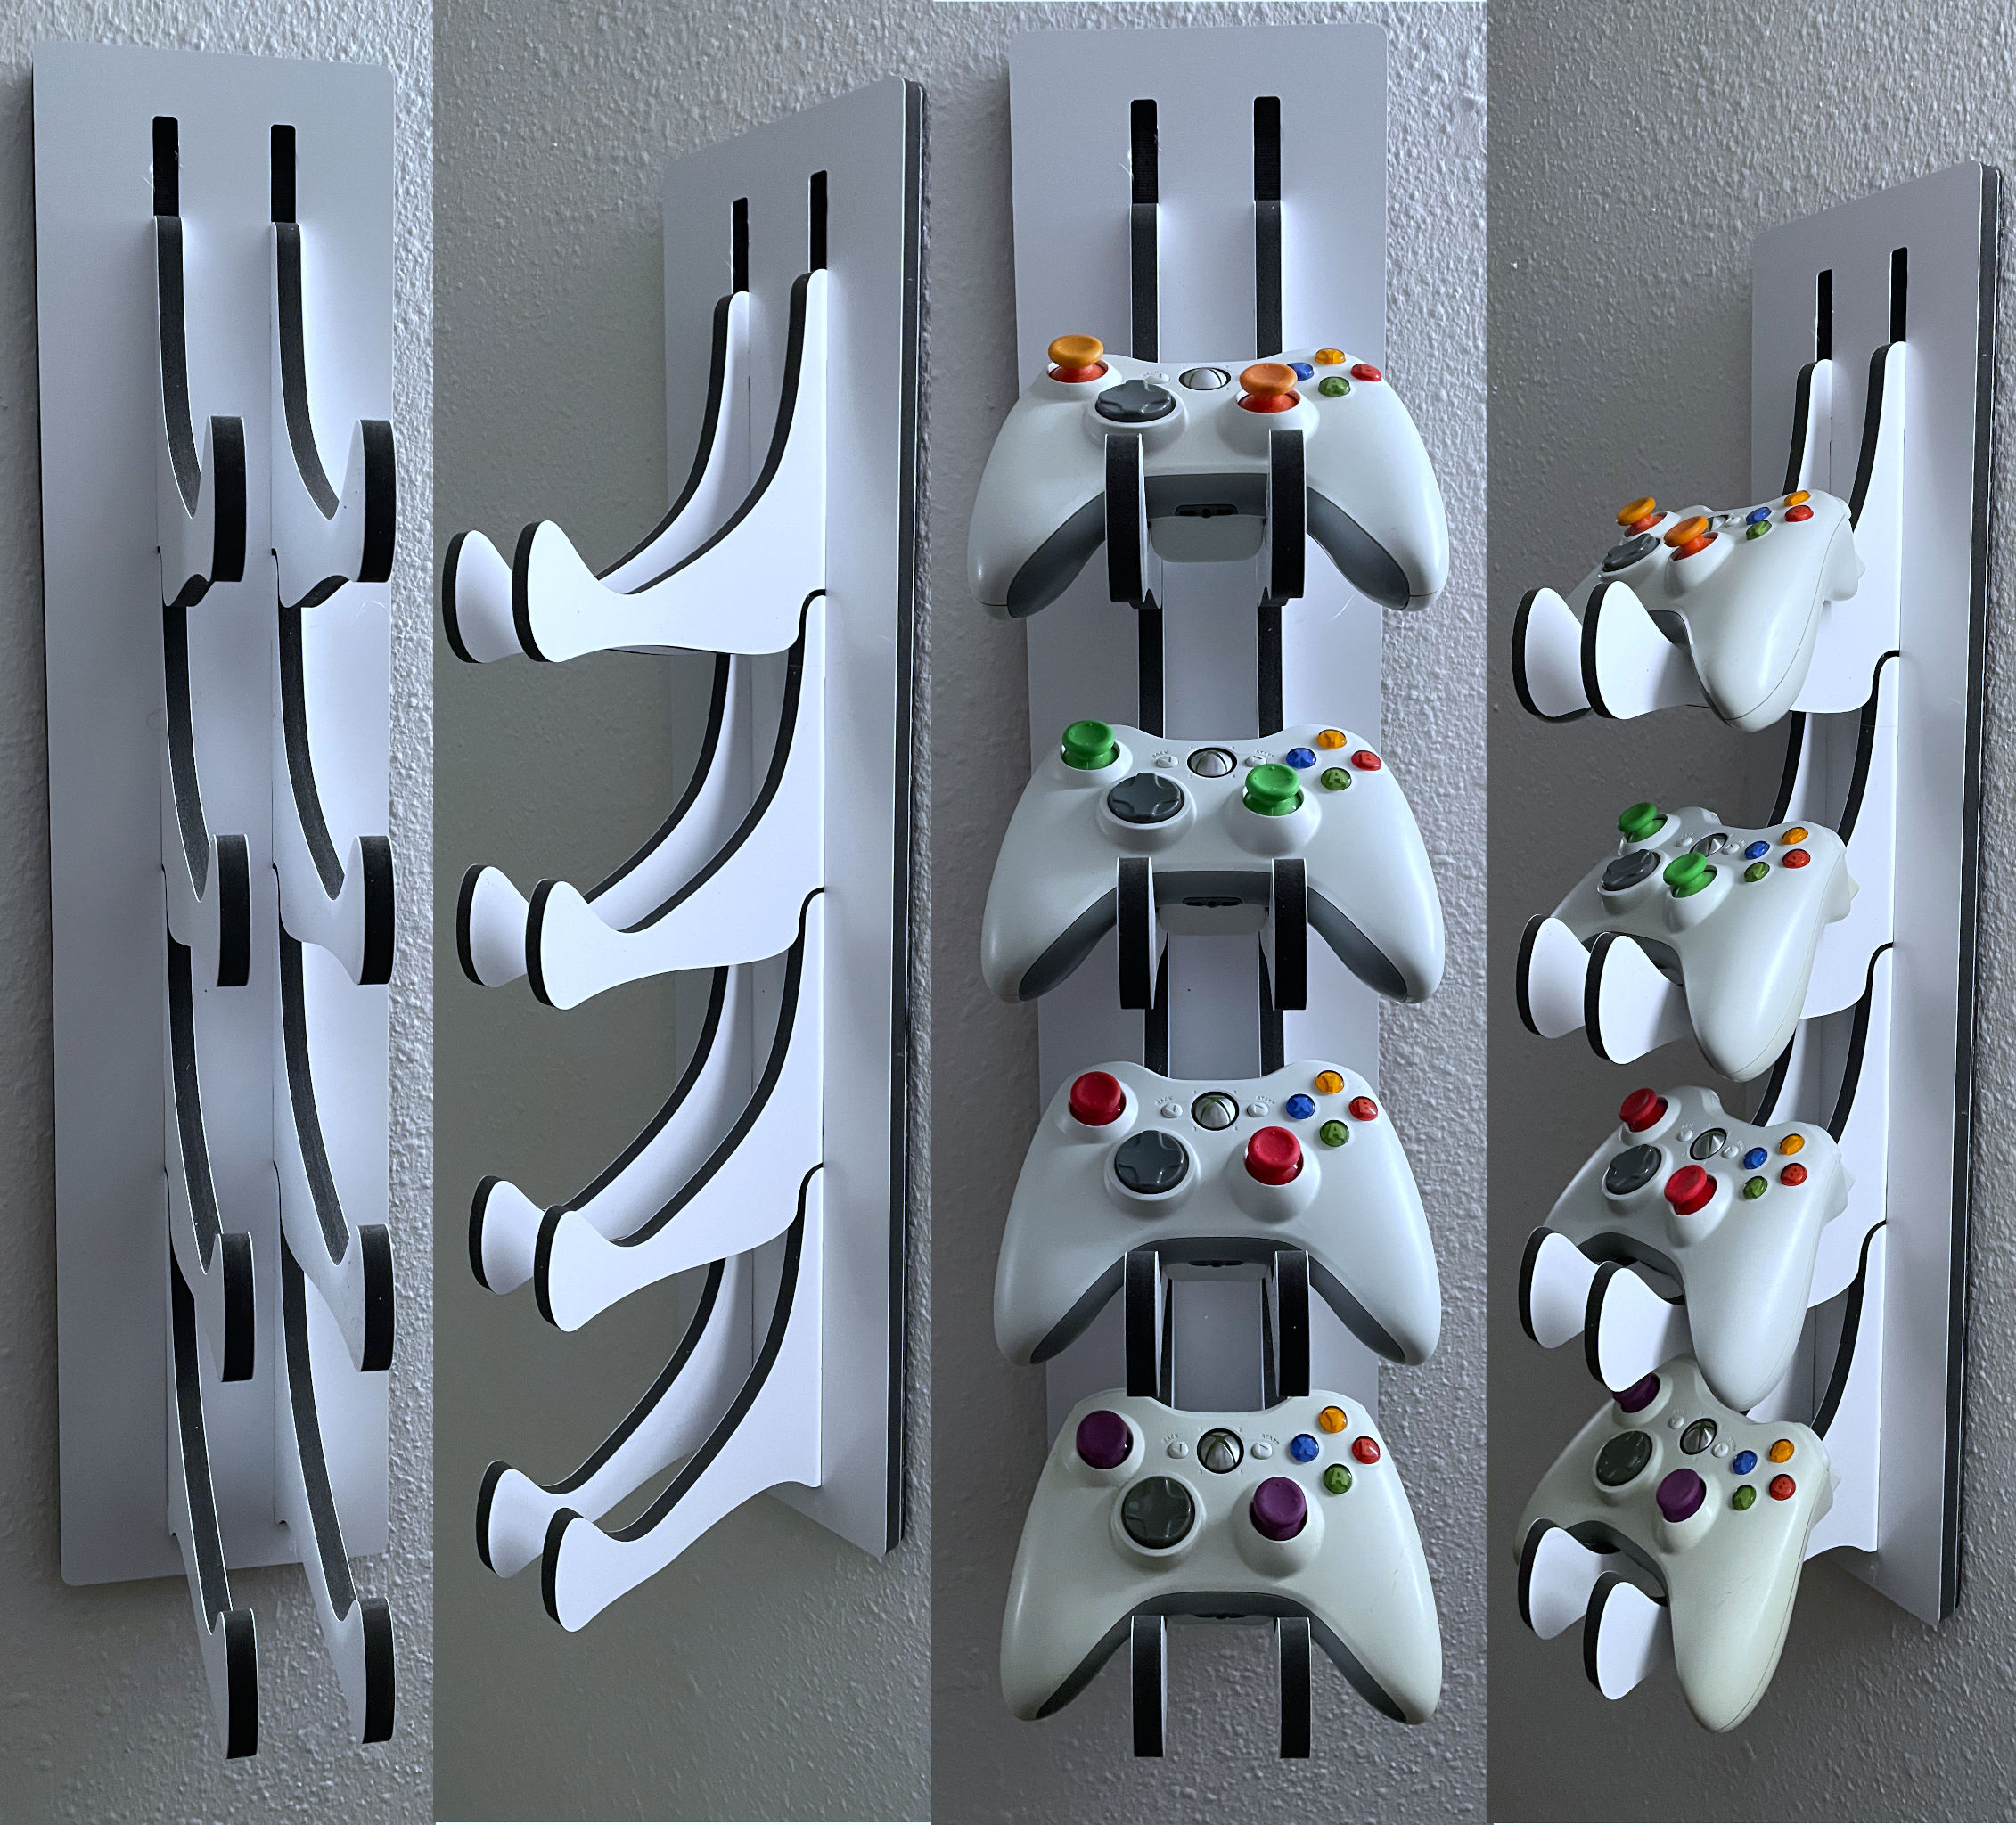
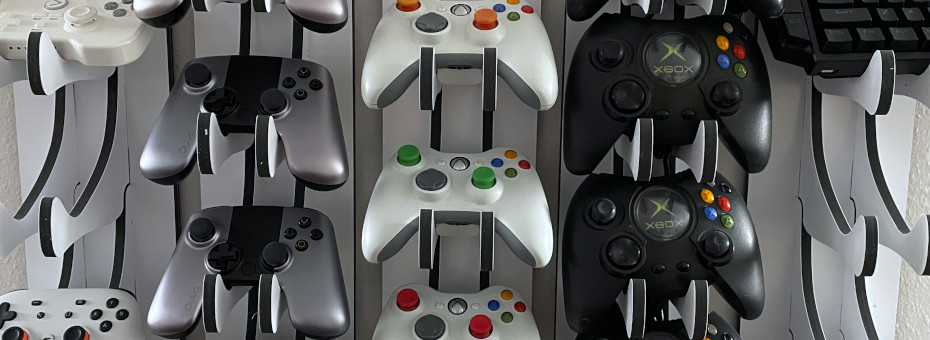
Initial fit test seems good with just some Xbox 360 controllers. We could lay them flat in the hooks, or prop them up a little to make them stand out. Overall, it's working!
Now, if we were casual gamers who had just 4 controllers for my friends to come over and play some Bro-Force, we'd say this project is done! Mission Success..
More! We need MOAR!!! - S
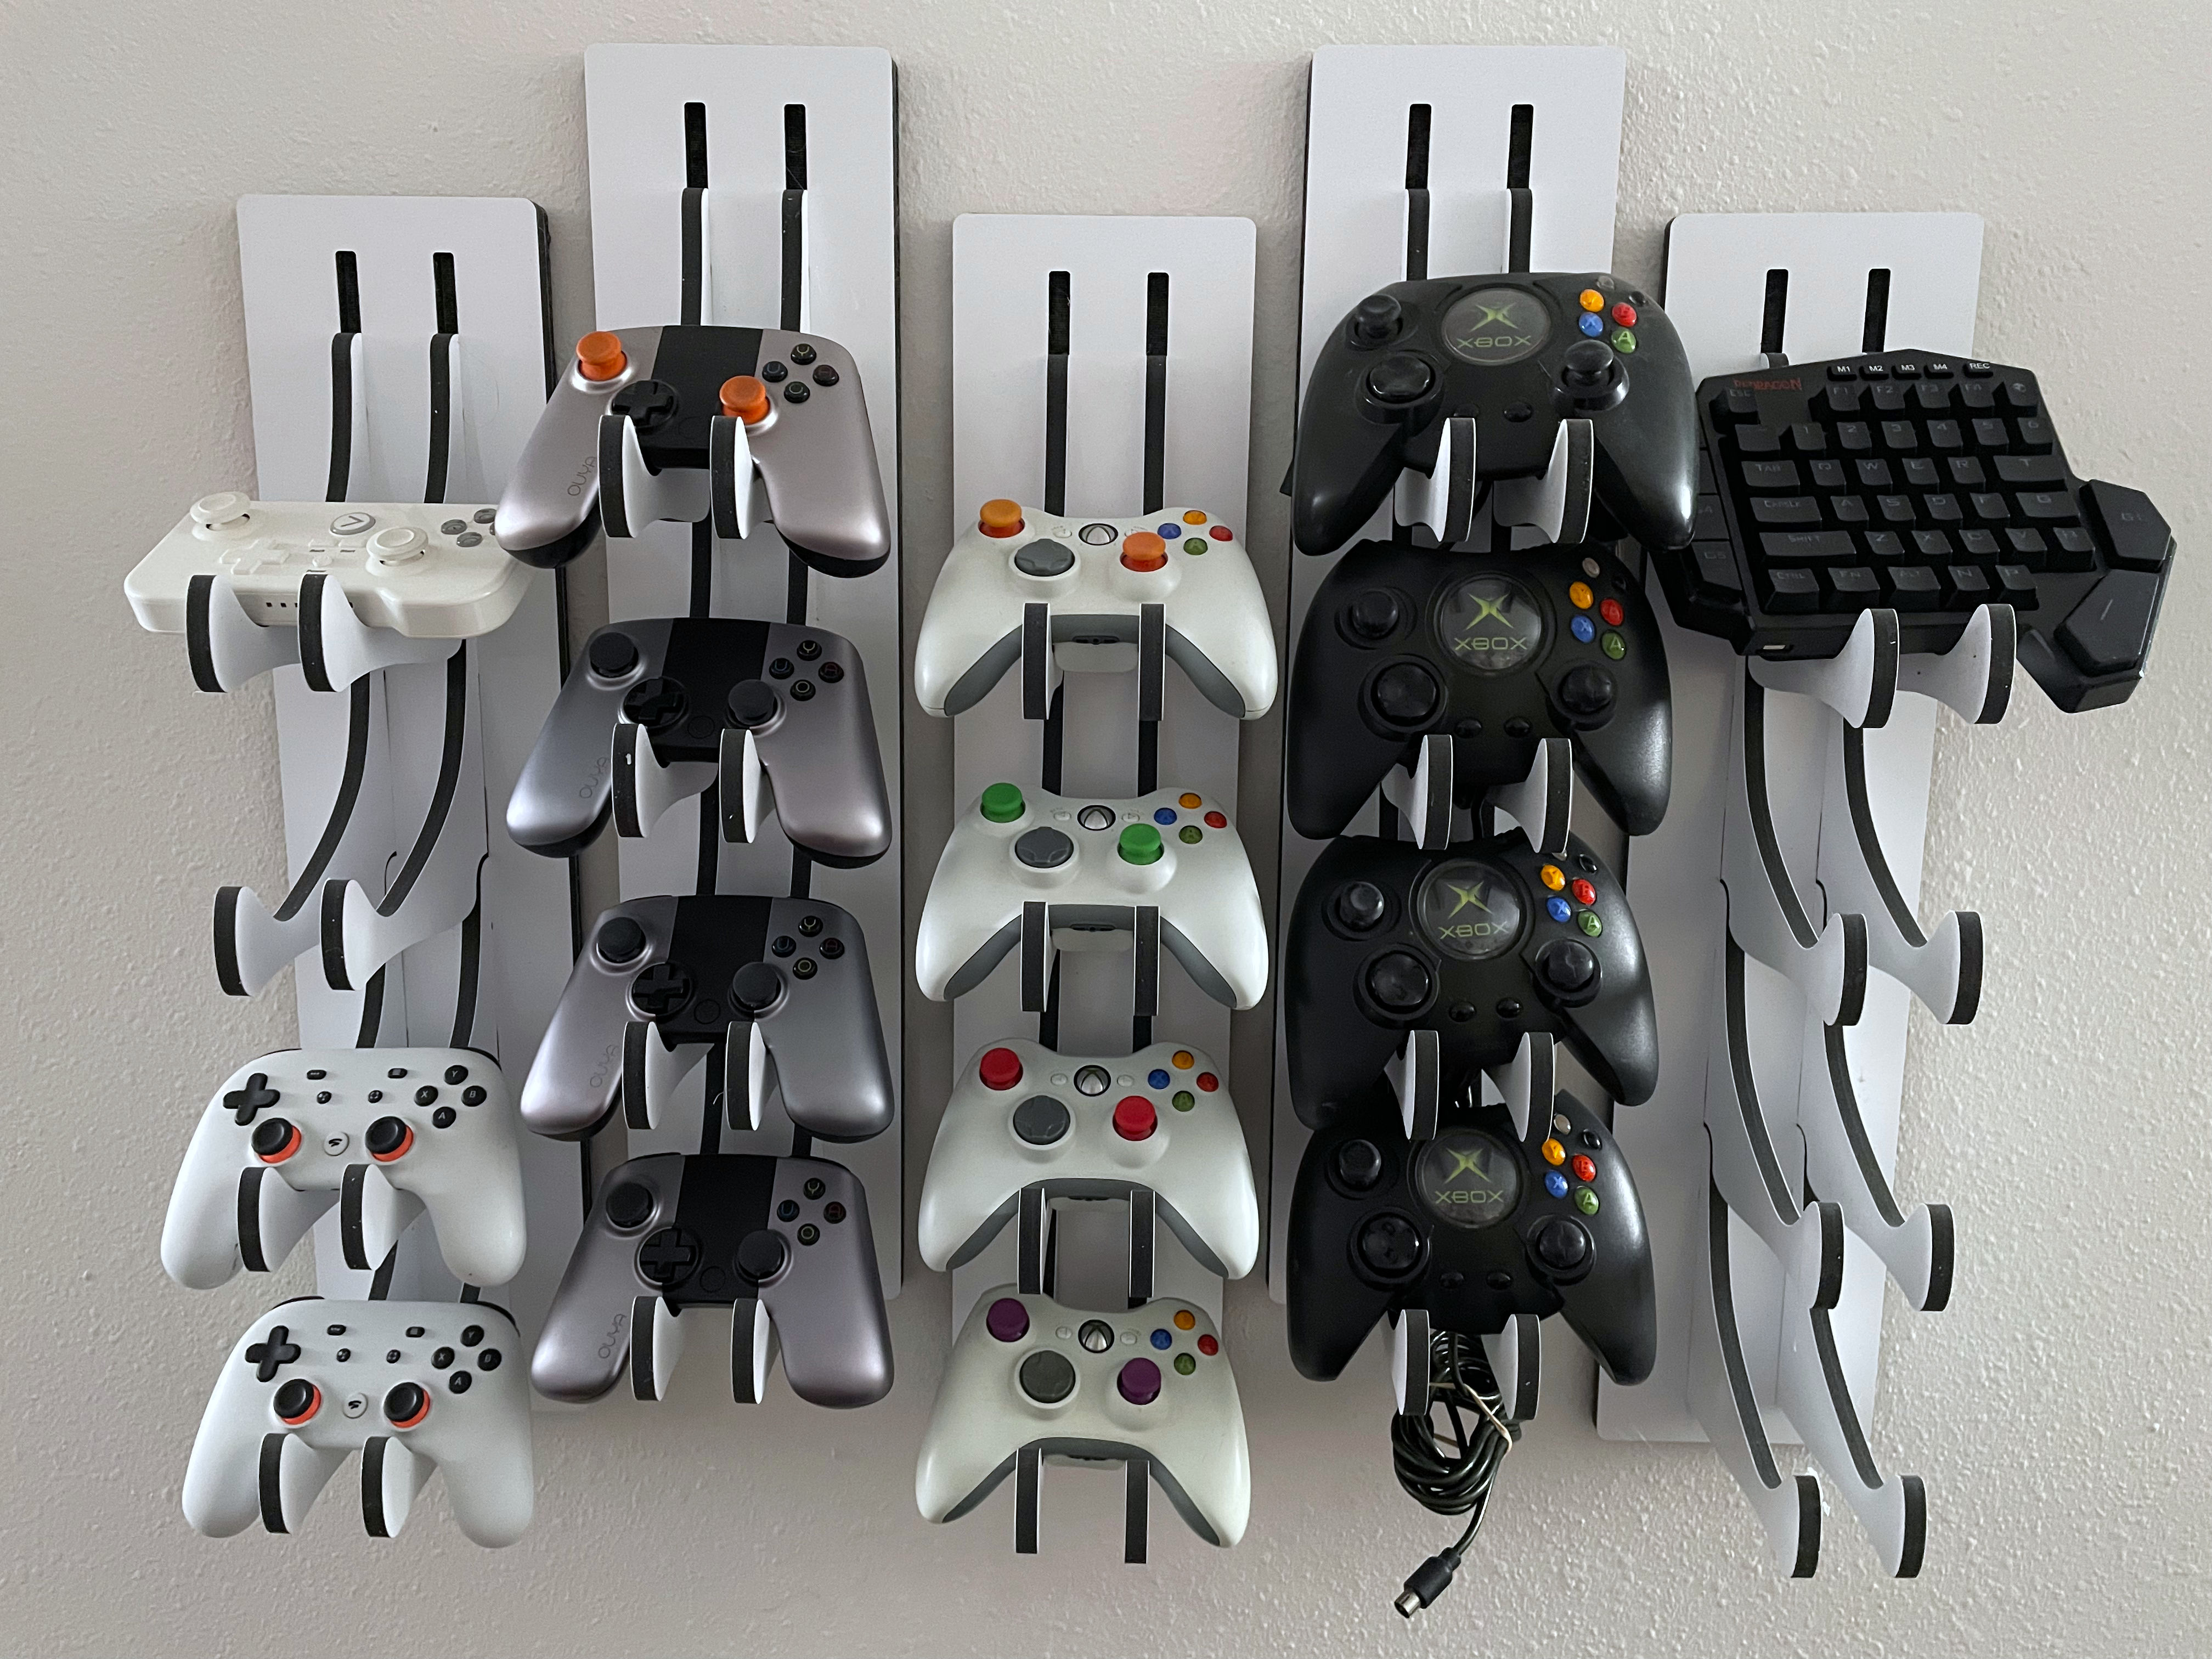 This isn't everything we have. So we still might need even more than this. But you party people get the idea. If you have a selection of game consoles, you could have them all ready to rock and roll. So far, we'd say the only real design flaw is a lack of cable management for controllers like my original Xbox Duke controllers. Or better, have a means to wire charging cables in the back of the frame(s) to keep each one of the wireless controllers charging. Hanging my Razer game pad got us thinking.
What about keyboards?!?!
Well, this shouldn't be a big deal, really. Make two of the DIY controller wall mounts and space them out. BOOM! Keyboard wall mounting success!
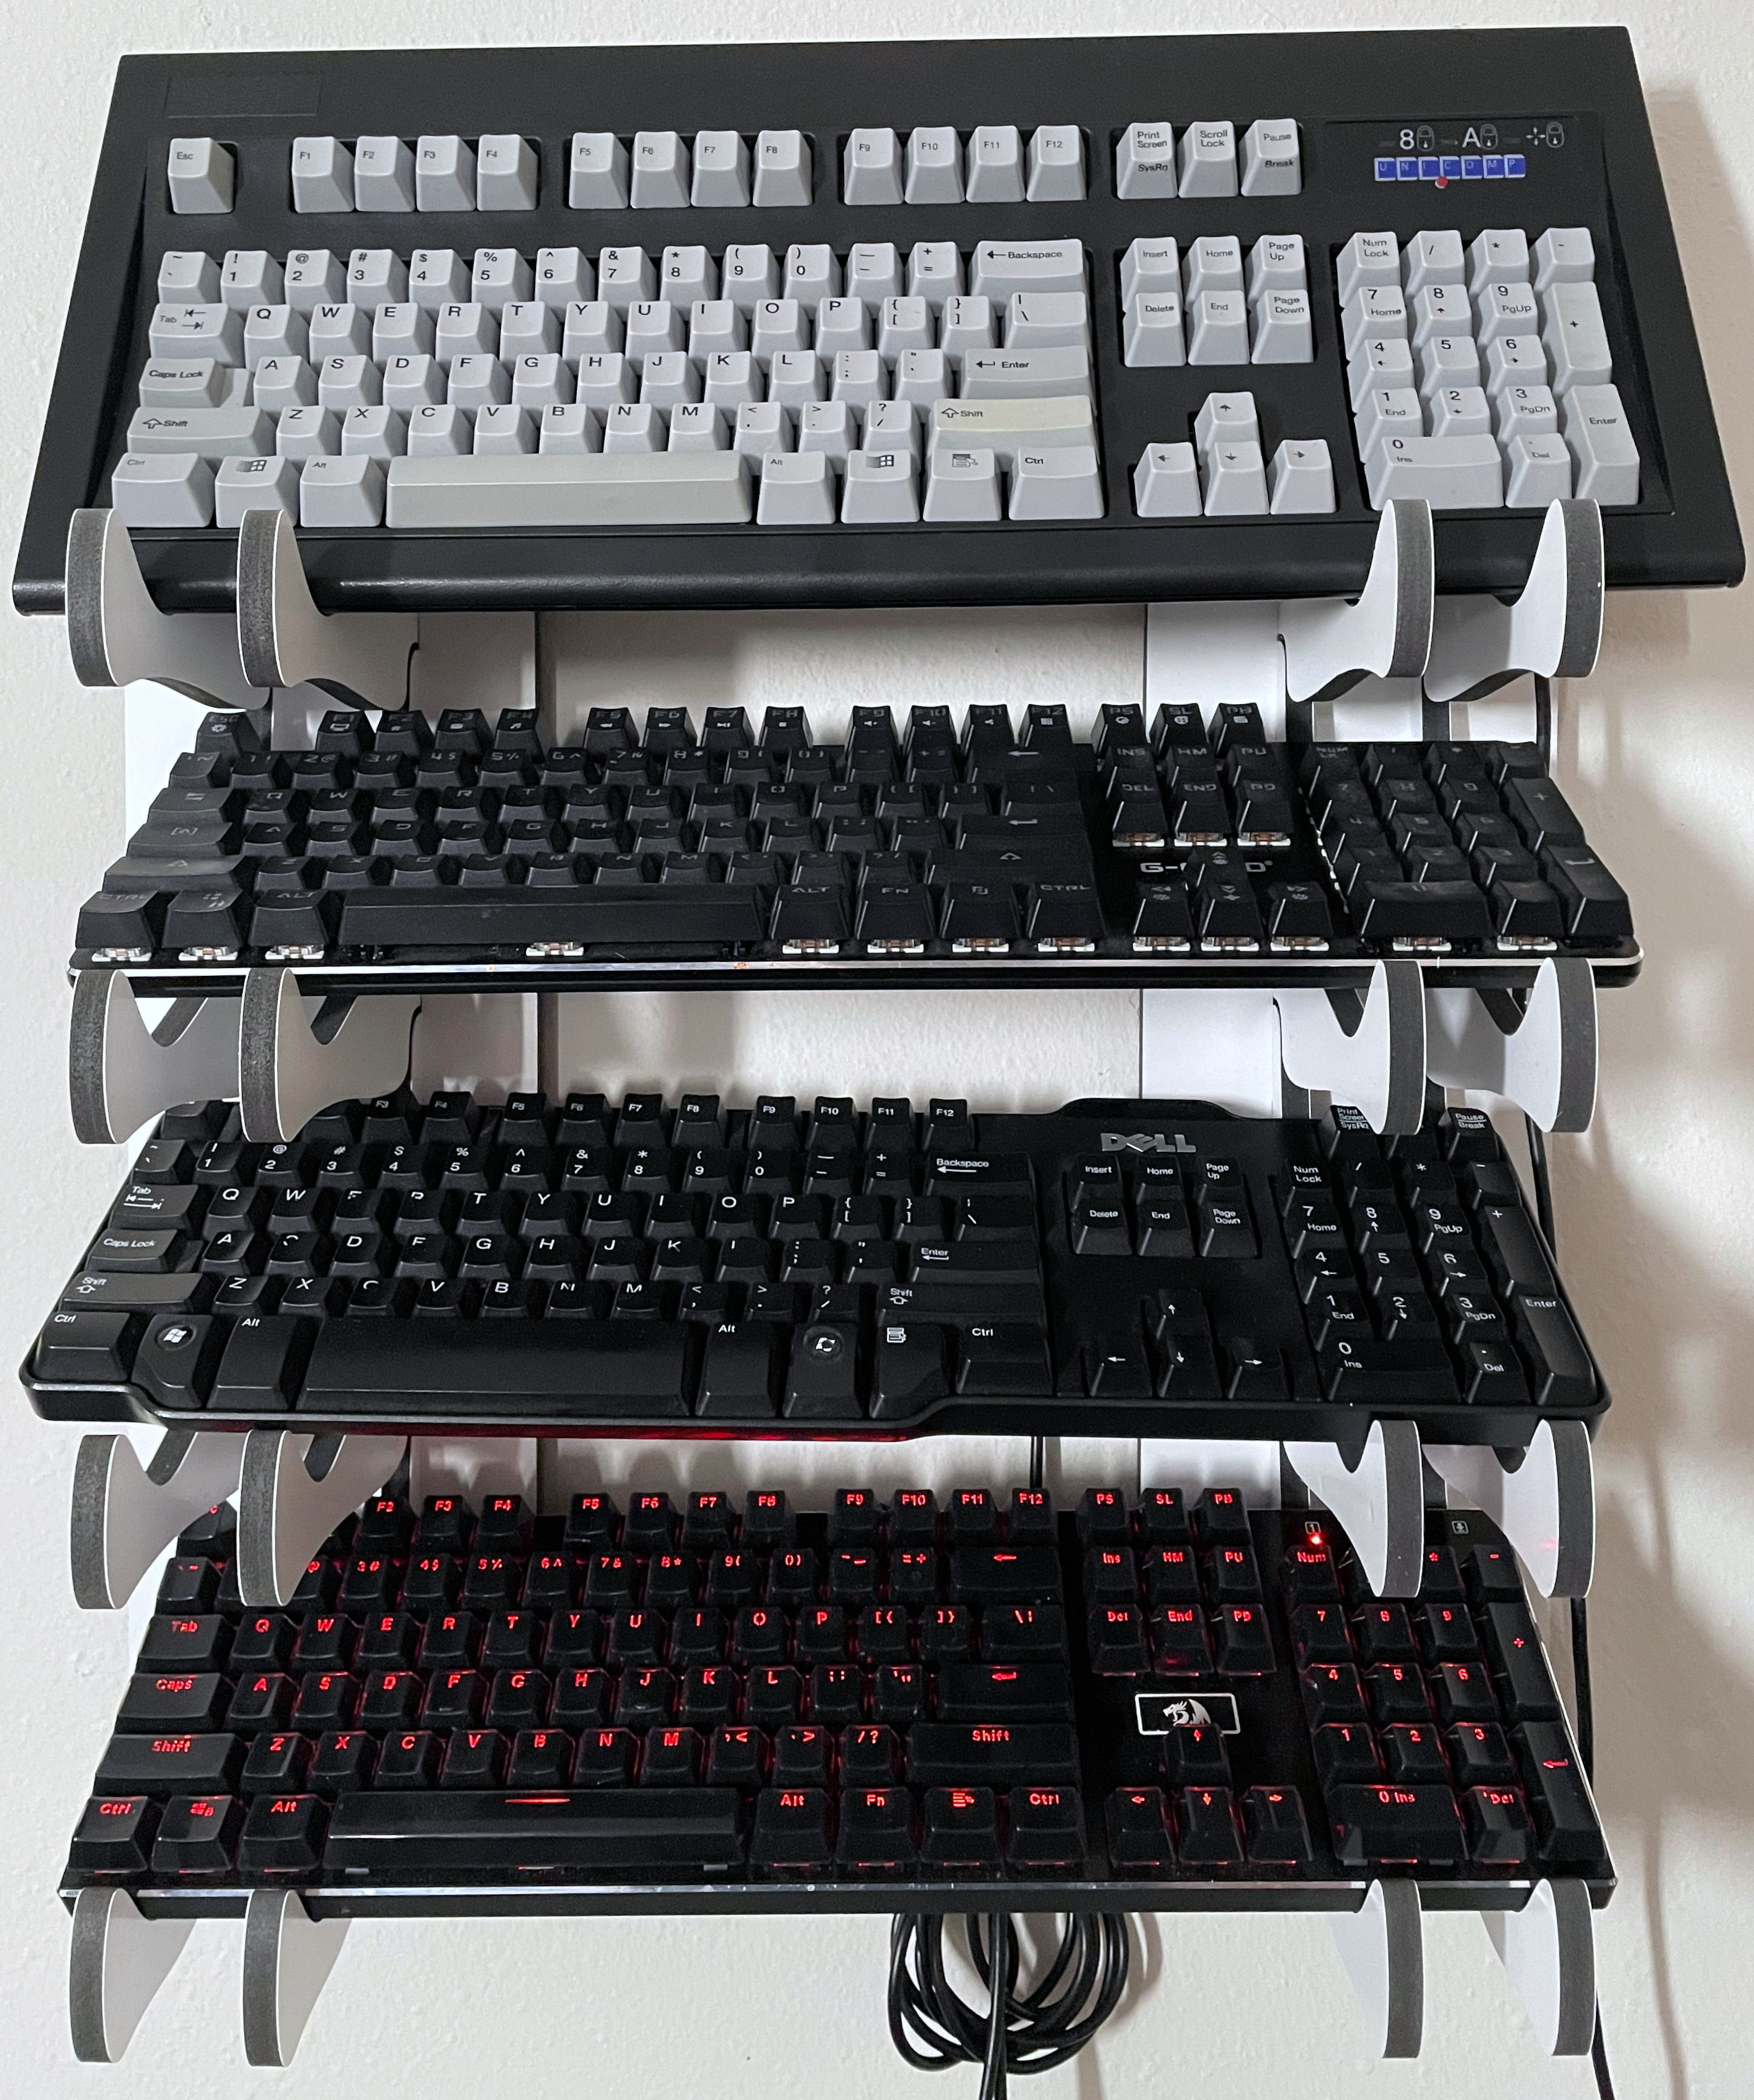
The results were mixed when it came to mounting keyboards.
- The RedDragon RK556 at the bottom fits in there perfectly.
- The cheapo $5 service Dell and the G-Cord wireless mechanical fits, but we have to lift it a little so the upper arms don't press into the function keys. It's not really a perfect fit, but it'll stay in there!
- The Unicomp Model M on the very top scares the shit out of us. It's hooked in there well. But for us to trust this on the wall, we'd rather have it nailed into the wall instead of using 3m hanging Velcro. Having a controller hit a carpeted floor is one thing. Unicomps have a bad habit of the keycaps exploding off of them like Chicklets if they take a good enough shock. Also, as it is the widest of our keyboards. It can only go into the top slot, and that is it.
If we modeled the arms to be an inch longer, then it would solve most of the keyboards we've mounted in here. Although not pictured here, no way in hell we're trusting the industrial keyboard on this.
 Our cut files.
I have provided a link to our Cut file in DXF and SVG so you can push this into your CNC (Or Illegal Cricut machines! Stack enough cardstock and glue, you'll get the same result really!) or just print it out and overlay this on cardboard, and go nuts with a box cutter. Either way would work, really. Nothing is stopping you from using other materials. If your thickness changes, just adjust the slots on the base.
Final thoughts.
Short and sweet. There are probably mounts like this out there to satisfy your metrosexual interior designs, we guess? Okay, how about we give you a better reason as to why these are built.
It's for people who repair PCs. Usually, you'd have a bench where the keyboard is flopped about because you know you're going to use it on the next PC you're about to repair. Well, you hang up your tools (or put them away in some organized tool case unless you're a total monster.) Why not hang up your keyboard? Or a controller, for that matter, if you fix a lot of consoles?
There were some pre-made versions of something like this made out of Acrylic. What was going through our heads was that we bet it's made with the kind of acrylic that blows apart just like glass. One good hit to the floor and it's gone! To us, it was simply that we had the means to make it, and we did. That's it, really!
Could you make one for holding mice? We suppose! With the current design, the mice would fall right through the forks; however, if you felt the top of the forks to act as a cradle, either staple, glue, or use wood tapping screws to hold the felt in place, then holding mice in them shouldn't be a problem. OR! Put the felt at the bottom of the forks! Let the mice fall between! Secure!
Got to the end of this? Thank you for reading yo! Much appreciated.
That is what server said.
+++ END OF LINE
I find the Keyboards quite nice. Like hotswappable :D
It would be funny to have one behind glass with a sticker "Break glass in case of emergency"^^
You know.. Might be a future project.. Aluminum box folded and painted red. Then the breakable glass in front. At least you know dust can't get on your keyboard if it's in a box!
Thanks for checking out this blog!
- S