

Incoming "Glorious" repair.
Just when you thought the keyboard blogs were done. In comes a different keyboard to my bench known as the "Glorious GMMK3" keyboard which is supposed to be one of those DIY level keyboards for people to get into the joy purchasing your own switches, your own keycaps, cramming housing insulation into the shell of your keyboard just so that you too can have that special "YouTuber grade THOCK" as you type. Or, perhaps you would rather go with linear switches with o-rings because you actually like to keep your job.
Looking up the cost of these complete kits, they generally go for $160+ (USD), which is double what we paid for our Red Dragon K556 when it was brand new on the market. A little boutique to appease the gamers with money. However, it is still basic enough to be picked up in most chain outlets. This particular keyboard landed on my bench for $10, whole dollars on Craigslist, with the supposed mother explaining how her "Gamer Kid" was working on this and broke it.
Fair ball. When we picked up the box, we could already hear the little rattle of screws rolling about inside. So! Let's crack this bad boy open and see what hell awaits us!
Disclaimer time!
Like how we start a lot of our reviews and even our guides, we want you to think for yourselves. Please note that we are not professional keyboardists. We don't have thousands of dollars of switches, keycaps, or a direct link to Shenzen, China (would be a little neat if we did, not going to lie). Most importantly, there is no way for Glorious to directly contact me unless they try to send the feds after me. The odds of a single Glorious employee reading any of my horseshit will be nil, as it seems this company has saturated the market and the YouTuber scene with freebie give-aways for reviews. We have not been paid nor given anything for free for doing these kinds of articles. Our perspective is always coming from the repair world, and thus our opinions on technology may be a little jaded and skewed, as sometimes we see tech at its absolute worst and not shiny new in the box.
Feel better? No? Get yourself an ice cream sandwich.
Incoming... Wait... Empty boxing video.
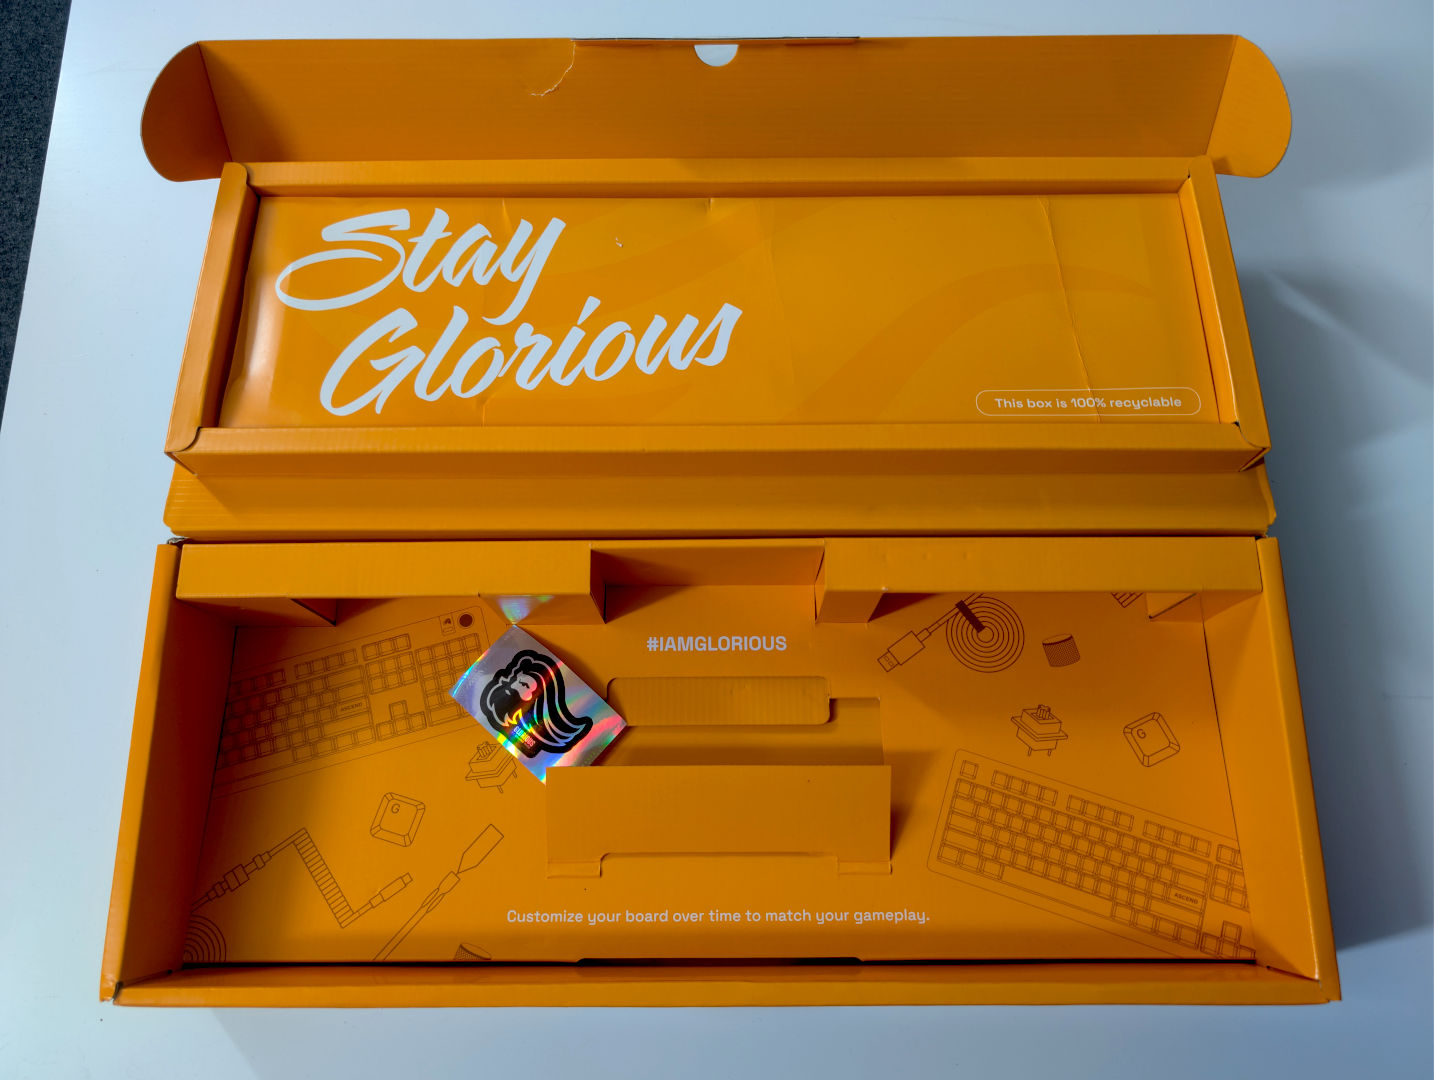
When we see elaborate packaging like this. We think to ourselves how much money could've been saved if you just shipped it in a regular cardboard box, because unless you're some kind of tech hoarder or you intend to sell your custom DIY build on eBay, these types of things are generally thrown into the same paper recycling bin at the end of the day.
Anyhow, the reason why you are getting an empty box unboxing is that, for some reason, we must have forgotten to take a picture of the disassembled keyboard with all of the screws, gaskets, and placers bouncing around inside the box, under the flaps, inside of the keyboard itself. It truly was a hot mess.
Their marketing model leads us to believe that the YouTuber "FlashGitz" should be receiving financial compensation, as seeing their sticker reminded me of his "PC Masterrace" comedy skit. YouTube link here on the clearnet, and have a good ad-blocker.
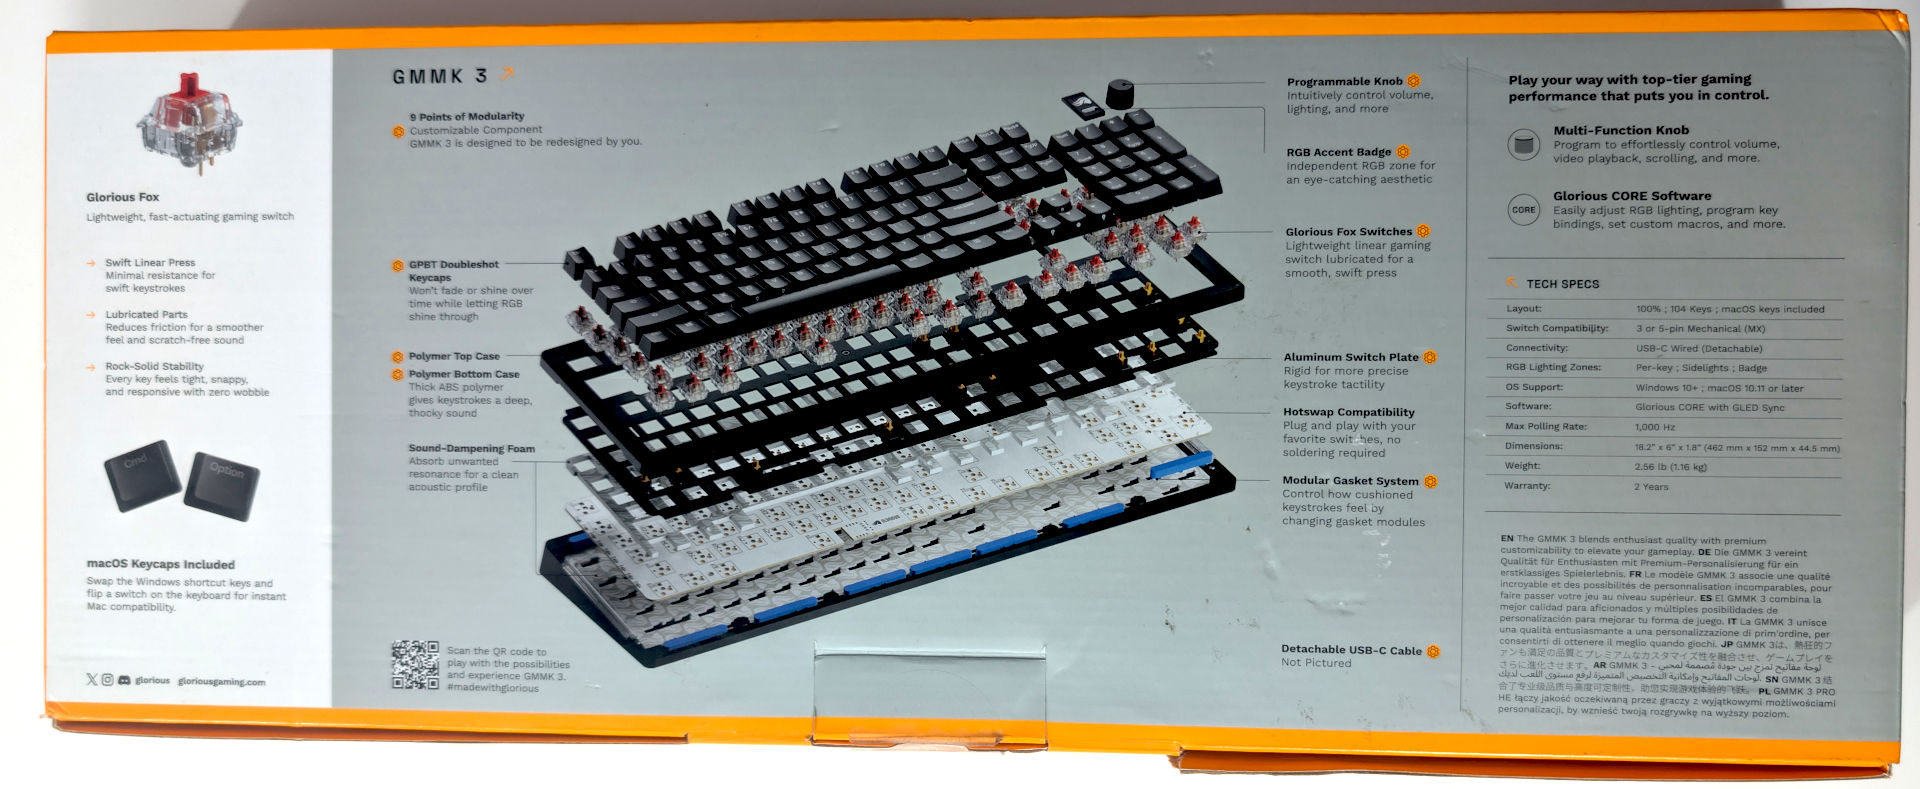
Now, we do have to give credit where it is due. If you're going to have a DIY-like product, you'd better have a flipping breakdown of the product! Now pay attention to how this keyboard is laid out, as it will be nothing like this. Also note that the company claims that this keyboard was designed in the USA and manufactured in China. Fantastic, we know exactly who to blame for what we are about to get into.
Update 01/12/2026
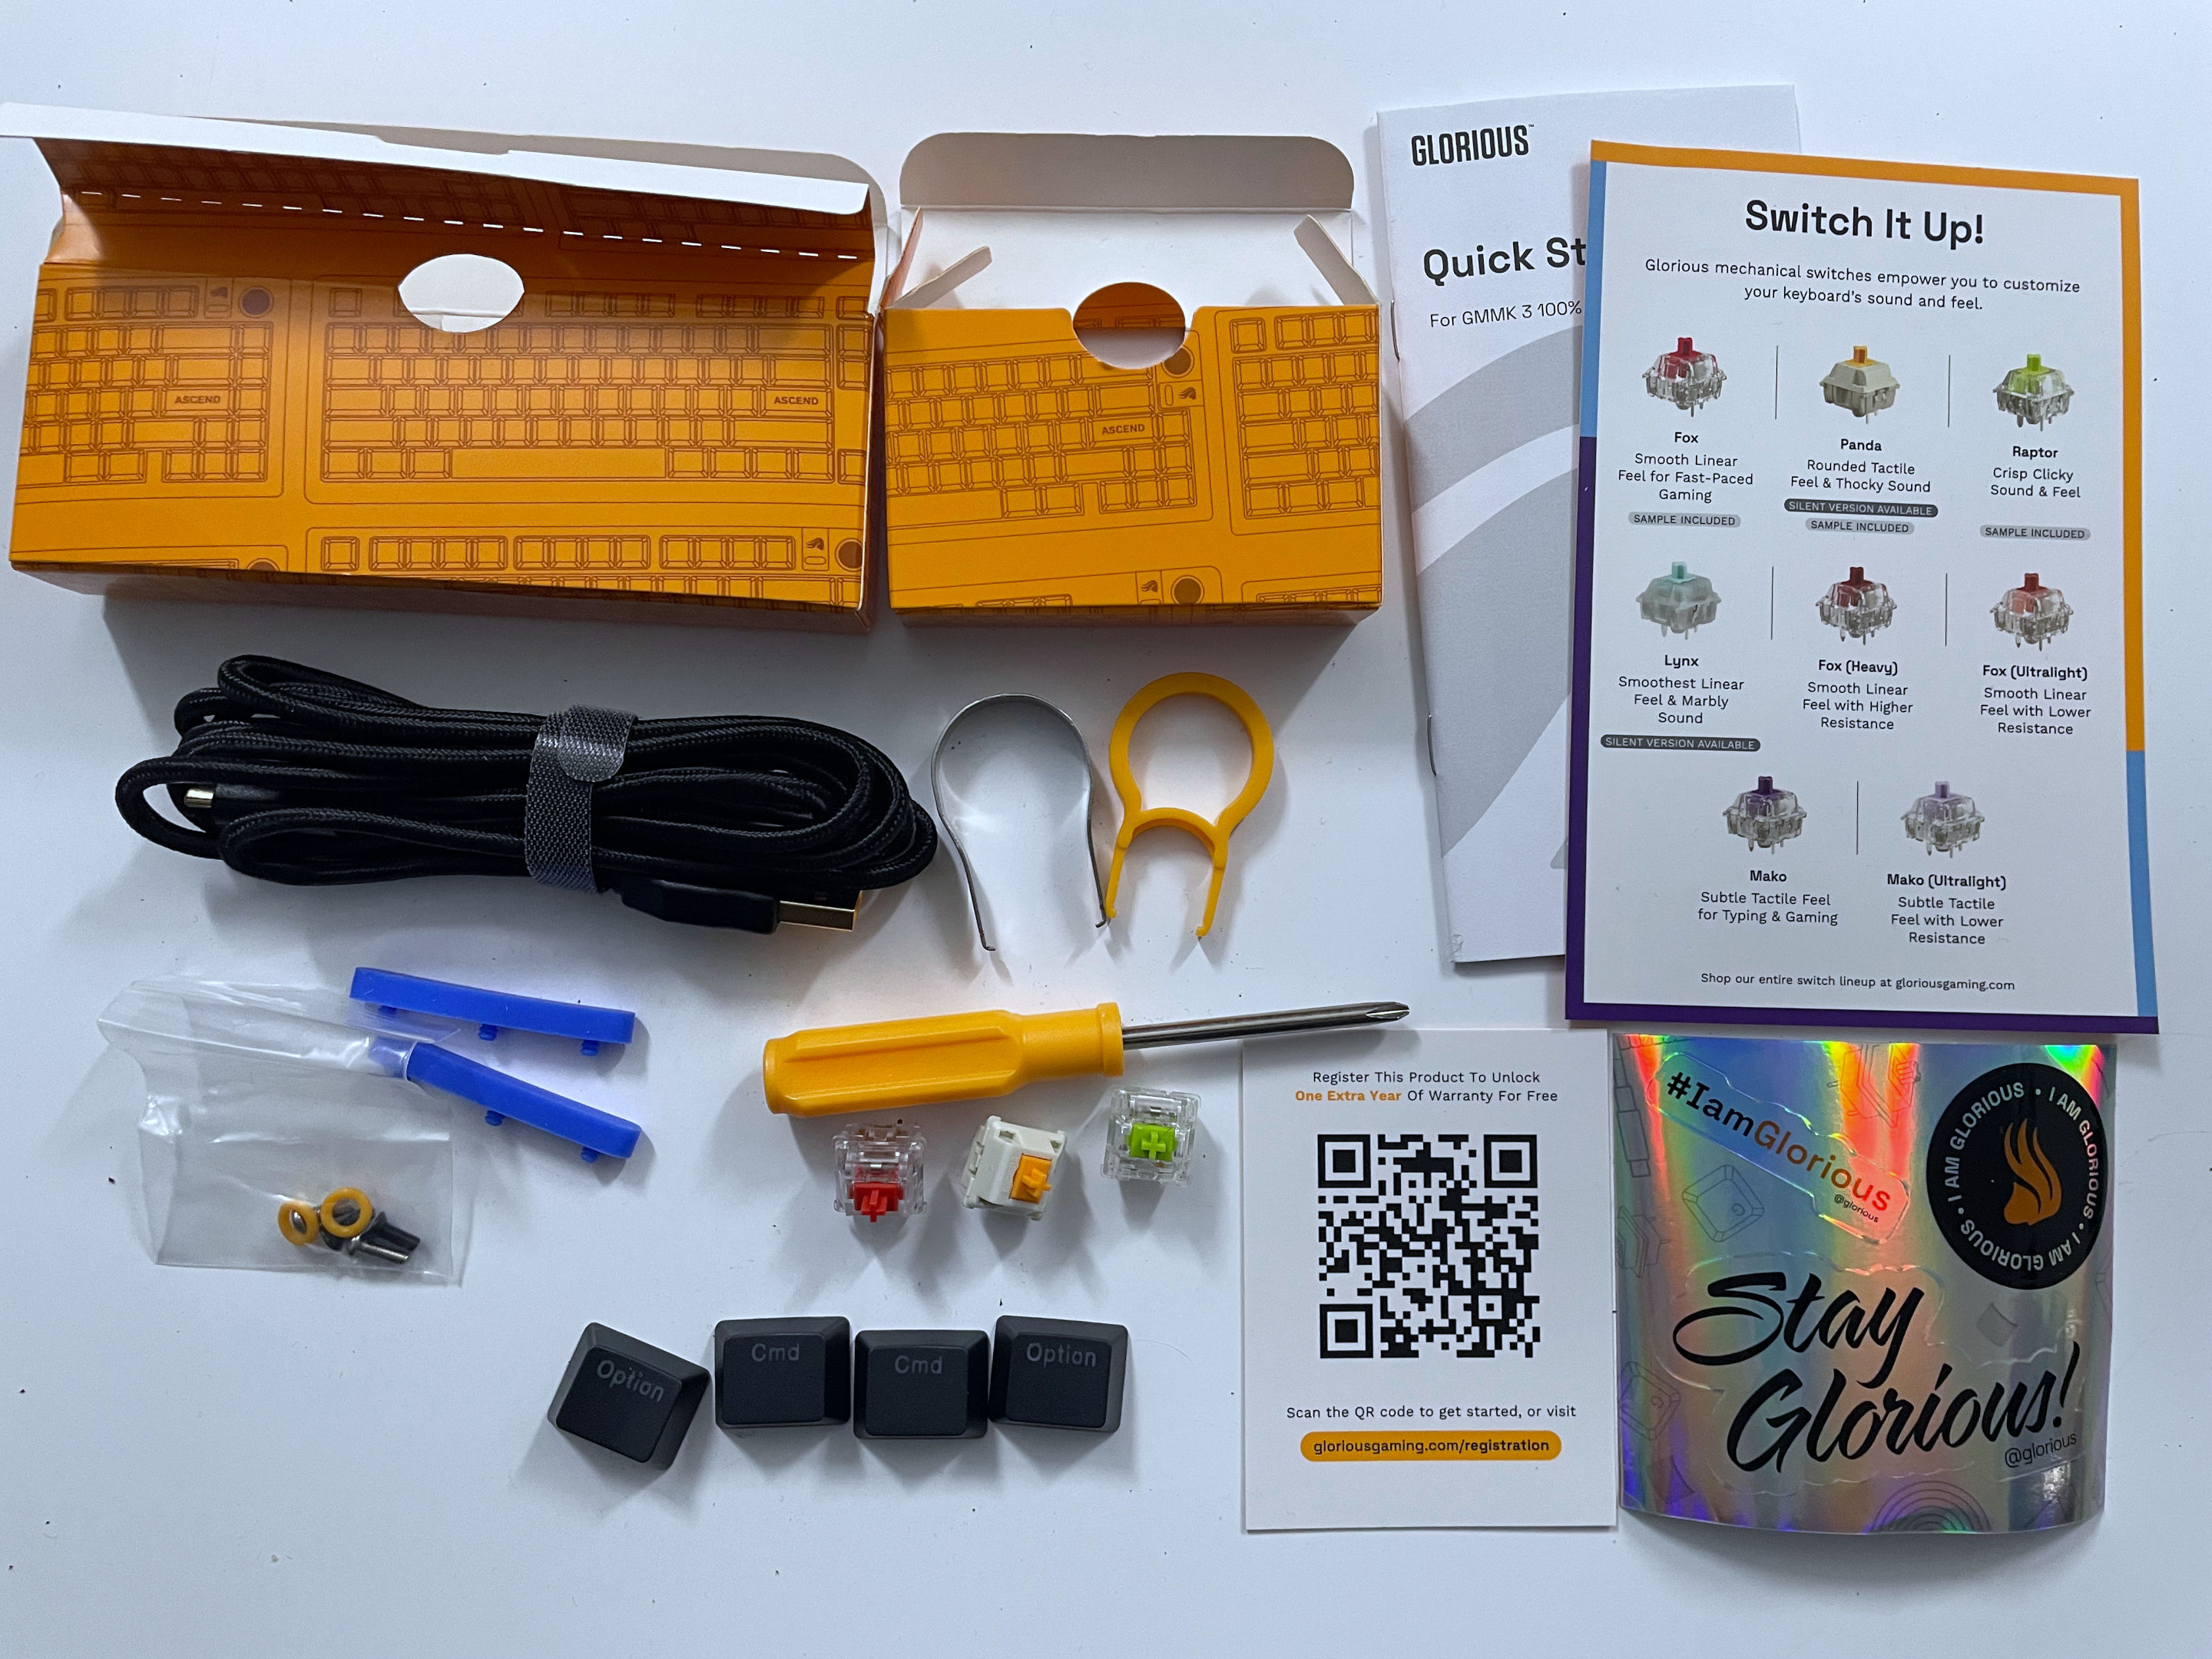
We managed to get ANOTHER Glorious Keyboard, which actually has the rest of the things that a gamer gets when you get one of these bad boys new.
Let's go through all of the things:
- Braided USB-C to USB-A cable - What would make this MORE glorious is if it were USB-C to USB-C, so modern laptops. But we understand. This is low-end keyb-.. wait a minute!
- Keycap extractor and pullers. They're kinda MEH.
- Phillips screwdriver. It's no Wera or PB-Swiss, but it gets the job done.
- Extra Gaskets. Apparently, the kid must've eaten on the first keyboard.
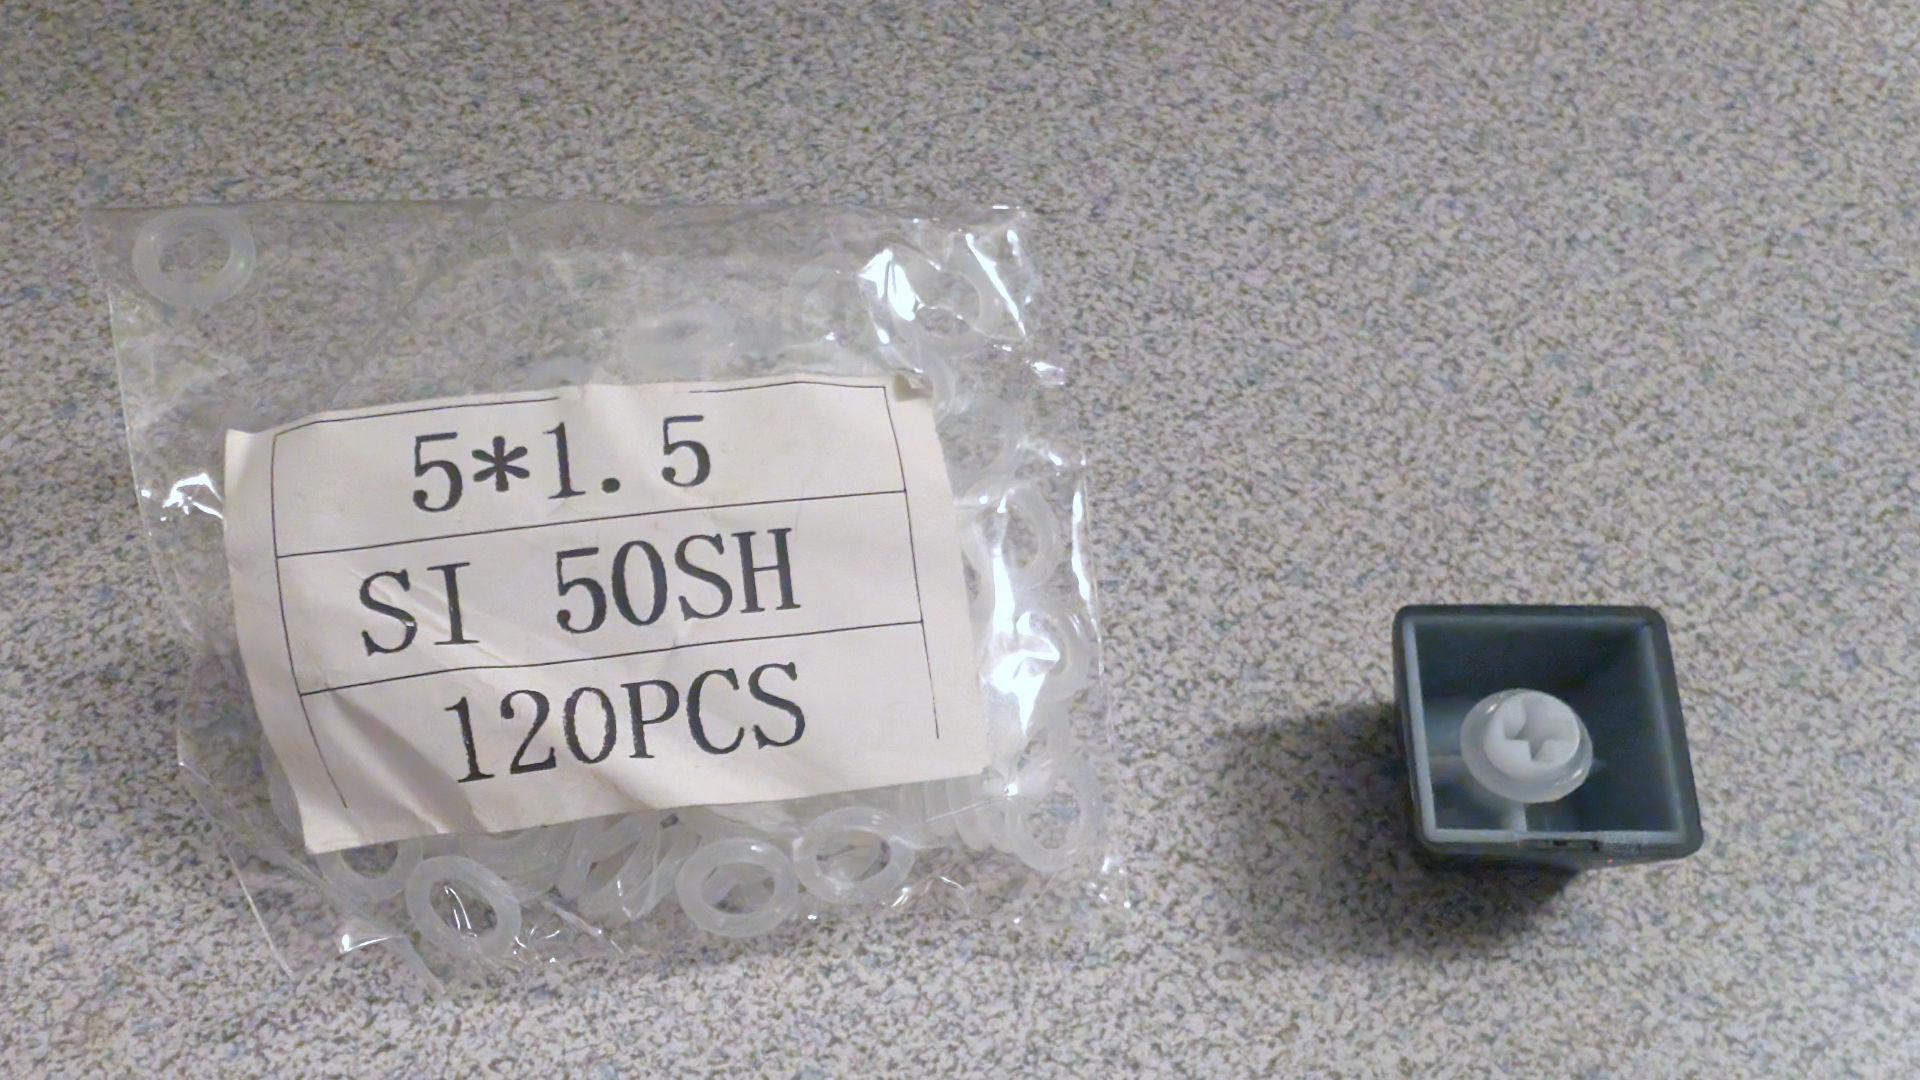
- Extra fasteners and two o-rings. Kid at these too. But also providing 100+ silicone O-Rings would put this keyboard way over budget, right, Glorious?
- Sample pack of 3 of the 8 possible key designs. One key we already have throughout the entire board, and the other two we guess is to give owners buyer's remorse for purchasing a complete kit with Fox-Red KeyCaps. Kinda cheap of Glorious to do such a thing since RedDragon gave us 8 keycaps.
- Mac/Apple keycaps - We appreciate these even if we don't own an Apple product. Especially in 2026, when Microsoft is up to its typical evil shit, and we don't want to be reminded of it on our keyboard. eject that Windows key for an 'option' key. Good enough!
- QuickStart and "Switch it up" guides. Now, the Quickstart is actually handy as it shows you how to factory reset the keyboard without installing software. The "Switch it up" guide used the word "Thocky" when describing their orange panda keys. Thanks for making us feel old, Glorious!
- More Stickers to advertise that you got an expensive keyboard, not really in quality, but price, and a warranty QR card.
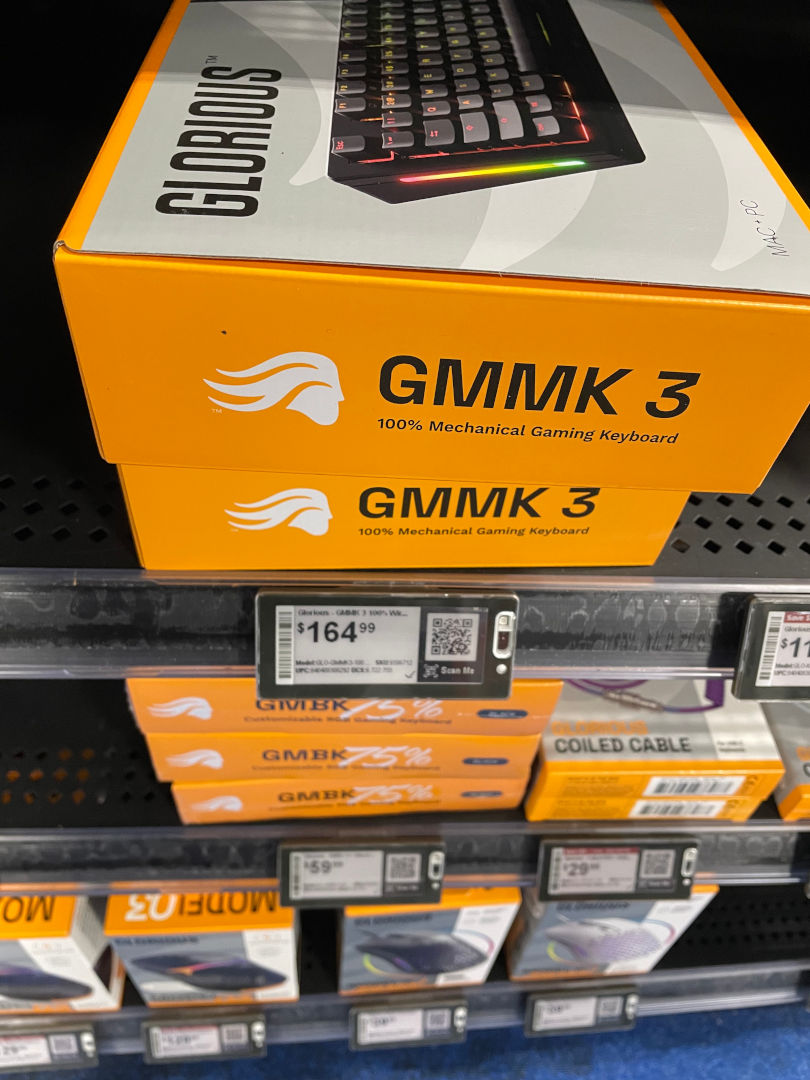 Well, guess that explains the return labels. Glorious seems to have flooded the shelves with its brand at Best Buy. Right next to Razer, Logitech, and Corsair. Also confirms the price, which, in our opinion, is stupidly expensive for what you get.
The keycap Puller
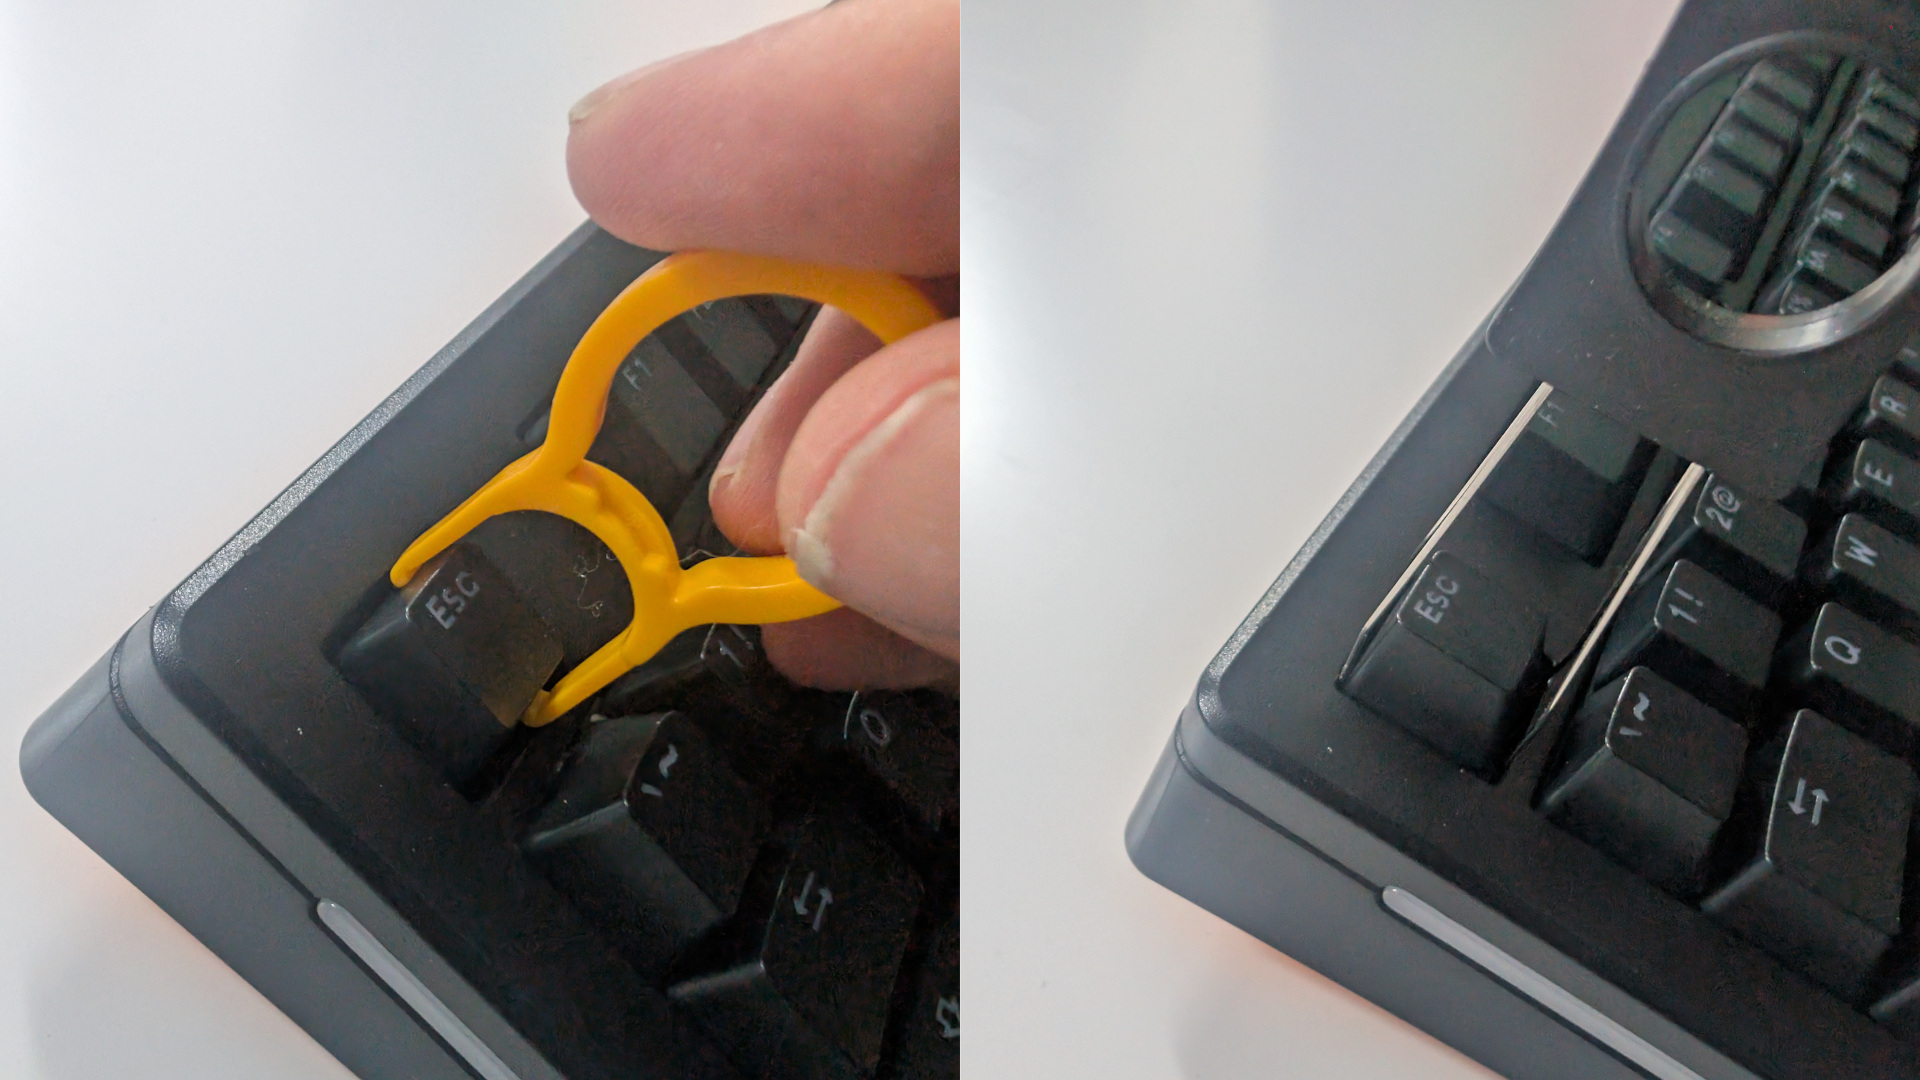
For reasons beyond explanation, you can't get their key puller in without removing the top base. But we CAN get our RedDragon keycap puller and extractor to easily remove both the mechanism and the keycaps without unscrewing the case of the Glorious.
Glorious sells a wired keycap puller just like what we got with our RedDragon, but it seems like a hilariously bad design to have just one wire, meaning that you are not applying even pressure to the keycaps as you pull. Without even pressure, you risk damage to your mechanical switches.
There was supposed to be a switch puller in this box, but apparently the kid took that. And you'll see why in the next chapter.
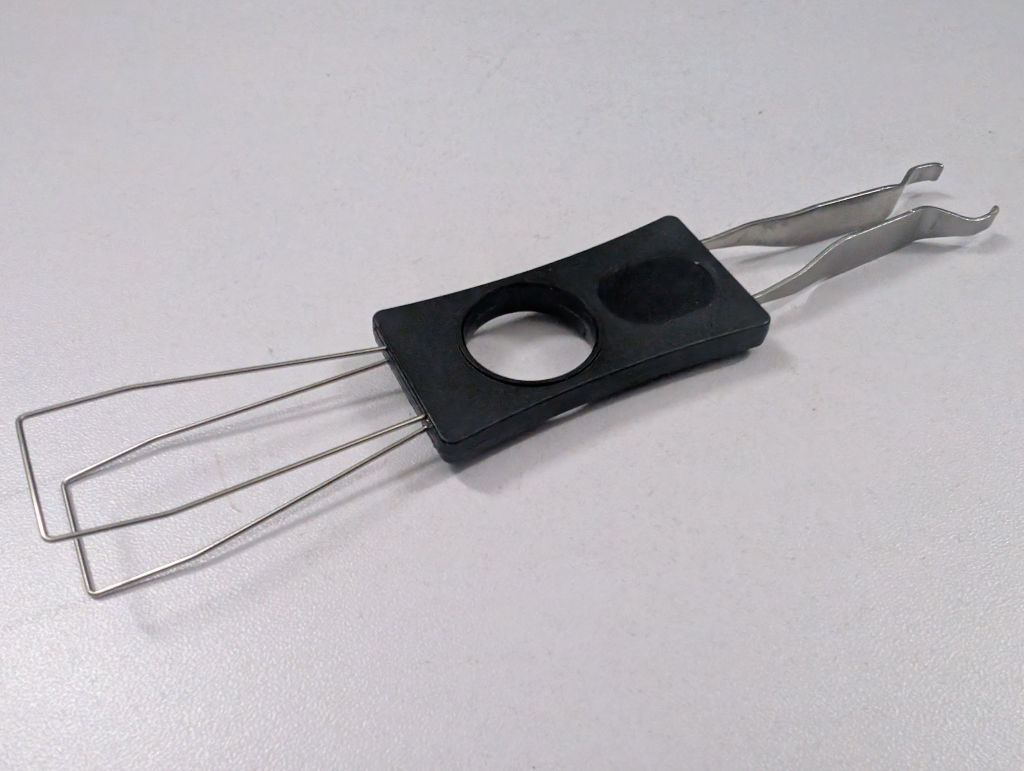
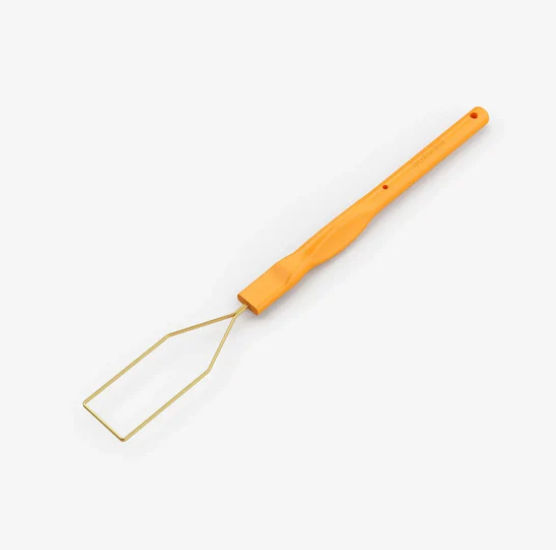
This is the unit we got from RedDragon, which is both the key cap puller and the keyswitch puller. It's all in one, so when (not if) you lose it, you'll be double-fucked!!
The switches.
We were having A LOT of issues with the switches. Initially, we were coming up with the assessment that lubricated switches do not mean good switches. Because you can take any shit scratchy-sounding switch, lubricate it, and say:
Wow! I don't need those fancy cherry switches!
If the switches are poorly manufactured with bad mechanical tolerances, you can obviously hear the 'squeak' or 'scratchiness' of the keyset. Lubricant would only hide the problem. But there was something more about these switches that came with the board, that there was some really bad mold injection going on.
Now, if you think we're just throwing speculation out there, consider this:
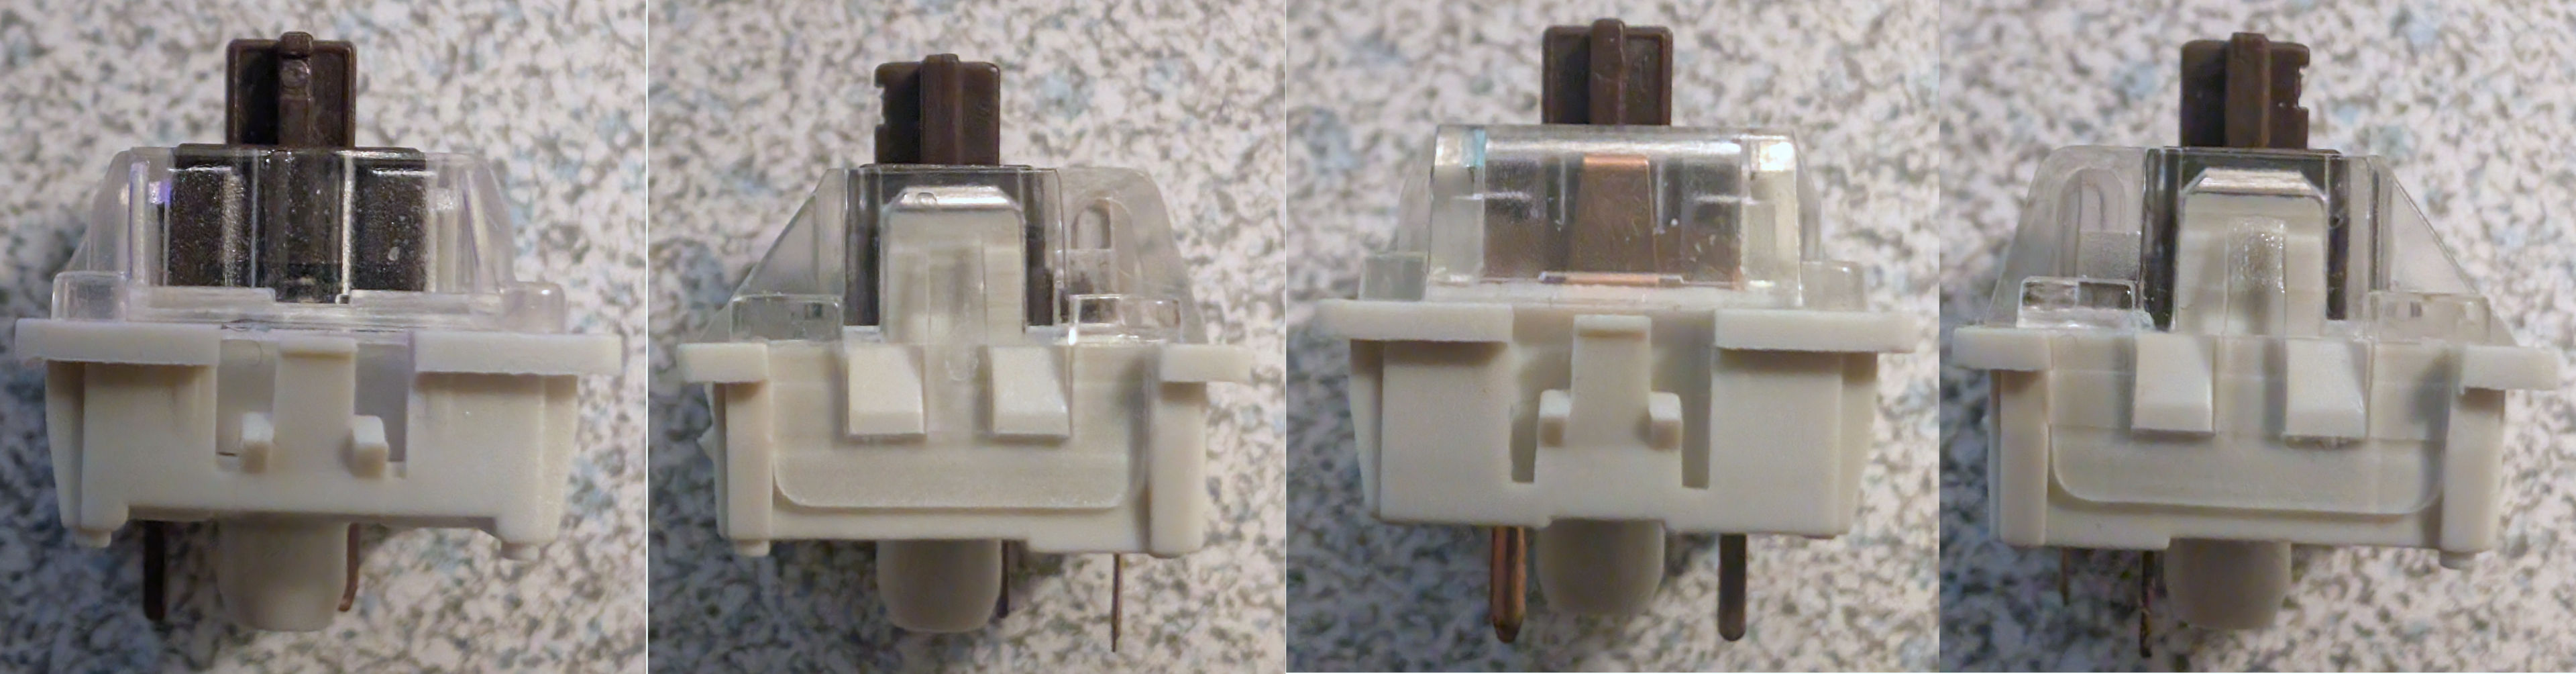
A while back, we made a cheap ArduinoDECK to control steam using a bunch of these bootleg brown switches, coming in at about $4.70 for a pack of 30. There's typically a small notch in the front of the stem of the keycap that is indented a little because our best guess is that's where the stem of the plastic injection needed to be broken off. We did check out our cherry reds on the Corsair M70 and the kaith greens on our Razer keyboard. Same thing. Despite being bootlegs, they seem to be at least keeping with the industry standard with everyone else. Cool.
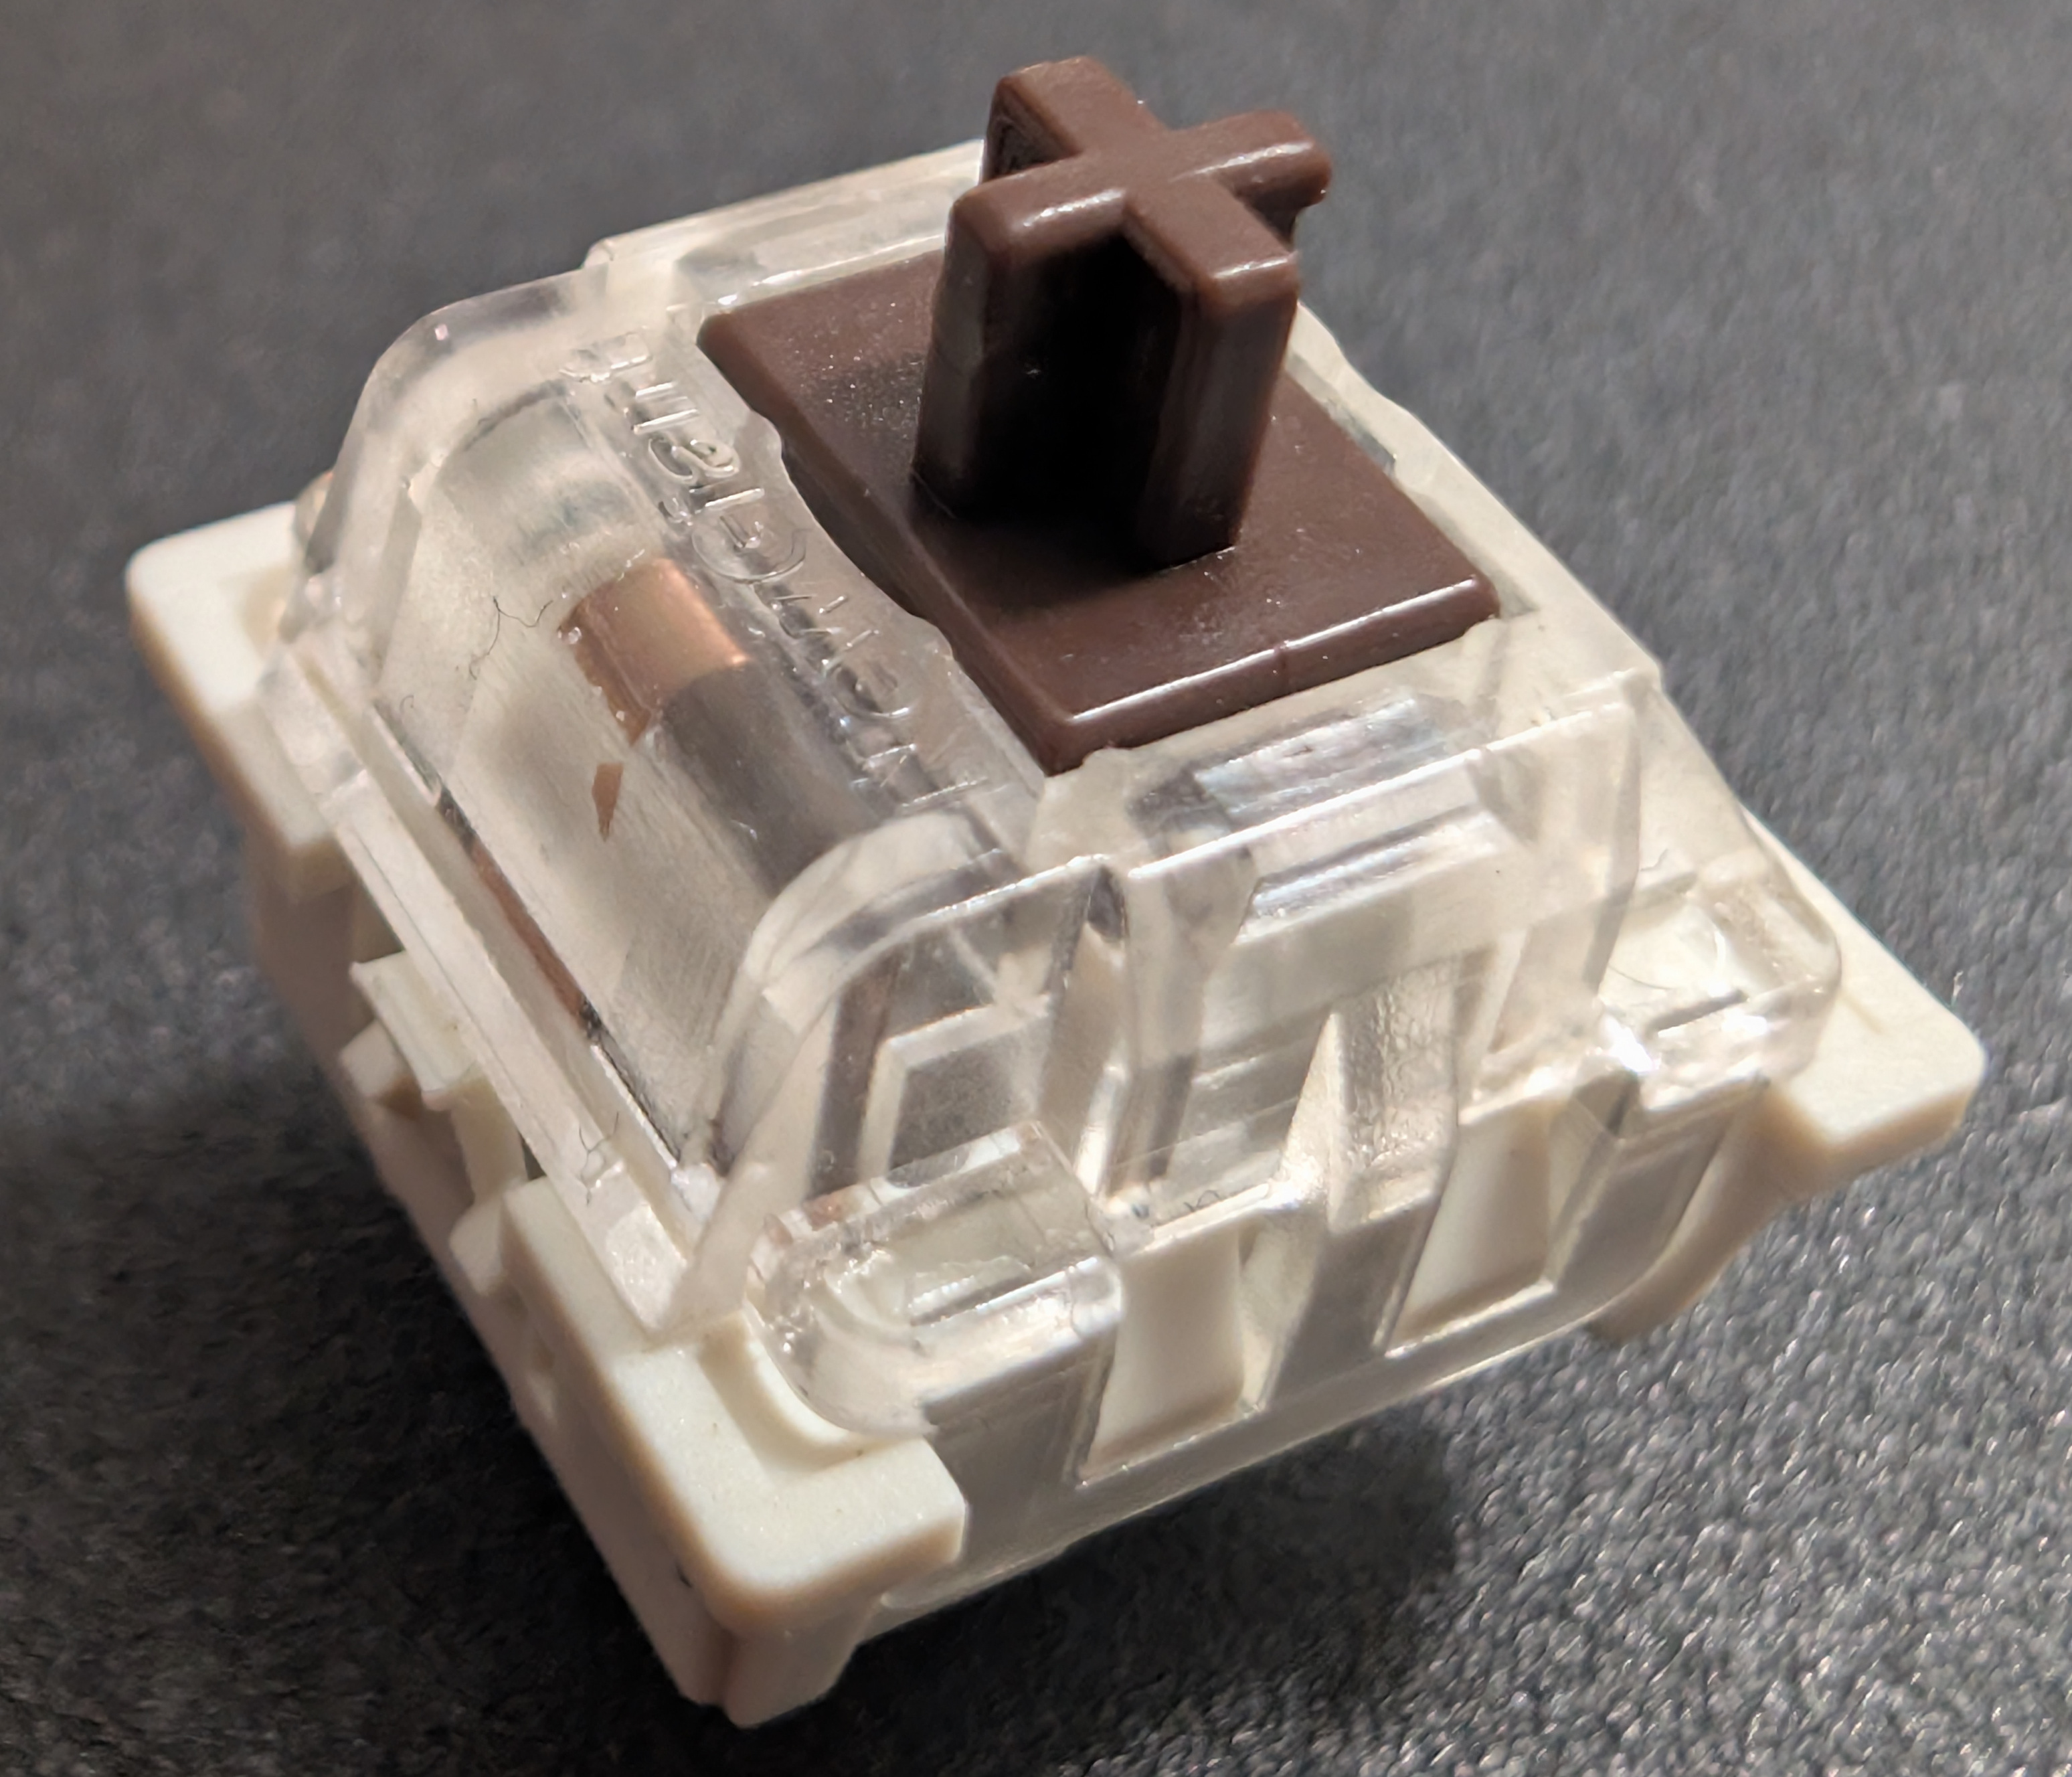
Now, for those curious what company is selling their switches for pennies. We zoomed in, and it appears to be a company called "NewGiant," whoever they are! But let's move on!
Maybe us replacing " 2 " " T " " ' ", and " Y " keys because the caps would wiggle and misfire as we were typing this blog has just gotten us a little paranoid about the overall quality of these things. Also, pressing and holding down these keys would cause very sporadic key-presses in Notepad.
Now, if you picked this keyboard out of the box, you'd assume that the keycaps inside are, in fact, the OEM Glorious Red Fox keycaps. At least we initially thought as well. Until we went to the Glorious website and noticed something. That, along with the crazy ass price that comes with their brand or keycaps, they do etch their name on the top of these bad boys. It's a little hard to see on the Red Fox due to the transparency. But the Lynx and Panda you could see clear as day. As a matter of fact, the Red Fox appears to have a much higher quality of transparency than what was in my pictures. The bottoms are not white. That's odd.
This is where we found out that the kid who had this keyboard got a little diabolical. Realized he fucked up his Glorious keyboard, panicked, and probably ordered the cheapest Gateron switches he could find to jam into this thing and get it out the door. Probably thinking mom was going to take it back to Best Buy. Putting ourselves in the retail employees' shoes, we sure as fuck are not going to bust out the magnifier to verify the keycaps are even the same.
So, all of the bitching about the quality of keycaps is justified. But it's not the fault of Glorious.
Damage report.
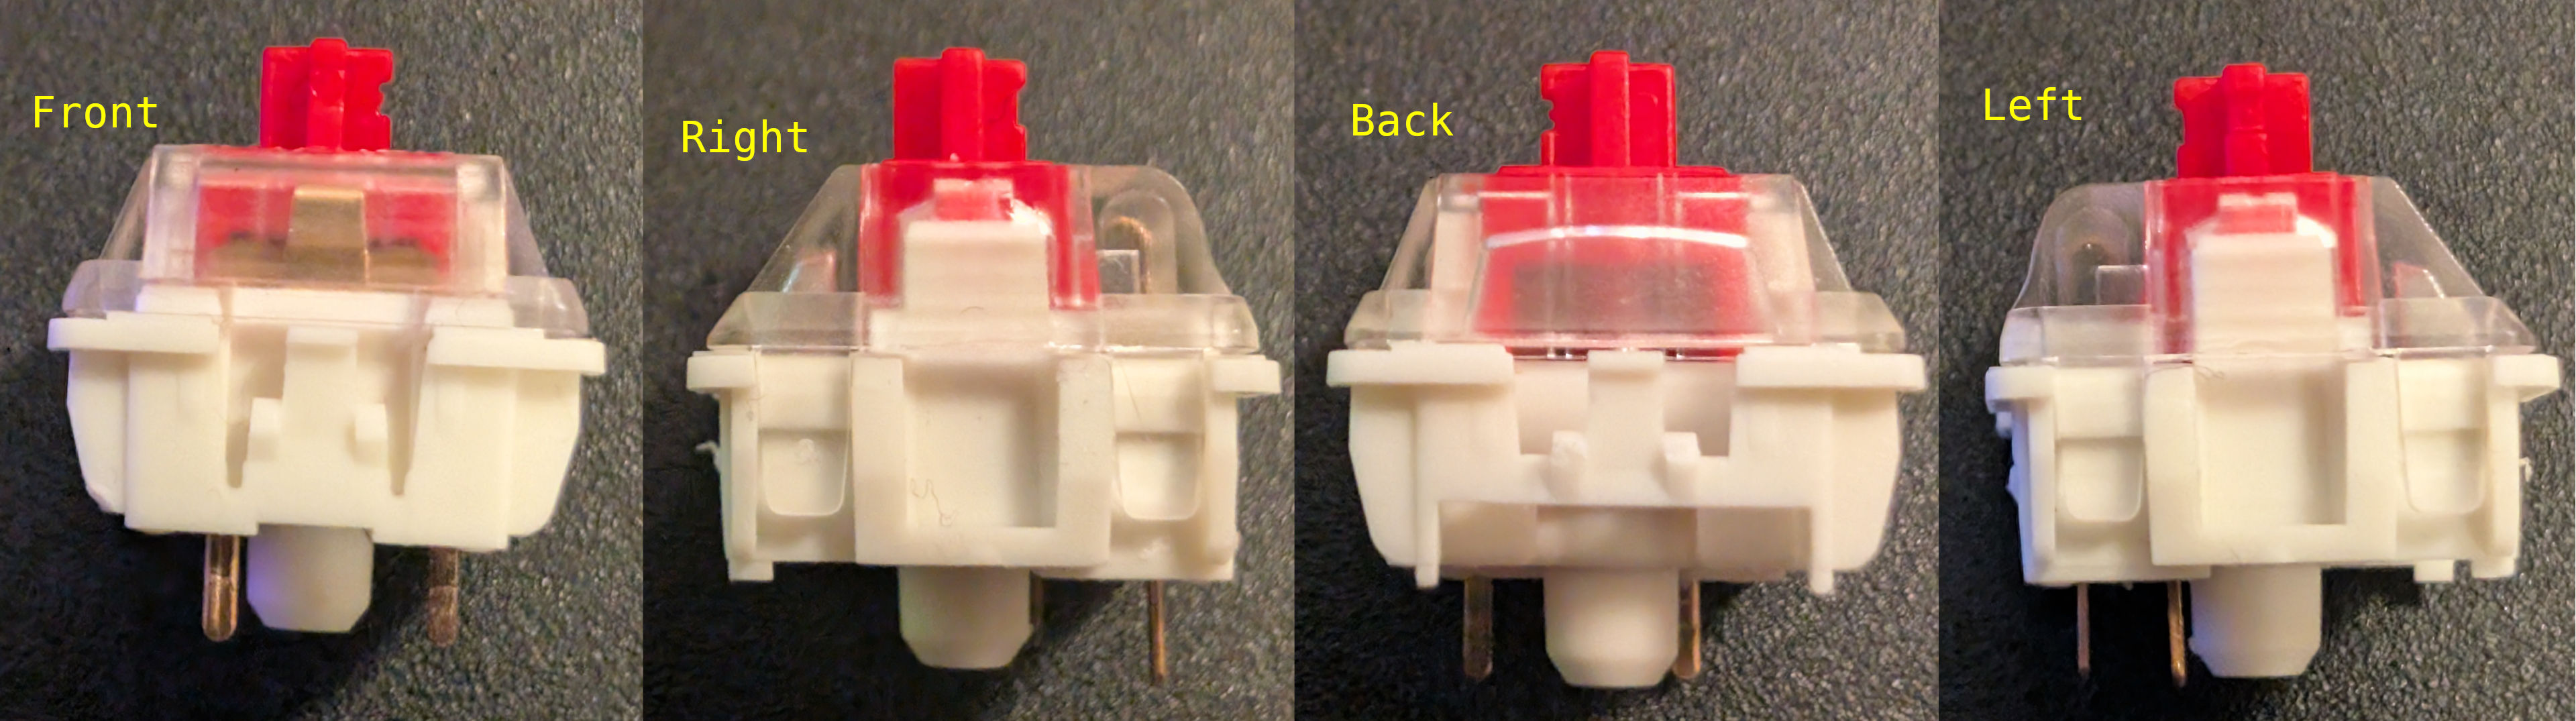
Anyhow, since the keyboard is mostly taken apart, we guess we could plug it in and do a keyboard test, only to find out the " Z " key is totally not working. since the "Sound-Dampening Foam" was missing. We attempted to remove the mechanics with our trusty keycap puller. But when we removed it, we saw an orange piece of plastic fly out from the back of the PCB at the same time. We found it, then looked at the back of the board to find what was below.
 That's a lotta damage!
Not even the kind of damage Flexseal can help you with, either! The surface-mount Kailth pads were totally ripped off the PCB. Apparently, whoever this kid is. Has some serious Kung Fu finger of death strength, where he attempted to push the mechanism in so hard that the glue holding the traces down couldn't handle it. Looking around the internet, this is not some isolated incident from Glorious. Although you can cite part of the fault on the end-user for being impatient with loading 104 key mechanisms onto a board. We also blame the US engineers at Glorious for this as well. Because a Mill-Max style hot-swap system, like what RedDragon had, which is based around through-hole technology, would be considerably more durable than relying on the glues of a surface mount PCB. As a matter of fact, these Kailth mechanisms are squared off, which means they could've easily been through-holed using 90-degree copper connectors.
We know, talk of cheap. Perhaps if I get a more beat-up keyboard, I'll design my own PCB.
We can't speak for all service technicians out there. But we would personally prefer to work on a fucked up Mill-Max through-hole mechanism than a surface-mounted component. At least with the through hole, you could drill it out (we've pulled out Mill-Max adapters before, just heating the solder and poking it from the other side got it right out.)
As for that plastic burn mark on the orange switch above. You're going to have to take our word that it was not us that did that.
Now, the matrix of a mechanical keyboard is fairly simple. Usually, the columns are all wired together in series. And the rows go off to those "VD" diodes to prevent ghosting or pressing the wrong key being registered back at the microcontrollers.
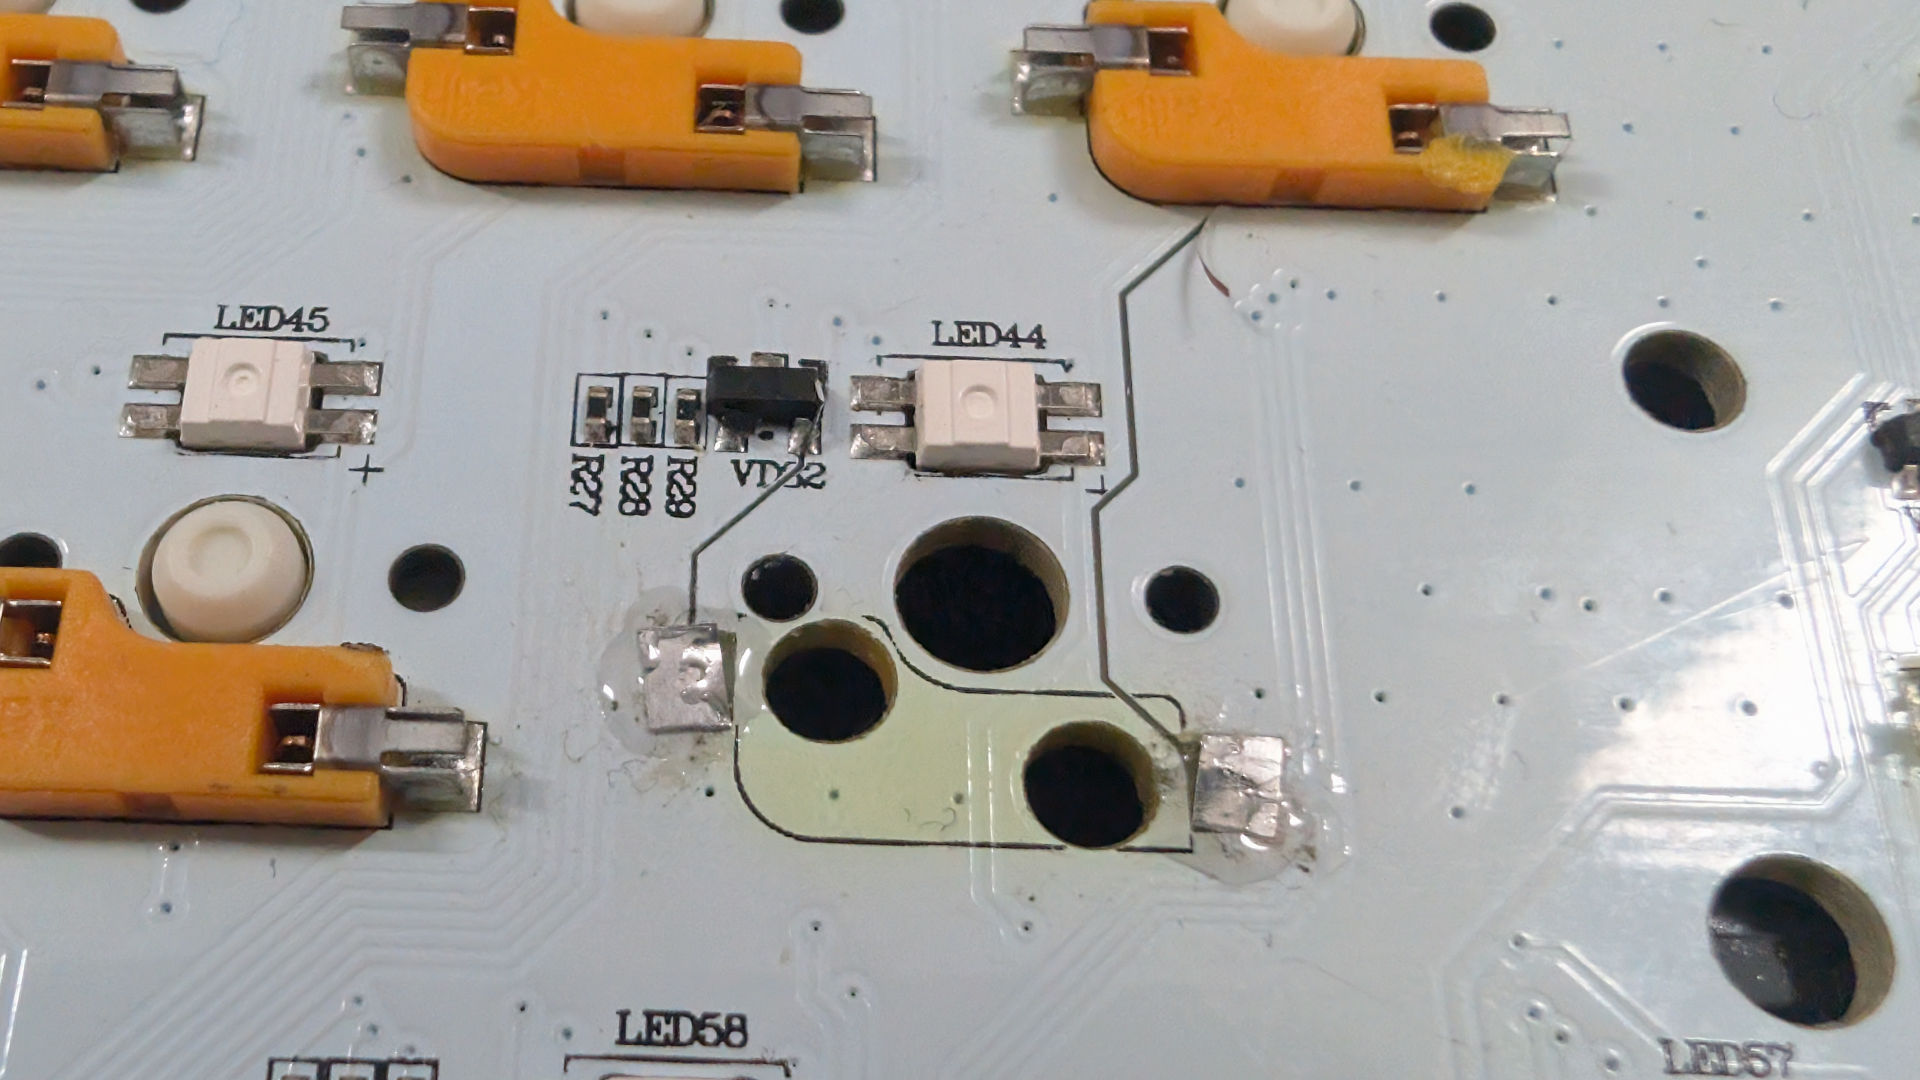
We took out our multimeter and checked the continuity of that hanging trace underneath the orange SMD socket and the right side, where the metal is. 0 Ohms. great. That's our series. The other side is going to be a little trickier, as there's not a whole hell of a lot of real estate by that black VD diode. But because it was peeled away, it shows clearly where the other side goes.
It should be important to note that we're a little lucky it was the " Z " key, as that would be the end of the keyboard's matrix for that region. If it were the " 1 " key, for example. Then " Q ", " A ", and " Z " would also fail to work as well as they break the series chain. That would result in us patching the wire both above and below.
Well, you can't solder it back. There's no fucking pads! You'd just burn the PCB if you tried. So, we take some notes for retro-gaming where finger-boards get burned out from the power supply ground-out in both pinball machines as well as JAMMA stand-up arcades. We have to MAKE a PAD.
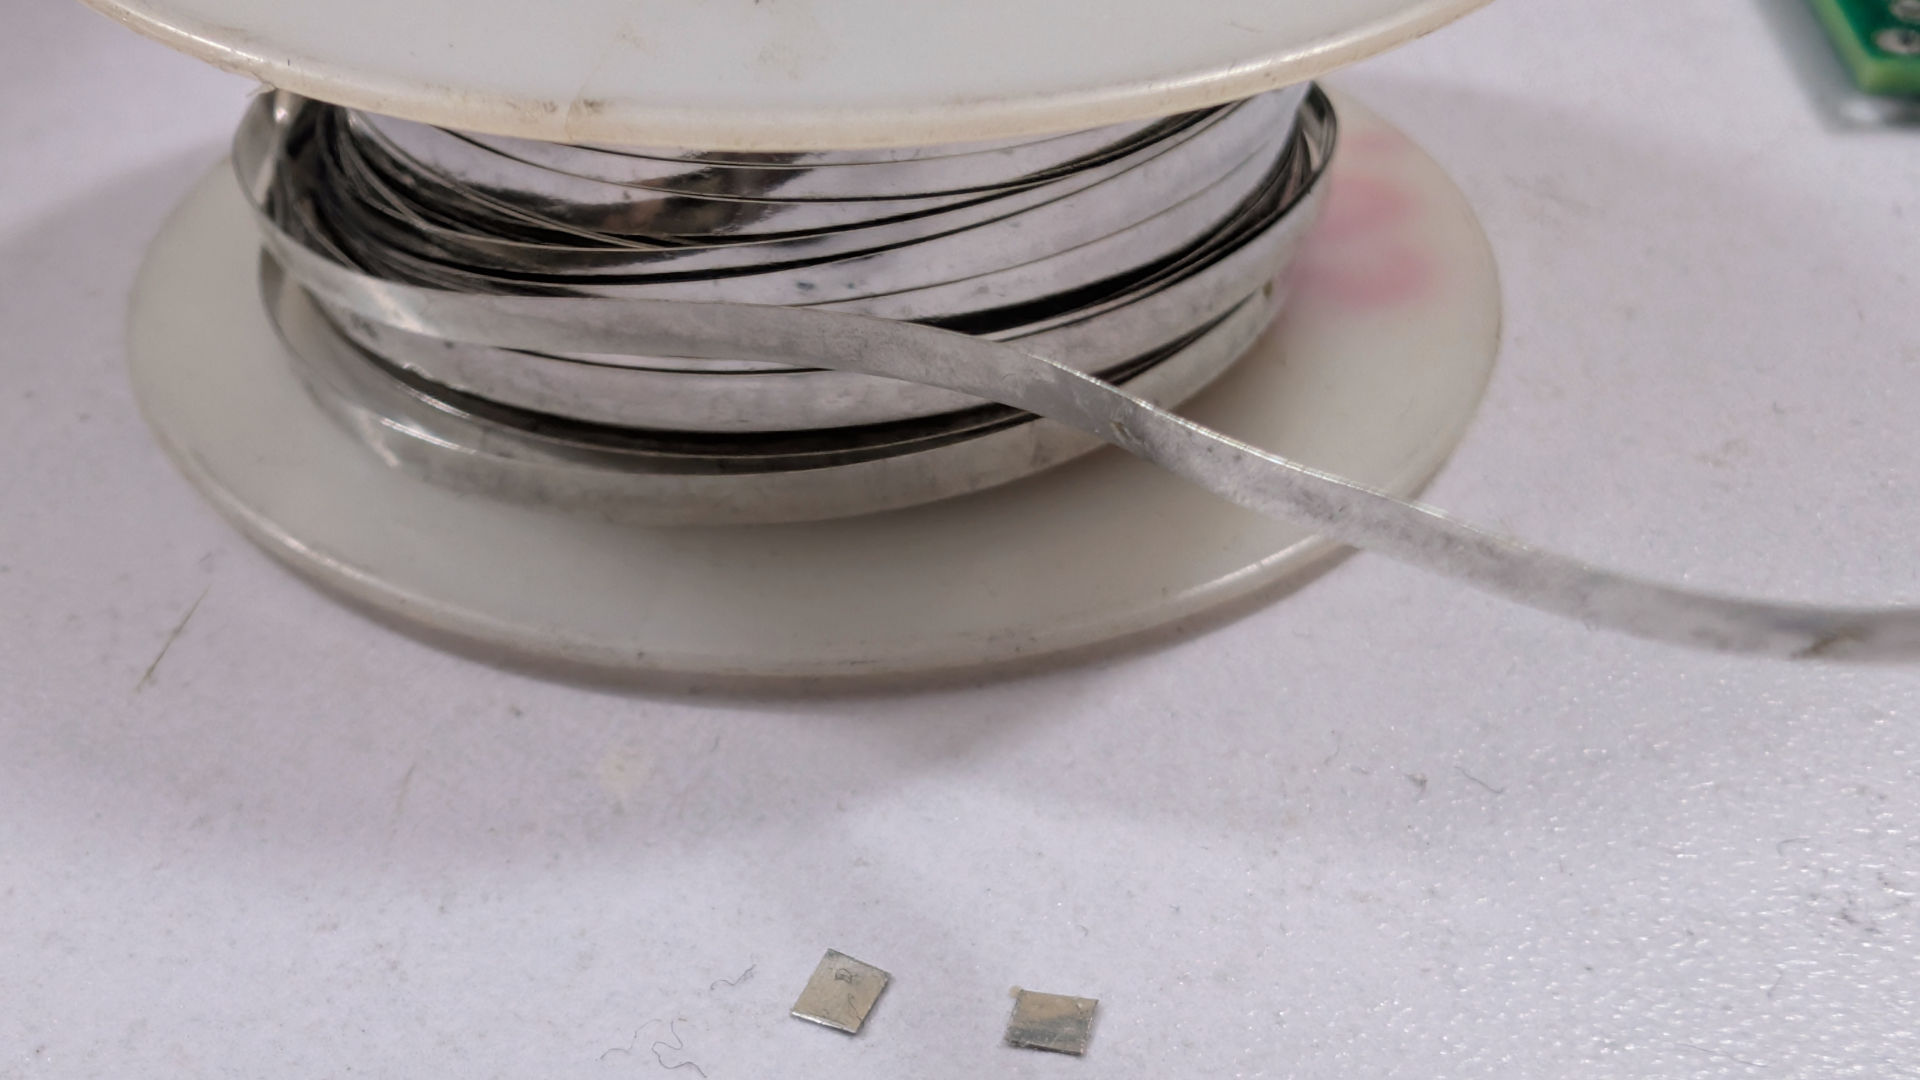
We had a spool of tin from when we were having "fun" making lithium battery packs for dumb projects. The width is exactly what we want; We just need to cut up some squares to use.
Some notes to take away from this technique. It does need a form of epoxy resin to glue the pads down. Apply the resin, tower dab away most of it so it's just a thin surface. Then, with tweezers. Place the pads in place. Try to get them lined up as close as possible. As for the type of resin I used, Gorilla Glue, which is a bad idea because that means you have to solder at low temperature, or else the glue would vaporize. Try to find some high-temperature resin that you could use.
We let the glue sit overnight so it could cure as best as possible for the next step, which is wiring and soldering onto those pads.
You could say this is not a "Glorious" repair. But it's certainly a functional repair!
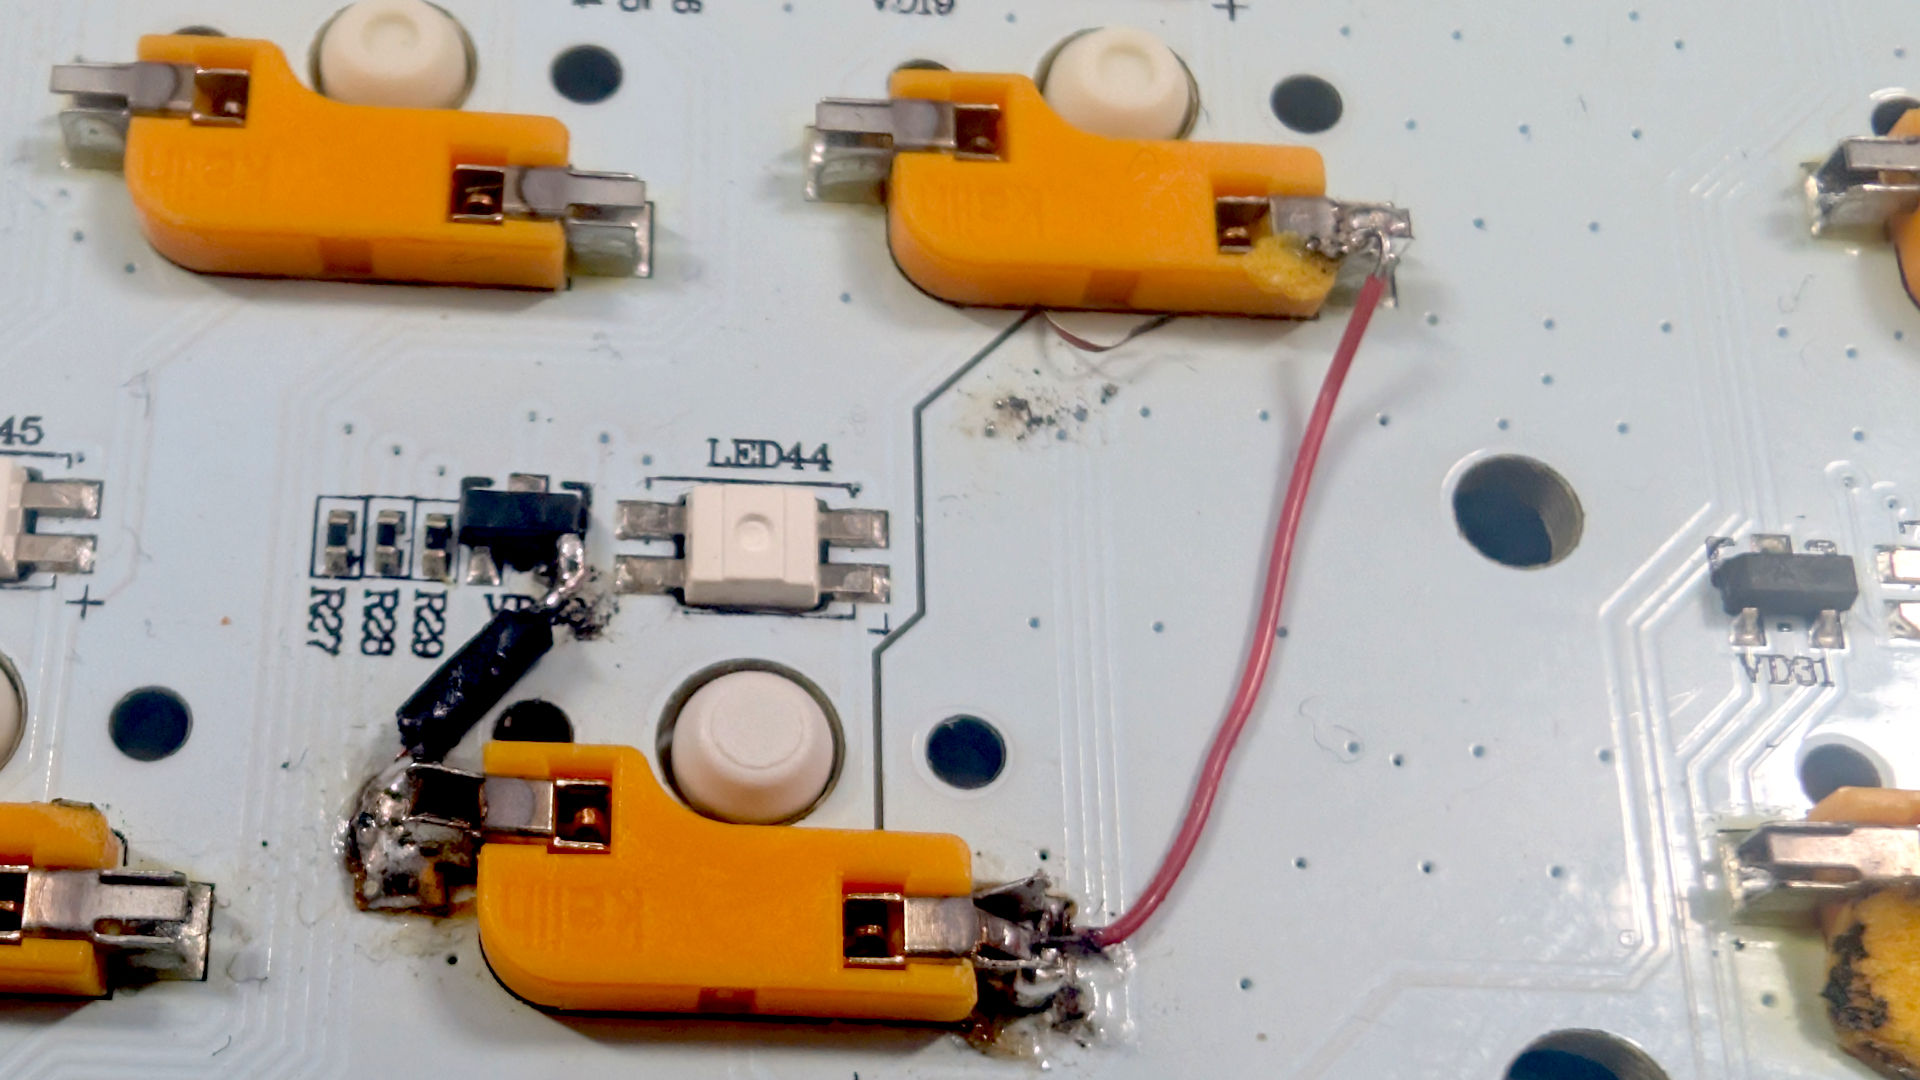
The red trace wire worked without issue as we had plenty of real estate to bead the solder and make sure it stayed on there super secure. We had to increase the gauge of the black wire so we could pre-bead the wire with solder, as we would be coming at the diode from an angle. Excuses, excuses, we should've probably gotten a smaller tip for our PINECIL before during this job but went with the stock tip instead. The trick of getting this all together is that you have to do the wiring first, sandwich the Kailh SMD pad with the mechanical switch second. and with a finger pressing on one side, solder the other until it bottoms out with the tin.
With a quick plugin to see if it works. (" Z " Key is back, hurray!) We threw down some more glue around the pads, as well as the back of the Kailh SMD plastics, to add strength in the future.
In fact, we dabbed ALL the Kailh switches where the plastic meets the PCB with a drop of Gorilla Glue. Just so they can stand a chance in hell when swapping mechanical keys. Now, when replacing the other 4 keys. It only took key puller strength to extract. Putting them back in required just 1-2 fingers and light wiggling. That's it!
Addressing the case.
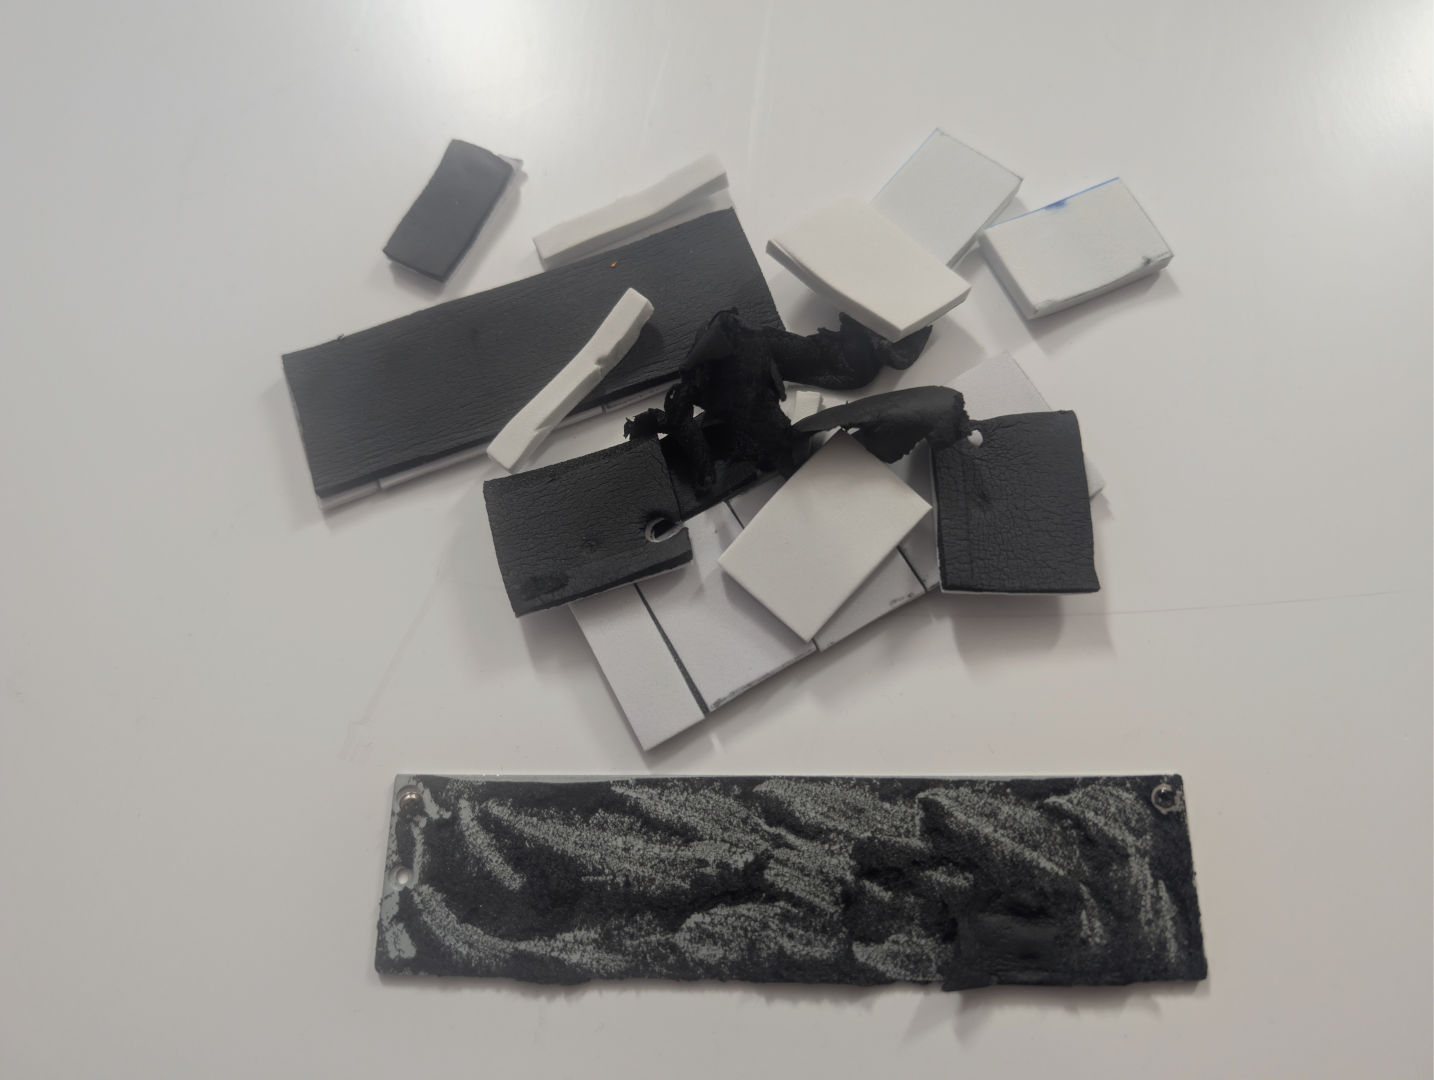
The PCB isn't the only thing we had to fix. There was something really fucked up going on with the foam inside of this keyboard. Like the kid decided to remove and double-stack the foam right in the middle. Really fucking weird. But also destructive because we can't separate any of it!
We're ejecting it all!
We're even ejecting the steel plate that gives gamers a false sense of quality by saying:
"It has weight!"
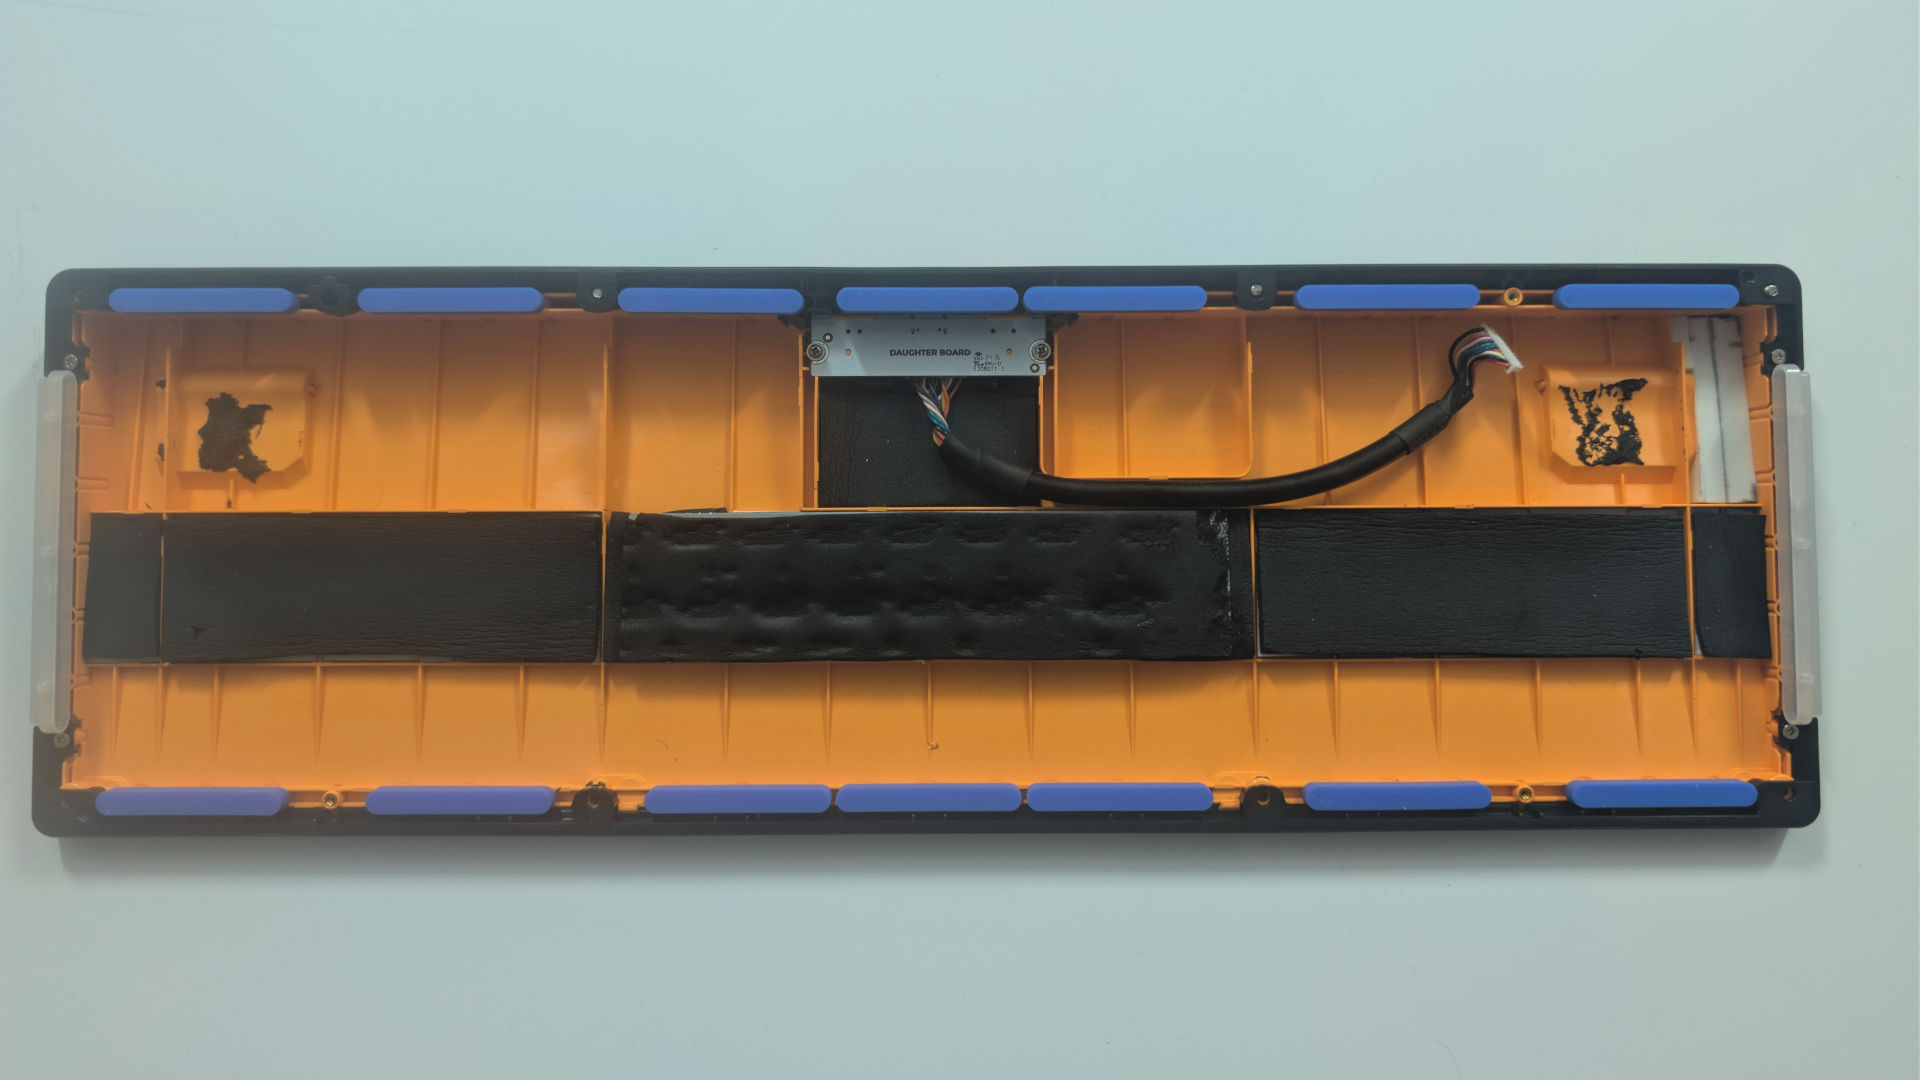
Look, we get why companies use plastic casing. It does allow for keyboards to be wireless, allowing for Bluetooth and 2.4ghz connections in the future. Encasing the keyboard in an aluminum frame, like what RedDragon did, really fucks up one's ability to promote wireless connectivity. And to be honest, we even like the daughterboard on this. If the USB-C connector gets jacked up, there's the possibility of repairing that too.
So to replace everything removed, we need to go to a Craft Store. Unfortunately, in the United States, Jo-Anns/Hancock Fabrics is gone. Leaving us with the bastards at Michelle's. We will need two things.
- Fibre-Fill - loose foam to reduce higher frequencies. This stuff is especially easy to get during Christmas, and we're not concerned about any fire hazards using this as your keyboard is typically 5VDC@100ma, which is far safer than the trainsets and Christmas lights this stuff is generally decorated around. If possible, your grandma might be able to hook you up, too. You don't need much, just a handful of the stuff. (I would ask my grandma, but she would make me work at her plant running the Durst printing several thousand political signs on e-flute, which we have better things to do with our lives)
- 2mm thick foam pads - contain the fibre fill and reduce the mids/lows.
Of course, we cannot say this technique is considered any level of 'soundproofing'. We're not sound engineers. But if anything, it should keep the keyboard 'floaty' just like what those blue gaskets are doing.
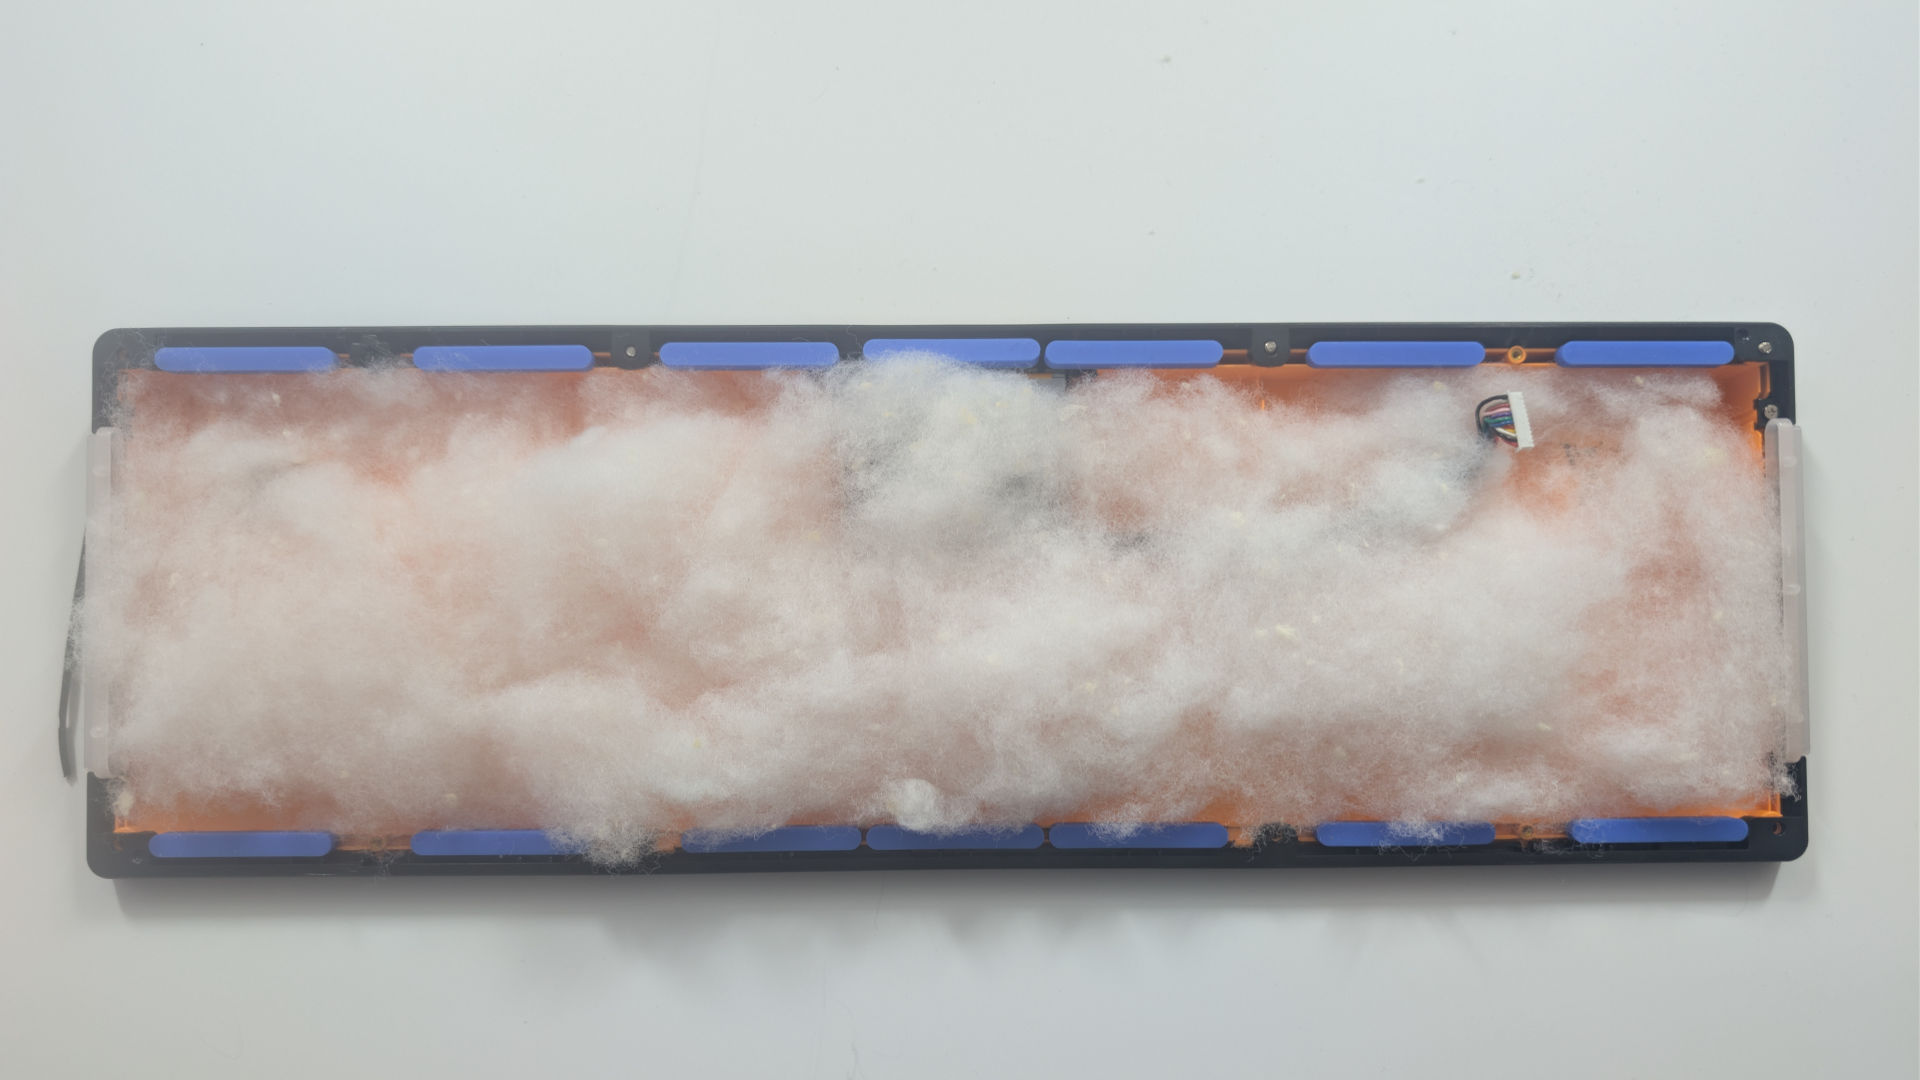
The amount of Fibre Fill is really small, as we had to fit-test this multiple times. But once we get most of it tucked into the cavity of the keyboard, we can move on to the next step, which is the foam sheets. Just as a note, we're not taping or gluing any of this down! We let it float inside because, as we assemble the keyboard, we can take a screwdriver and push the foam along the sides as we close it all up.
These foam sheets that are designed for kids' projects are super cheap, and you only need 2 of the 3 sheets in a pack like this. You can roughly measure the cavity of the case and, with a pair of scissors, cut it all up to size and place it on top of the fibre-fill to make it nice and neat when you put your keyboard together.
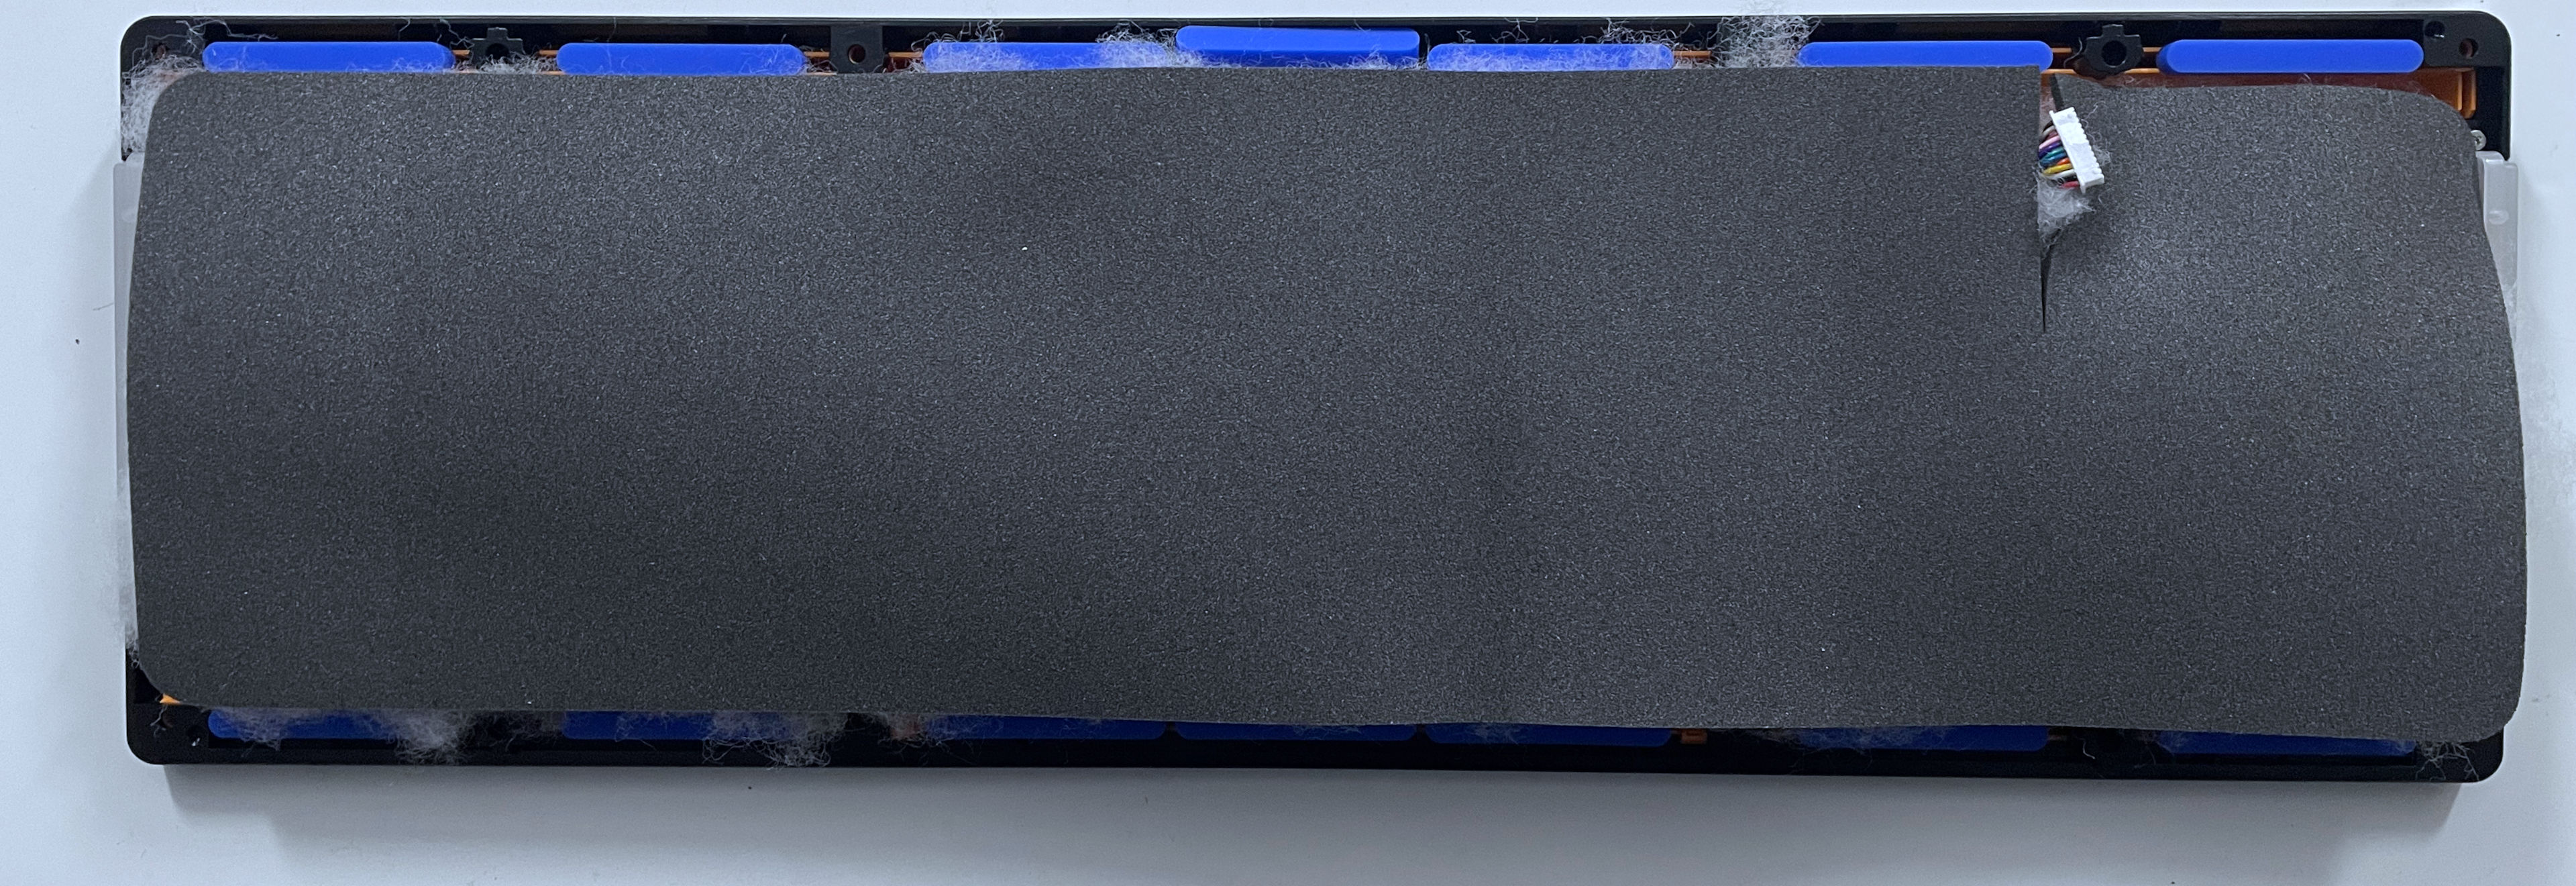
We got a larger sheet and cut it to size following the PCB of the Glorious keyboard. On our first keyboard, it didn't come with the dampening foam at the bottom, but the later purchases certainly did. It took a few dry-fits to size up all of the foam with the keyboard assembly, but after removing a few handfuls of fibre-fill, it was super snug. Also, having the foam super-tight against the board would add additional support for those Kailth sockets as well. You want it tight. But not so tight that you end up giving your upper bezel microfactures from the stress of closing it back up again.
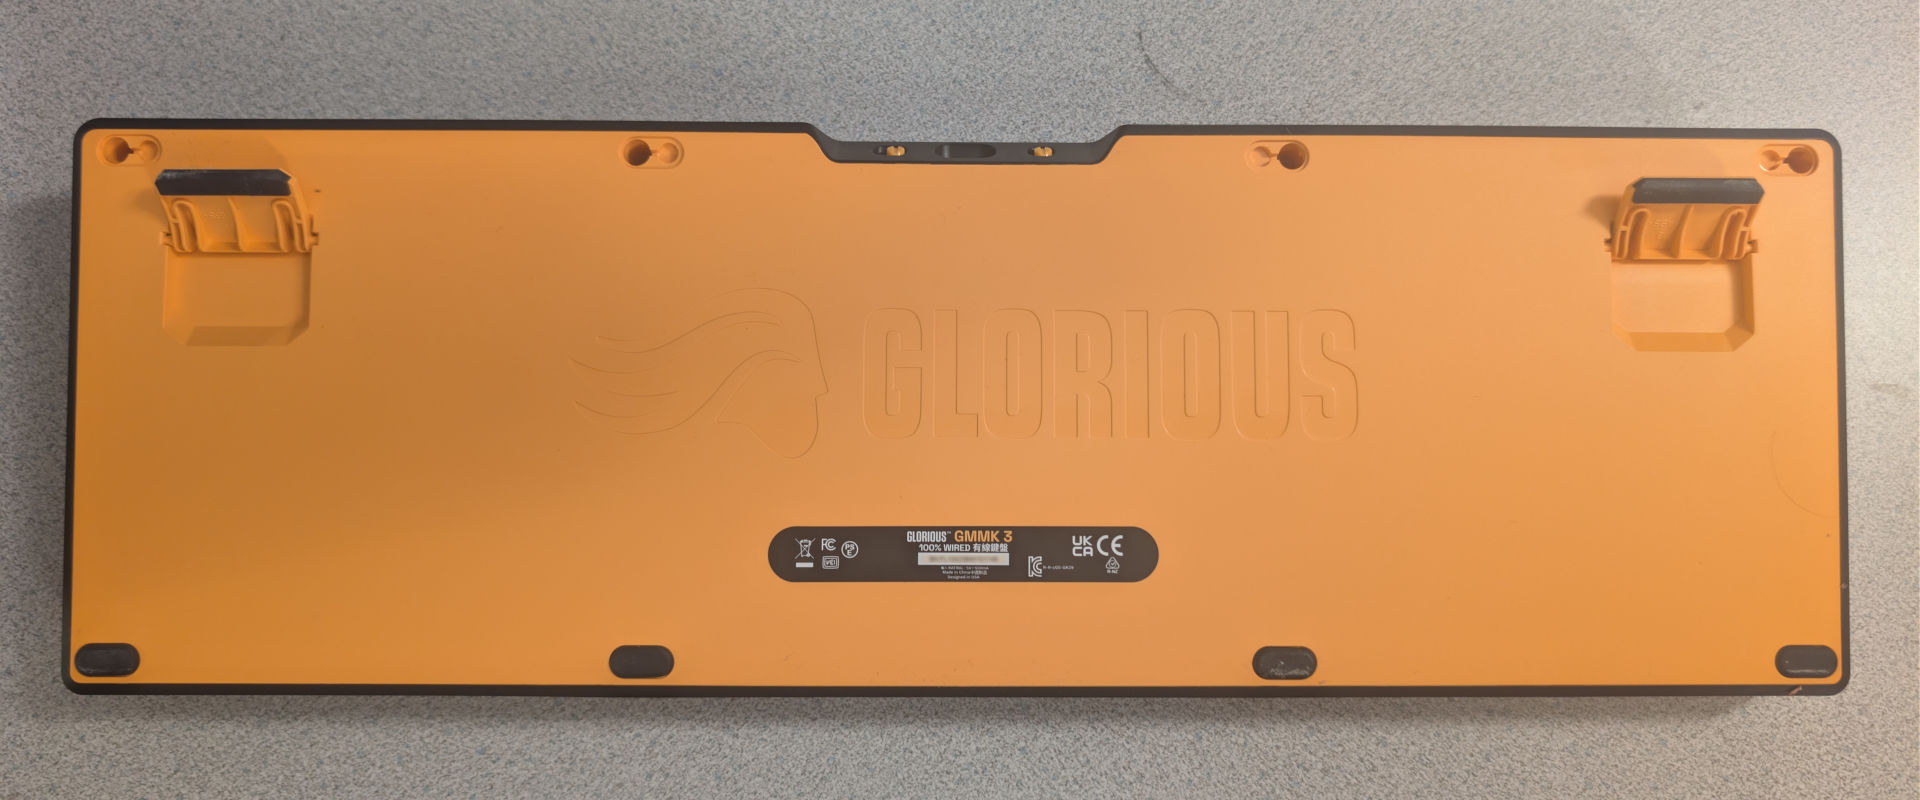
Serial number blurred to protect the guilty.
Buttoning this keyboard up, we were left with the final challenge, which is that the kid lost half of the hardware. Well, we have at least four keyboard feet, so we'll place those at the bottom. As for the missing screws, the thread length and diameter are similar to some of the oddball computers we've taken apart in the past. So after a while of digging around the 'Screw-Coffin," we found some suitable screws to put back in and secure the keyboard.
The website.
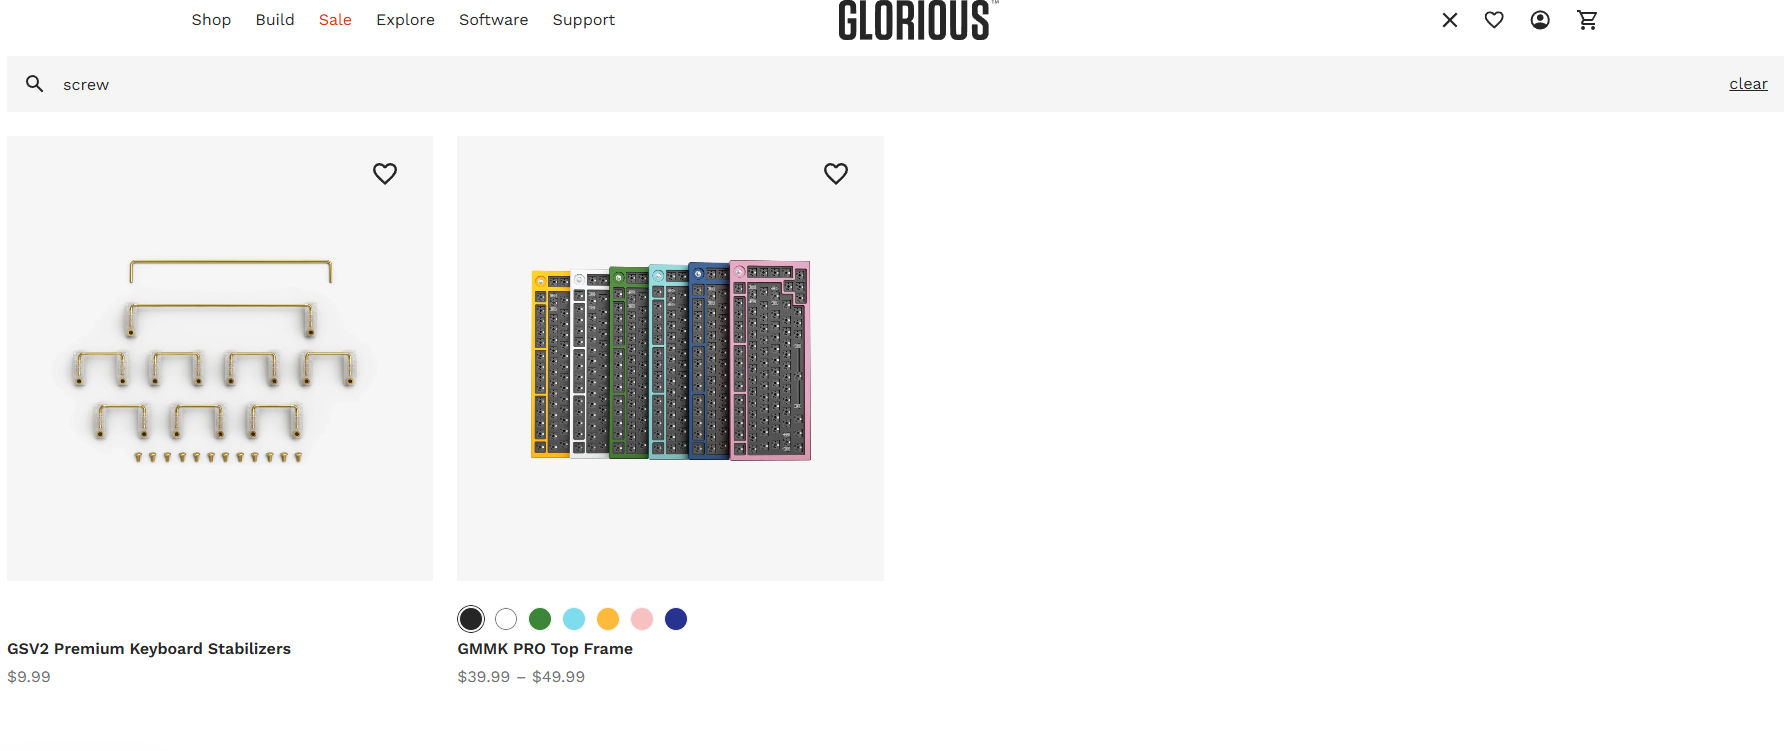
For a company that prides itself on letting people build and customize their keyboard. This, to us, is the biggest slap in the face, as you can't get the rubber feet that obviously you could easily lose, as well as the hardware, such as any/all of the screws. Their website behaves as the electronic version of "Build-A-Bear" where they let you choose a limited amount of things you can replace, and anything that came stock with your base model turns into a 'tough shit, buy another' policy, which is about as anti-repair as you can get.
For those wondering. We tried to search for the following:
- screws
- screw
- hardware
- plastic
- mount
- mounts
- fastener
- fasteners
- Gasket (which came up with the GMMK Pro, but not the blue neoprene gaskets that came with the GMMK3)
- Keycap Puller (Returned a result for a wire puller that is one-sided, meaning you'll do more damage to your board!)
Perhaps we're not a "Glorious" customer. Function over form. Right to repair. And most importantly, not be a group of wasteful bitches that offer a crap 1-year warranty plan. BUT! That's just us!
To O-Ring or not?
We did try to O-ring the entire Glorious keyboard because we figured this would probably make a good work keyboard. Neither CLACK nor THOCC. The keyboard would just be silent, especially with the red linears. But upon initial testing, we were getting a crazy amount of misfires throughout the entire array. To which, we are finding out it's not really the ring's fault as much as it is the switches themselves, in that the silicone rings were pushing the tips away from the base, resulting in the keys not pressing all the way down.
However, keep the O-rings on anything double-wide or higher, such as the shift keys, enter, space bar, and backspace. Because those keys are heavy enough to also have stabilizers preventing the keys from popping out. It really helped with the space bar because, WOW, was it throwing a high-pitched sound as the key bottomed out. Thus, the O-Rings were a much-needed improvement to get silence out of your Glorious. Perhaps with better linears with a shorter travel, it would be perfect.
Chances are, if we had GOOD key switches instead of what the kid put in. There's a good chance our O-Ring mod would've worked flawlessly.
The software.
Glorious does, of course, come with its own software called "Glorious Core," which is giving me some wicked Corsair Flashbacks.
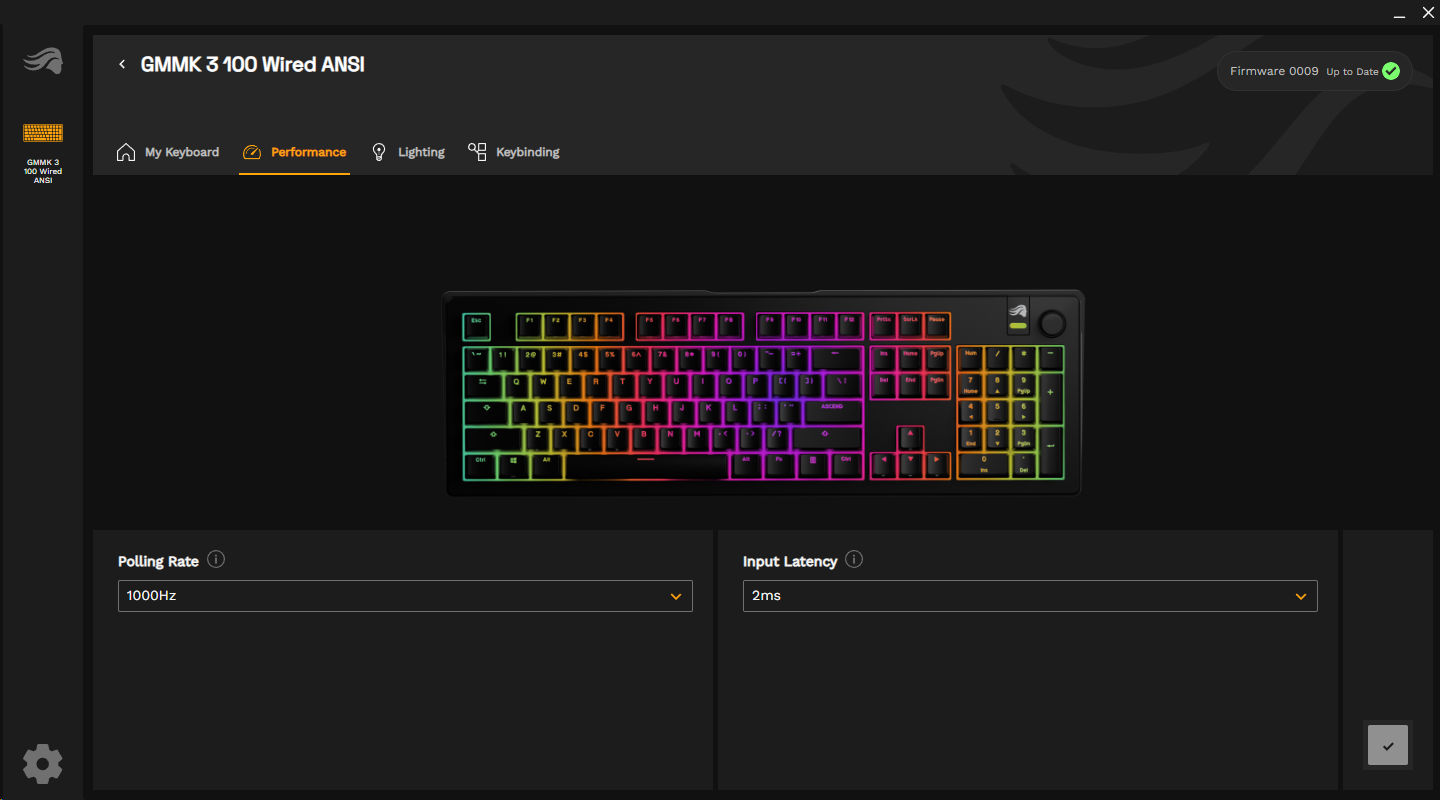
Some reviewers say that the Glorious keyboard is the only keyboard you need for your entire lifetime. But whose lifetime? The lifetime of the company and its limited software running on a limited operating system for a limited time? Outside of perhaps updating the firmware and adjusting the input latency, it's hardly worth installing. In most companies running a Windows environment, they would just outright ban the use of this software anyway, deeming it non-work-related. Thankfully, you can still control your lighting system with the function keys.
We will say that the Glorious Core manager is only taking 18MB of RAM. This is far better than what Corsair could do.
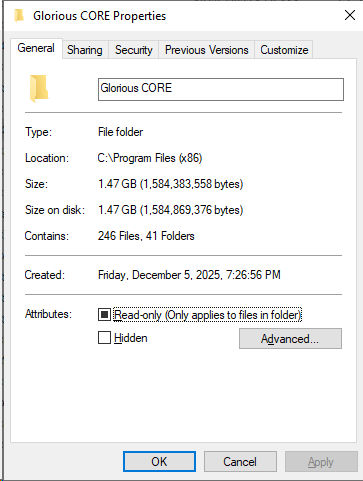
Not only does the Glorious Core install itself as an X86 app, which in itself is a little dated. But the filesize for such a simple program is completely absurd. This is due to the nature of modern development, where devs use a Chrome wrapper instead of spending the time to build a frontend from scratch. Then, unironically, put ffmpeg.dll in there (our guess is to introduce commercials into the app in the future)
We have Steam games that use less space than an app that plays with macros and adjusts the polling rate. Fucking shame, Glorious. Using open source software for your own commercial benefits, considering how much you charge for your keyboards, you can afford better devs.
Update 12/12/2025 - NO! I'm not done!
You know what? This isn't repaired yet. Also, we were right about the 1.5 mm-thick silicon O-rings.
After replacing even MORE key switches. We have had enough of these shit Gateron switches! The letter "H" is double-firing for no reason. Sometimes the letter "P" doesn't even fire at all. Normally, when you transfer keys around, we would take them from the F-keys and bring them to the functional letter keys because we could put the NewGiant Browns in the function row there, as they're not pressed all too often. But the annoyance level was getting to the point where it was almost every other day, so we had to break out the key puller.
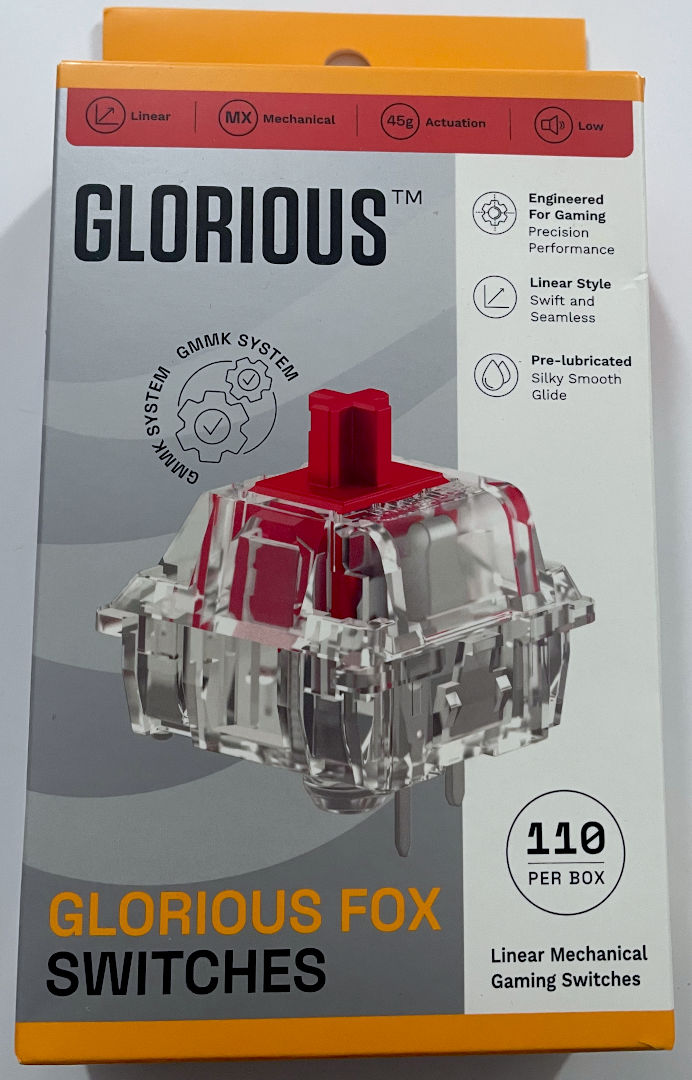
With Glorious releasing their accessories at a good discount on Amazon, we got the set for $27USD, which is low average as to what one spends for a keyswitch set. We want to truly fix this keyboard and restore the 'Glorious' to make a justified review. And not a review tainted the reputation of other companies.
Oh, sweet titty fucking Christmas. C'mon! What's in the box!!!!
.... No severed heads this time.. Sorry everyone.
 These guys really love their foil stickers. Makes me wonder if they got them done by StickerMULE. Beyond that, a simple business card and, of course, the keycaps themselves. To which again. No need for the fancy graphics. I would've bought the keycaps from Amazon even if they came in a cardboard box.
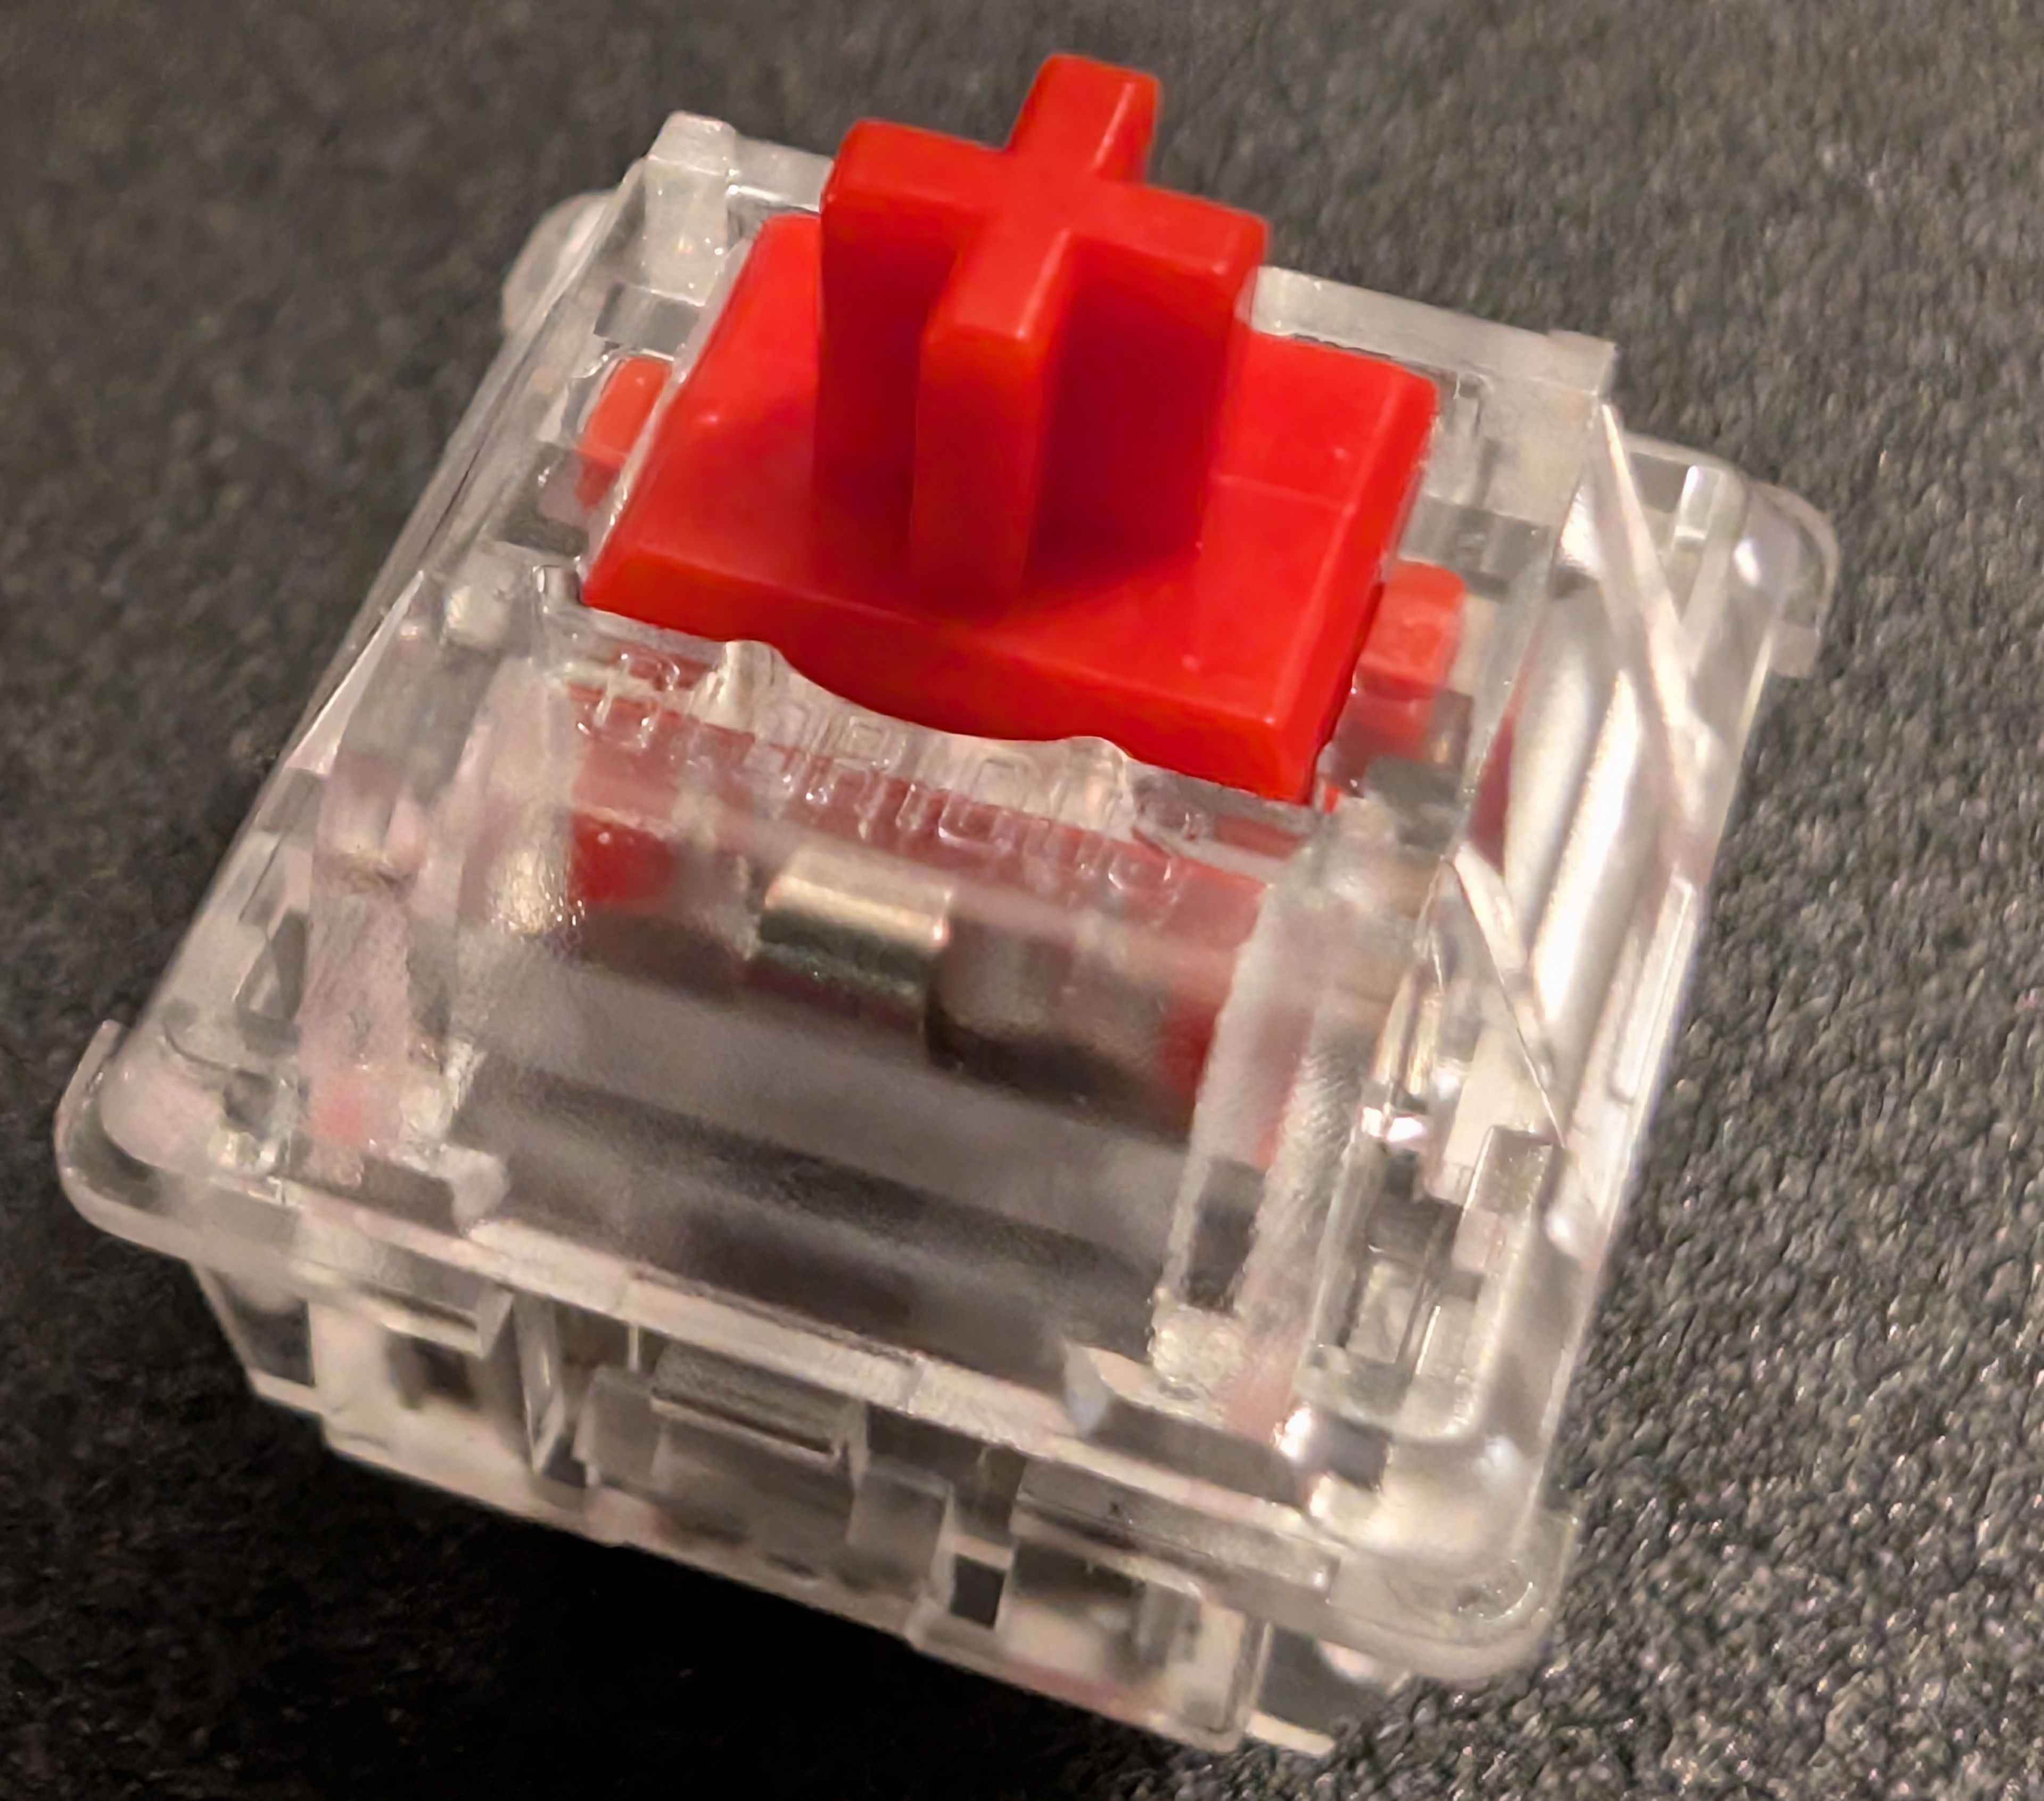
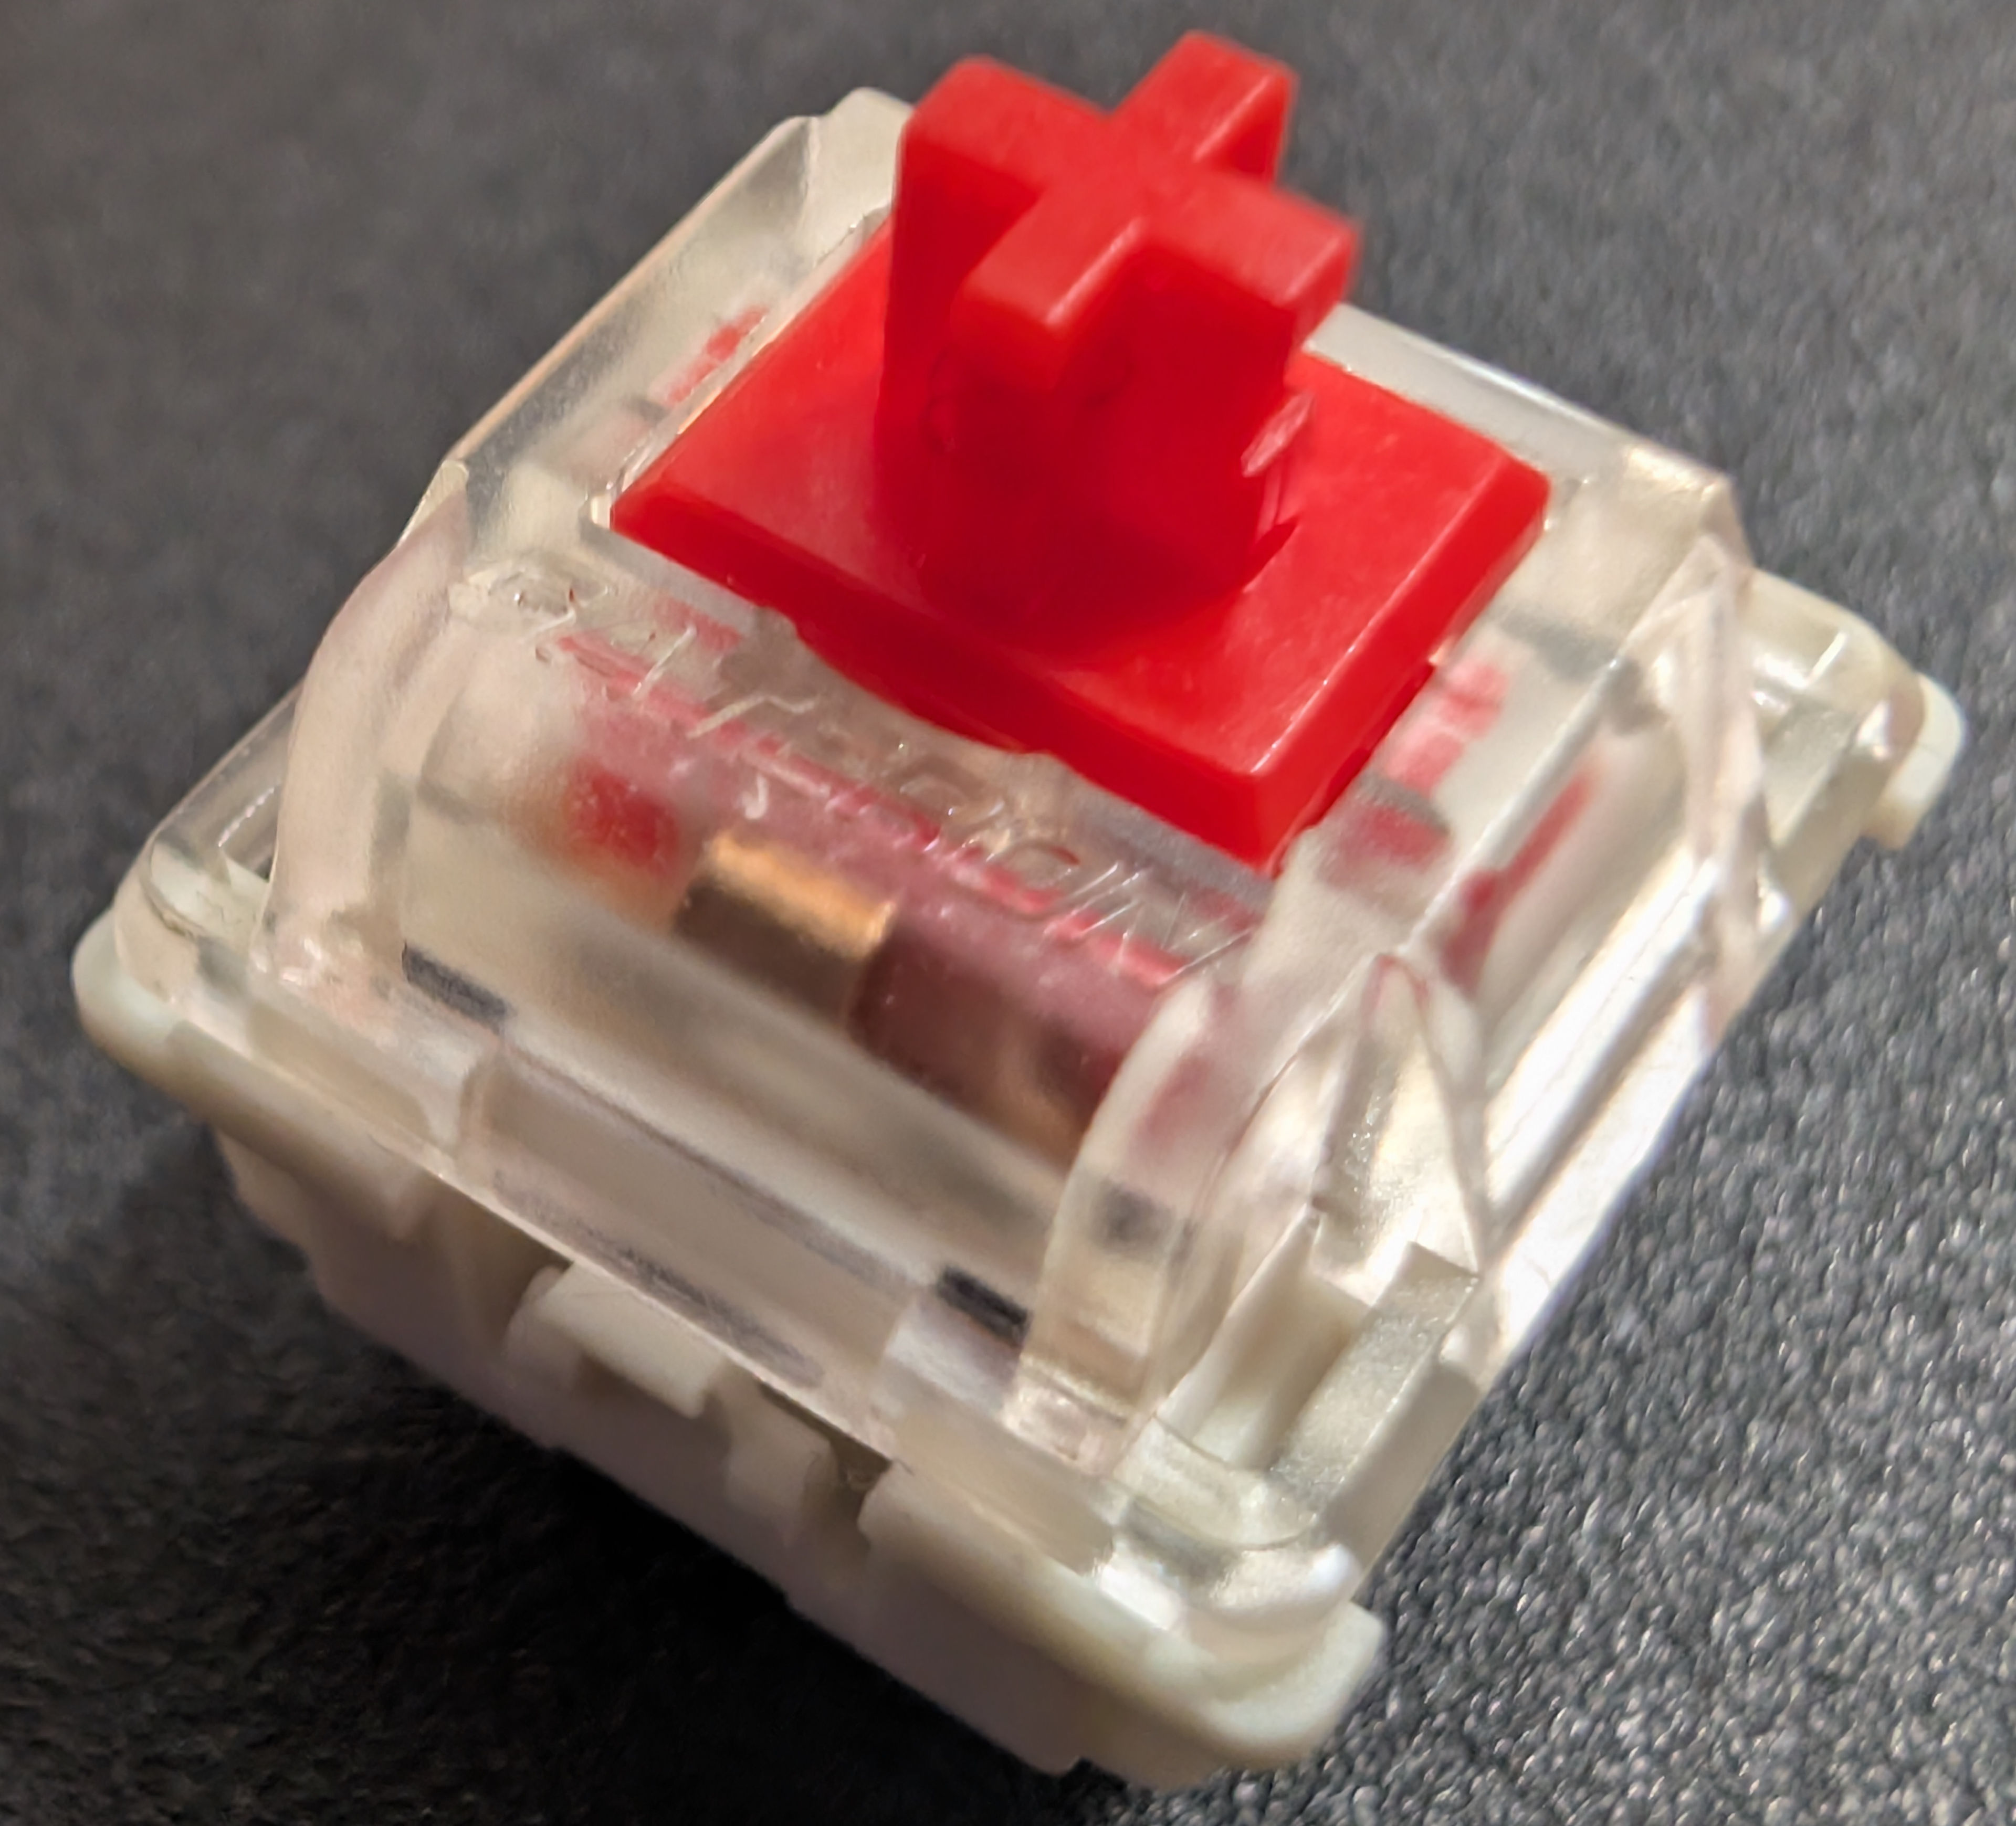
Since we are flexing our amateur macro-lens capturing skills and got the NewGiants and Gaterons up close, I'll take a pic of these as well, just to show it does indeed say "Glorious" on the keycaps. As these are purely transparent, they're not Aliexpress 5-cent switches packages in a Glorious box. Always important to spot-check what you get. And hey! look! No shit, plastic injection molding issues around the stem.
Installation time.... AGAIN!

Even removing the Gaterons was a total nightmare! I felt like I had to use almost all of my arm strength to pull them out directly with my removal tool. We think the forks were getting warped a little from how much of pulling pressure we were applying. Eventually, we've chosen a safer path of just wiggling back and forth until they come out with significantly less force. But the Gaterons might have been the culprit for the keyboard damage in the first place.
When we dropped the Red Foxes into the sockets, we just needed two fingers to press them into each of the sockets. That's it!
By the way, the O-rings are going back into each of the caps. As it really does silence any clack sound that may come off the keyboard if they type too hard. That's pretty much the only mod I've done to this keyboard. Well! That and the foams on the inside earlier!
After installing and powering on the keyboard, it certainly does feel brighter than the old key switches. It would probably really shine if we got some Pudding Keycaps on this board. But the paint job is still good on the keys, and we intend to wear/burn through these caps first before ordering another set.
Final thoughts.
We would say that we were taken advantage of when reviewing this keyboard. Except it was purchased broken for $10 USD. To which, at $10USD, this keyboard is fucking awesome! With the additional $27 to replace all of the switches. With the 3-4 dollars in foam. Spending a total of $41 for this keyboard is excellent. Now, as for the time spent in order to get this keyboard for $37USD is irrelevant because part of the fun of keyboards like this is spending the time to customize these things to our liking. Which, despite missing a lot of parts as well as getting fucked with Gateron switches. We managed to still pull off with a nice and quiet keyboard.
After fixing this keyboard (The right way) and using it to write this very blog. We don't think we'd ever be the kind of animal who would go out of their way to buy one of these brand-spanking new. We would probably be suffering from a little buyer's remorse spending upwards of ($150USD) for such a device. We've even heard of people in the keyboard community dumping $340USD in extra/exotic parts on their Glorious GMMK3. Wow..
Like office chairs, talking about keyboards is a lot like talking about politics. Everyone has their own background and opinion of what they feel is the ultimate keyboard. To us, for example, we always opt for the 100 percent or 104-key system, because number pads to operate Lotus 1-2-3 and Microsoft Excel give us a serious case of the chubbies (Thinking of you, Justin, in accounting!) We've tried 60-75-85 percent keyboards, and our feeble brains just misfire using them. I could see the smaller percentage keyboards for tight environments. But considering we're using behemoth servers as PC cases. We're good on space.
As for the comfort and usability of the keyboard, adjusting from browns to red linears fucks with our heads a little for the first hour. But we're now typing at a steady pace on this thing with minimal error correction. The shorter linear travel of the Red Foxes over the Gaterons really does help correct the O-Ring issue we had earlier. We even tried the volume knob, which, if you are rocking headphones at work, can be important to adjust your conference calls on the fly. Because no one else sure as fuck will.
As for durability, you can replace just about everything from other vendors (just like the kid did... Although we hope you guys are a little smarter about it). You don't even need to visit Glorious for most of the upgrades. Hell, you technically don't even need their software once you've adjusted their polling rate; you can simply uninstall and live for 10+ years when the plastic housing between corrodes and cracks. Honestly, if the plastic frame is the only major criticism we have of this keyboard, it's doing pretty well! The frame plastics flexed a lot when we were pushing on the keyboard's gasket system. This is after even replacing almost all of the hardware inside with matching machine screws.
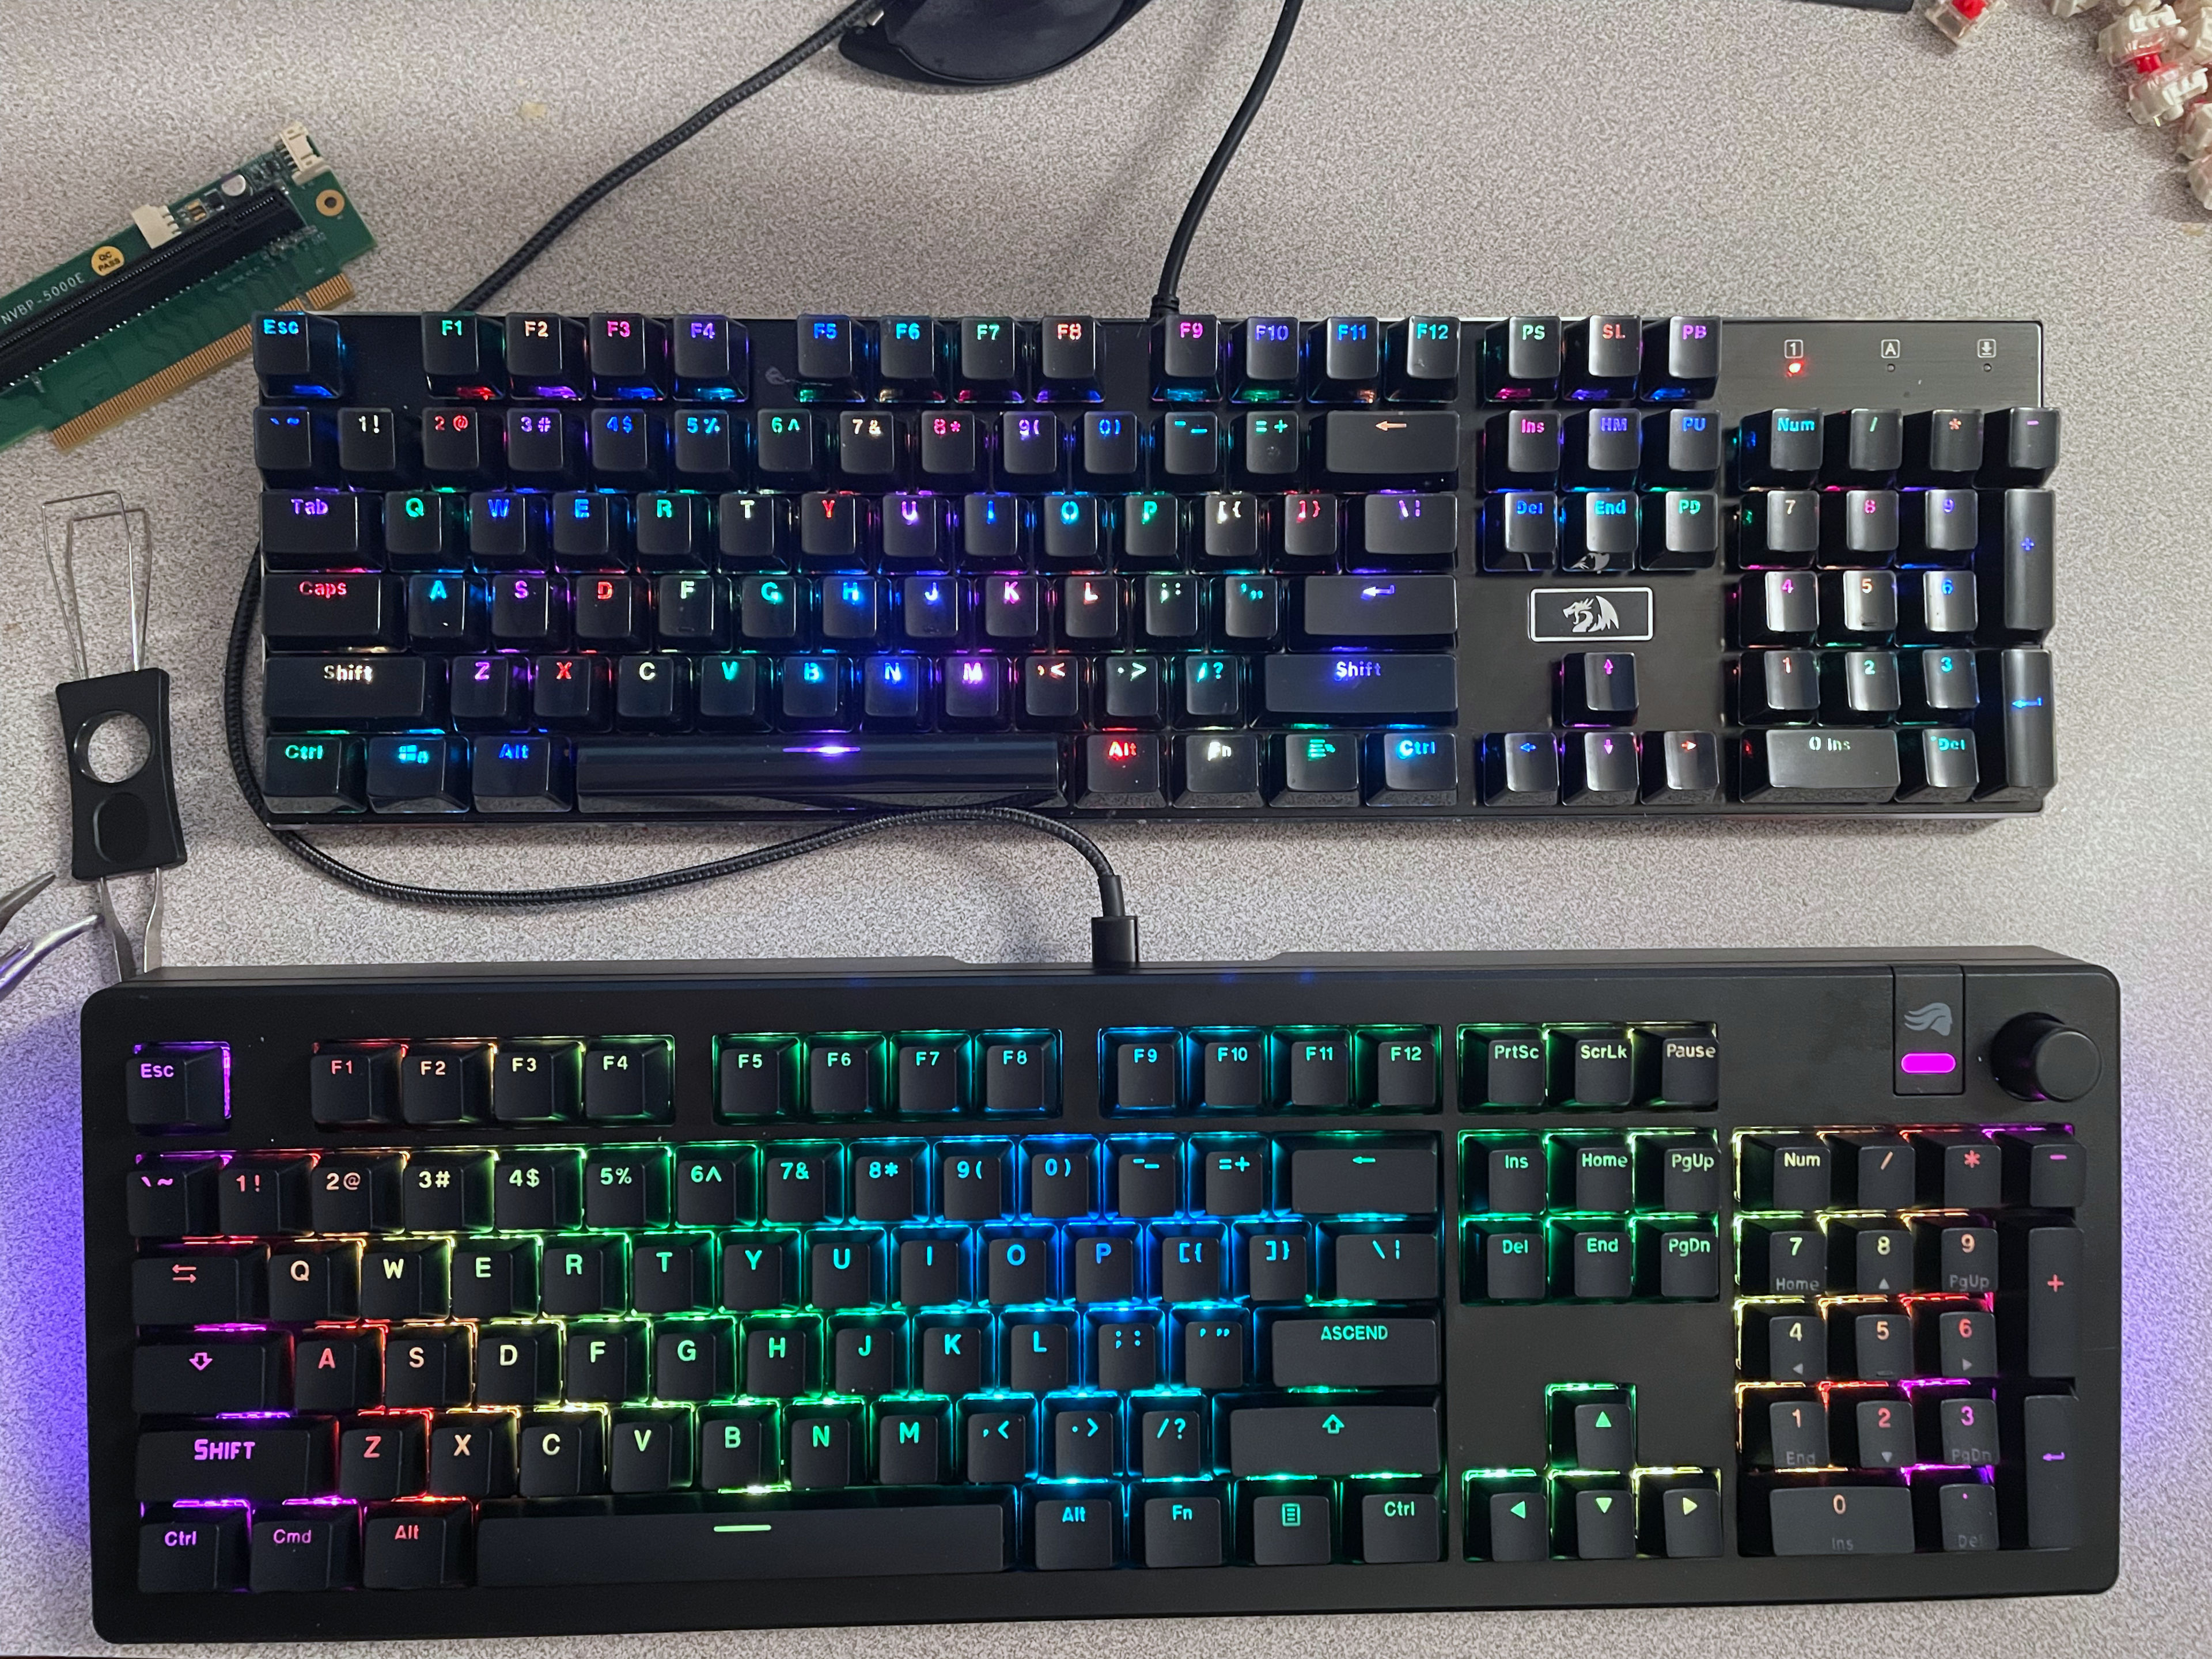
For the home, we'll return to the RedDragon K556. It's a little more clacky with the aluminum body. It really is unfair to compare the RedDragon to the Glorious GMMK3 because the Red Dragon K556 is more like the original Glorious GMMK. There are some really nice features, like being able to replace the USB-C cable and switchable layouts for MAC and PC. But it's easier to service to clean the RedDragon K556, and as the frame is flat and not like the Glorious, where the plastic can 'pocket' the filth of daily keyboarding.
Granted, we cannot put Hall-effect keys into the RedDragon. We can't do that to this Glorious GMMK 3 keyboard either. Because we'll need the Glorious GMMK3 HE edition, which costs EVEN MORE MONEY than the ones we got. Since we work in places where there's a lot of magnetic energy going on. Might be a bad idea to get Hall-Effect switches anyway.
Anyhow, we hope you found this article useful, and if you're still reading. Holy shit. Thank you for joining us on this repair adventure!
That's what server said.
+++END OF LINE
Hey there! I have a broken Gmmk pro (V1) My 4 and 5 keys stopped working and I've troubleshooted to the point I believe maybe the Diode is bad? I am still getting voltage on 4 and 5 and the switch completes the passthrough of voltage but I think its just not reaching its final destination...? Any chance we could talk and I could pick your brain? hit me up via email if you can :) would be greatly appreciated.
Diodes can die on these mechanical keyboards. And given what you are describing it certainly sounds like a diode failure. a way to be certain is switch your multimeter to continuity mode and test both sides of that diode. it you got nothing. bad diode.
https://www.s-config.com/razer-chroma-2014-keyboard-repair/ - I actually encountered this on a razer keyboard where liquid damage is what caused the diode to fail.
And since i didn't have any SMD diodes i just used 2 1N4148 diodes which had the same power draw as the SMD.
Anyhow. hope this helps.
Thanks for checking out this blog.
- S